“改造車”-車検を終えて!!-自動車の復元-左右のイルミネーション-外装(エクステリア)-”アンダーネオン”-再装着に関する記事
昨年の12月に無事にどうにか
日本の法定車検が通過して,自家用車を
"車検前"の状態に戻しつつあります。
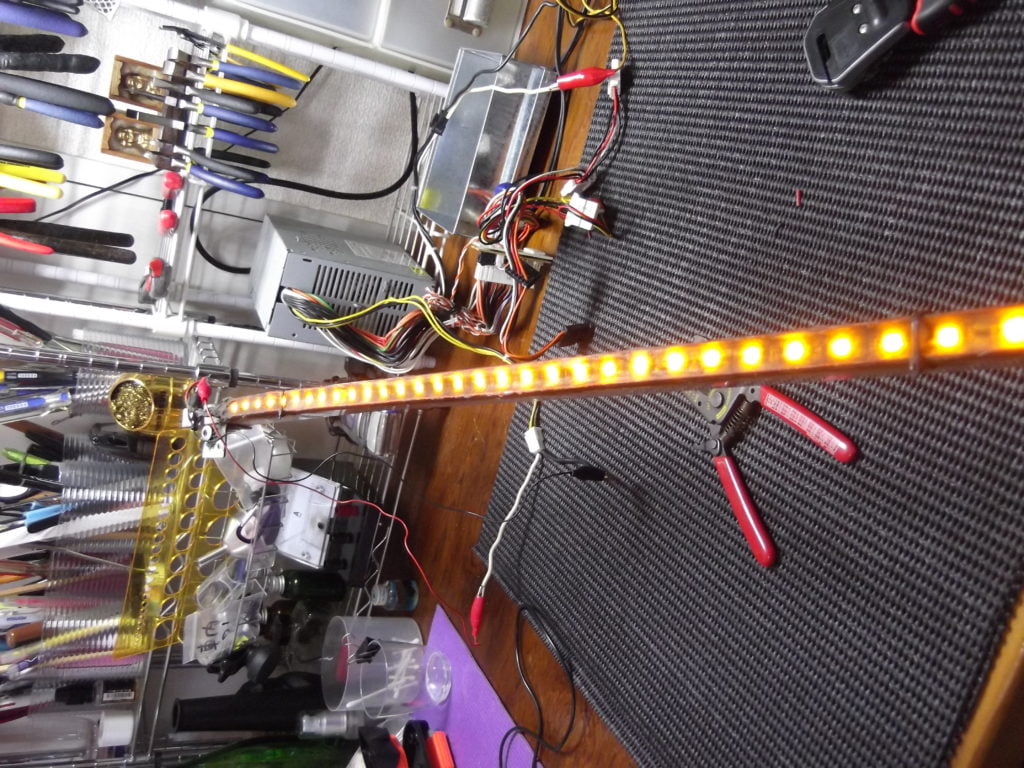
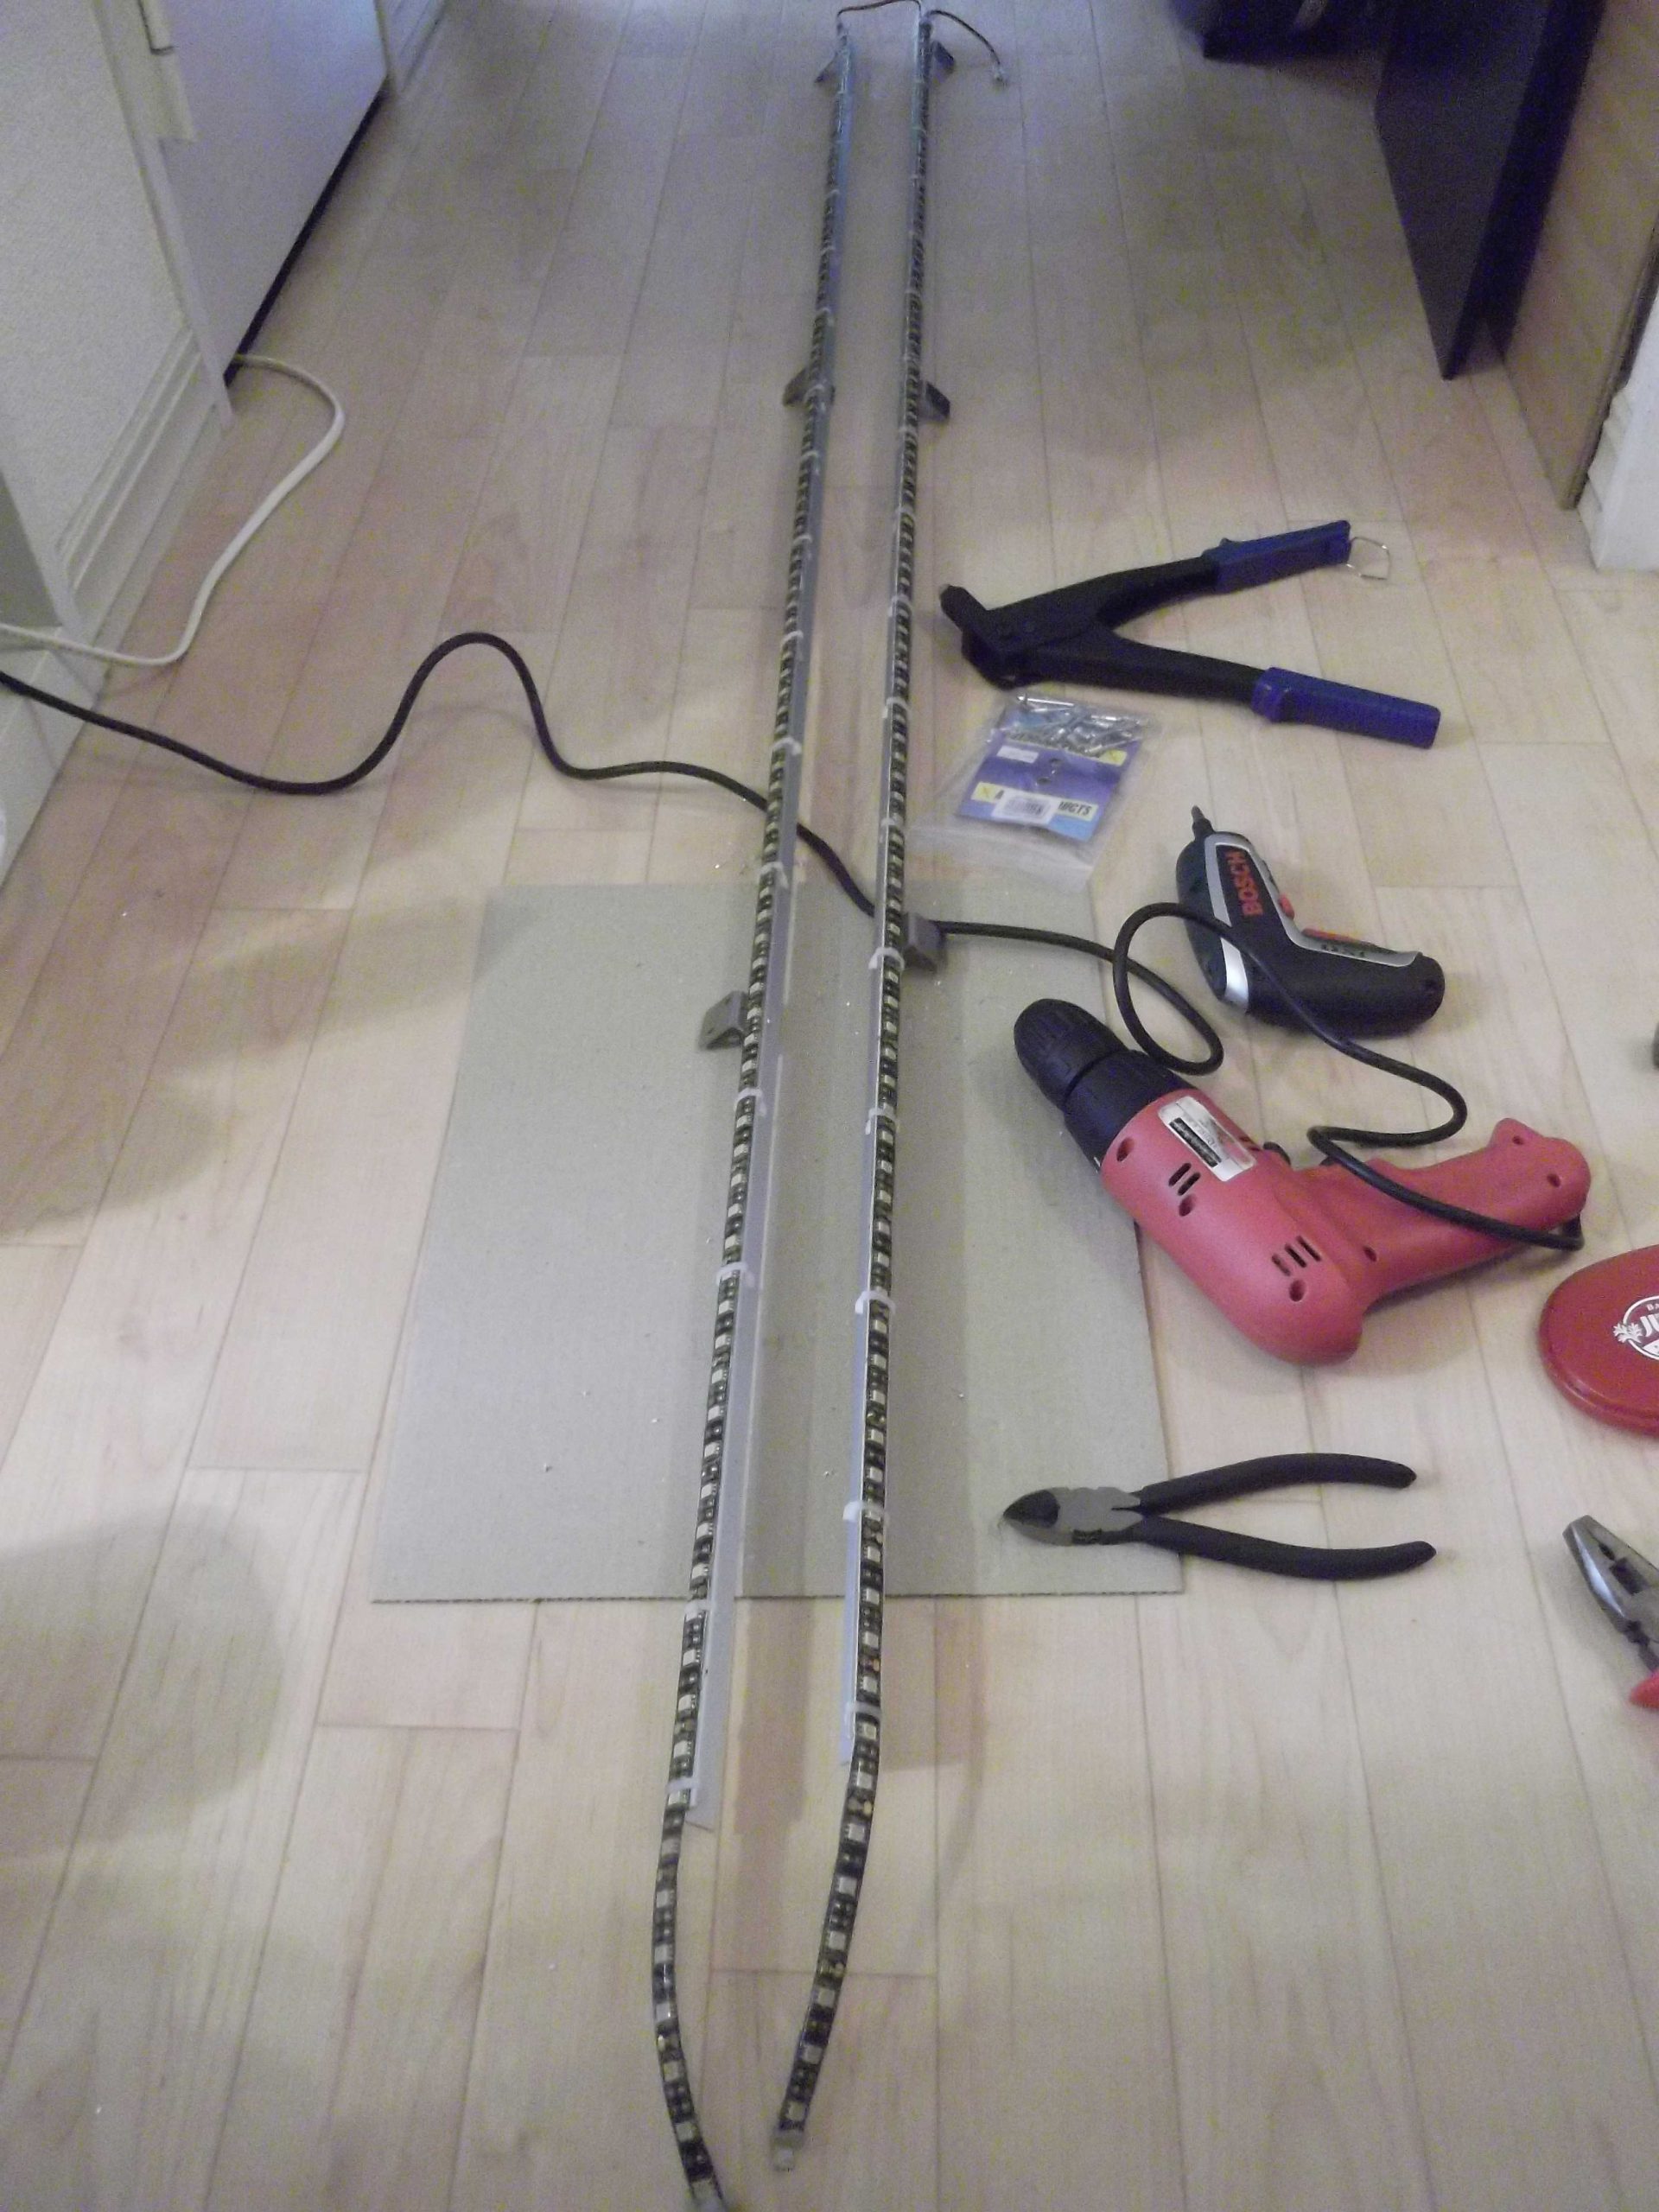
先日,左右の"アンダーネオン"の装着が完了したので,
記事にします。車検前よりさらに頑丈に装着しました。

装着しているアンダーネオンのテープLEDの
施行は平成30年ですから,ええと2年前ですね,
かなり経ってますが,今のところまだ点灯してくれているので,
そのままで流用しました。
現在,乗ってる車体では今回を含めて脱着の回数は3回。
アンダーネオンの製作途中の古い画像がなかなか見つからずに記事に
していませんでしたが,
先日少し発見出来たので合わせて掲載させて頂きますね。
今後LEDの照度が極端に弱ってきたり,
駄目(点灯しなくなる)になれば新品と交換する予定です。
テープLEDというのはどんどん進化していて,
型番で消費電流や光度が全然変っています。
車検前までは全部LEDは新しい型番の新品に交換しようと思っていたのですが,
なんだか面倒臭くなってきてしまいました?w。
一応点灯しているし,
暫くは現状維持でいようと判断し再装着です。
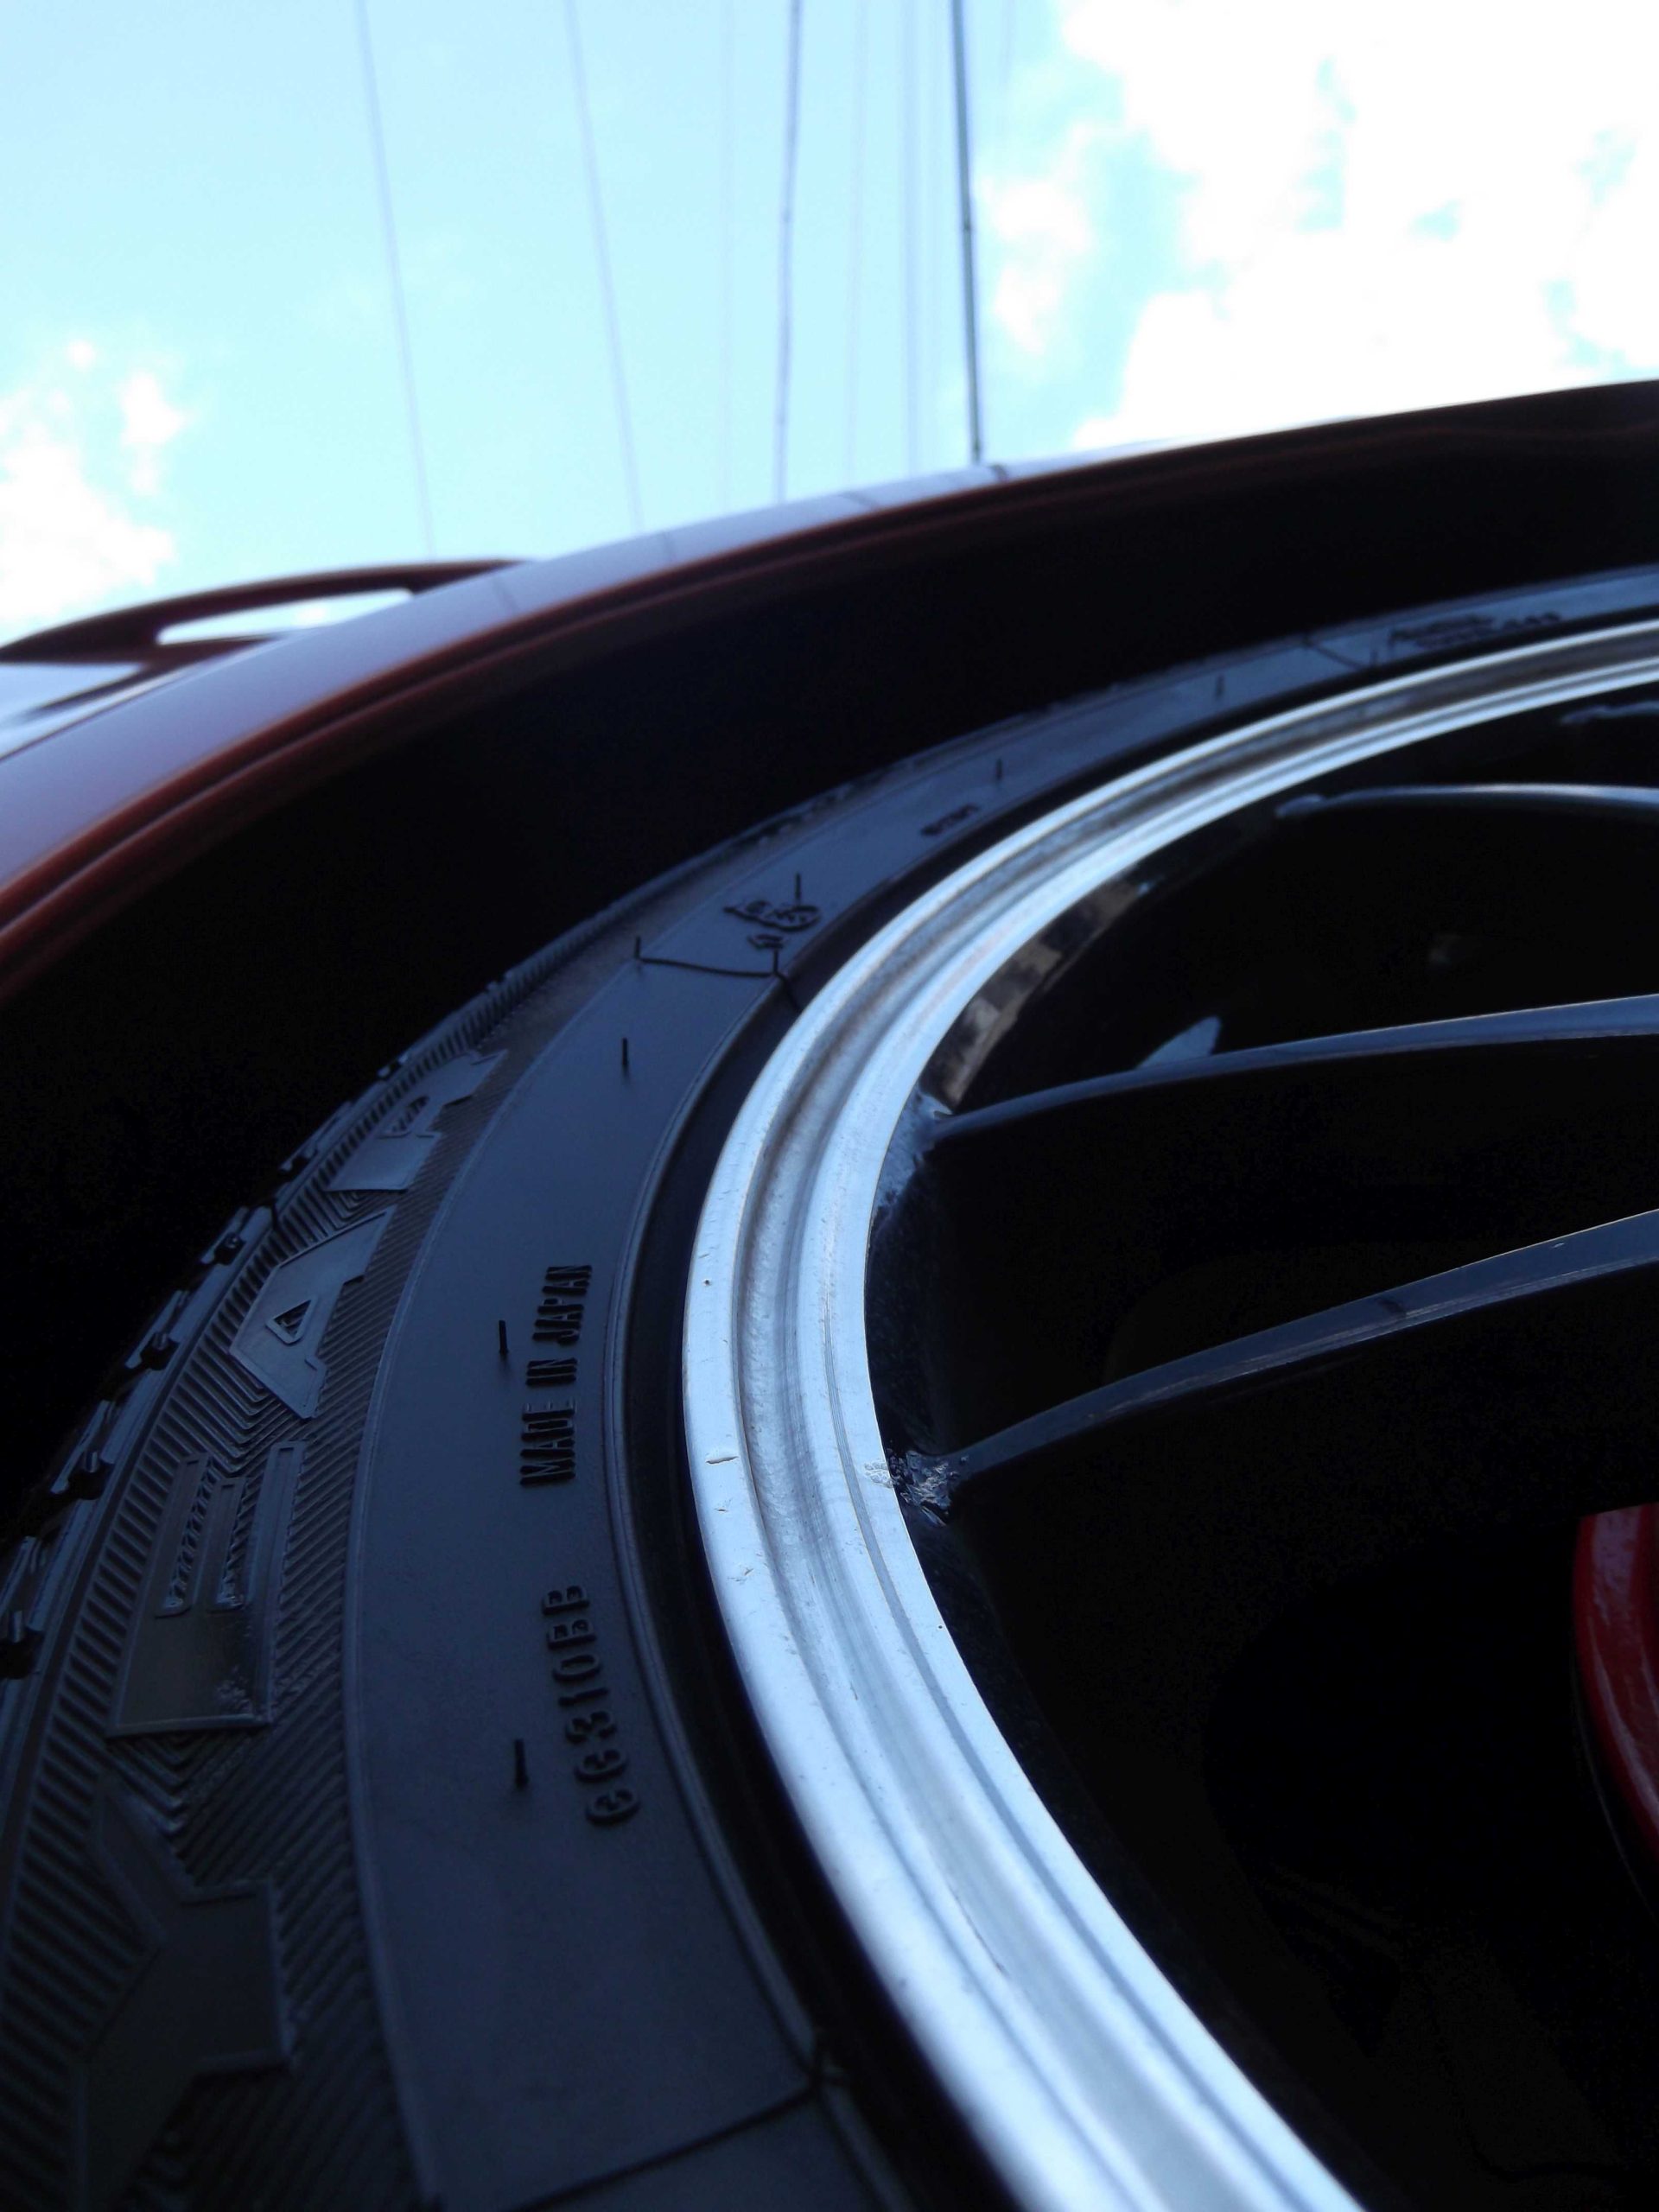
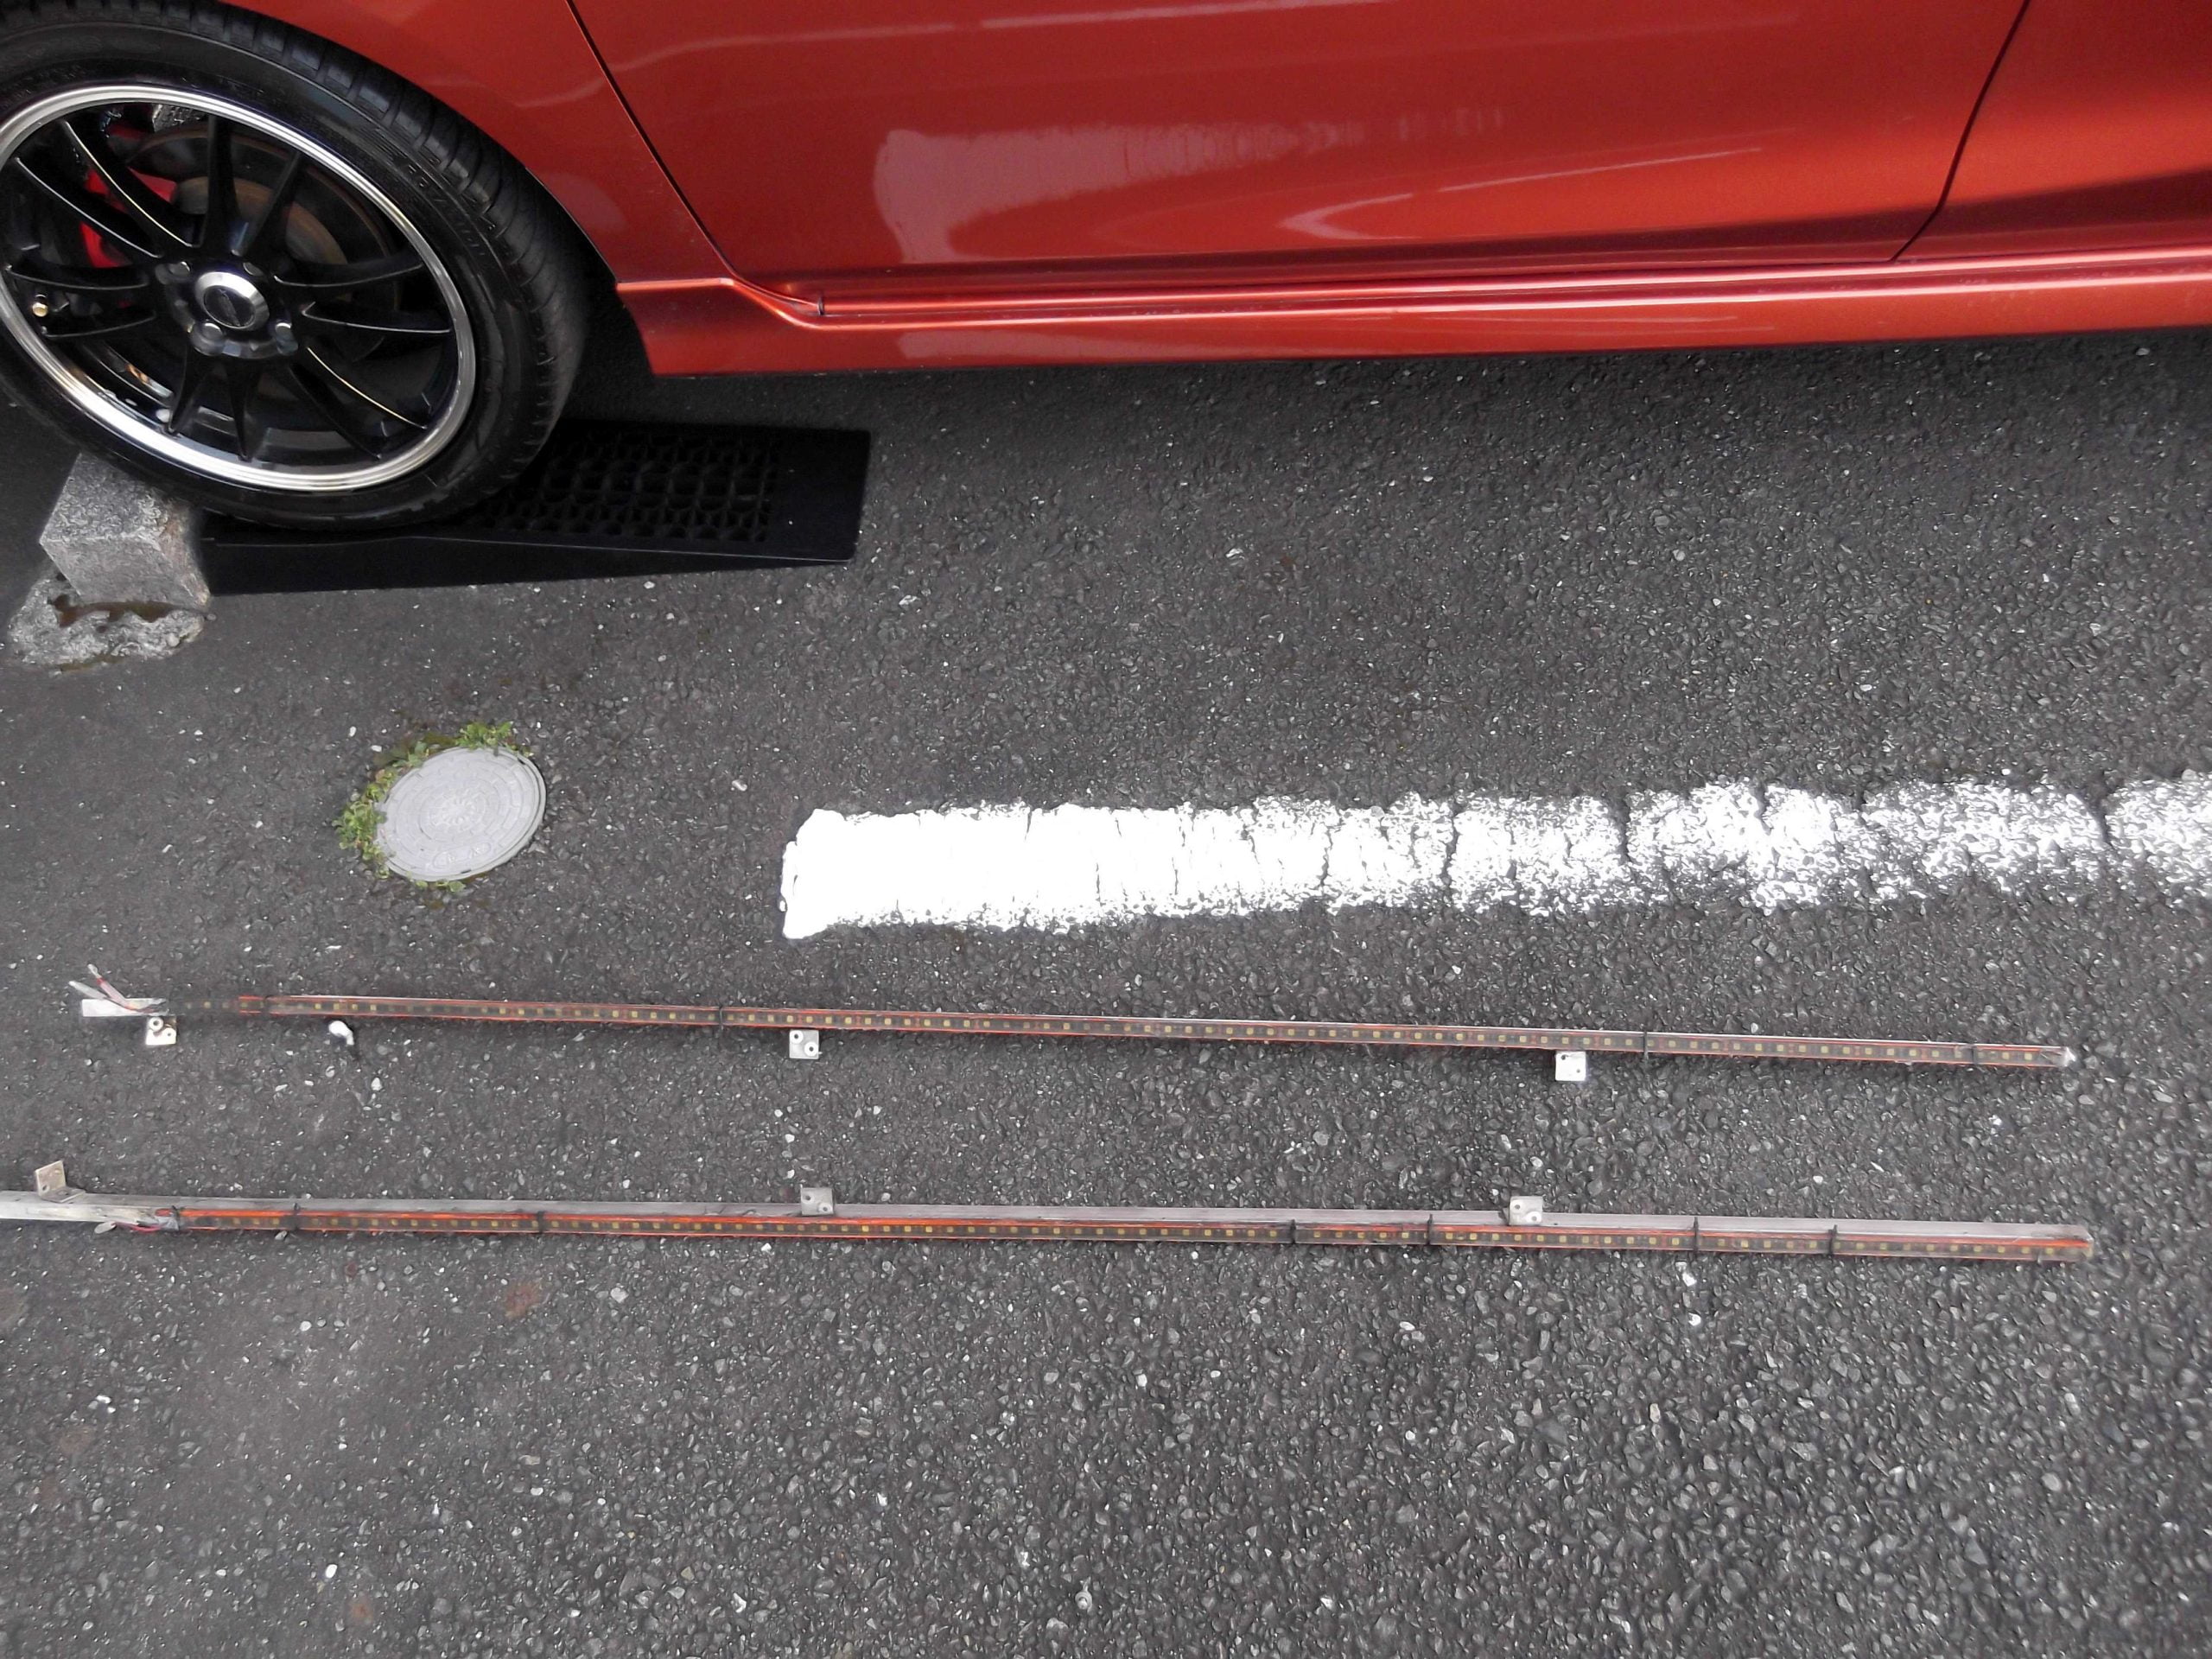
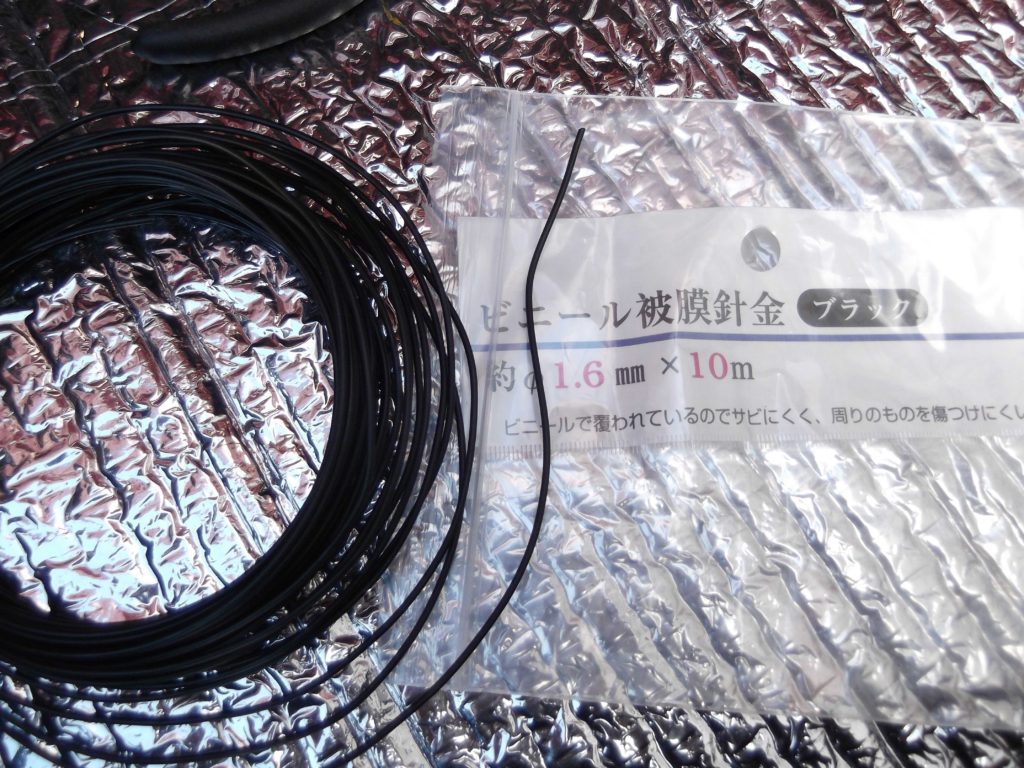
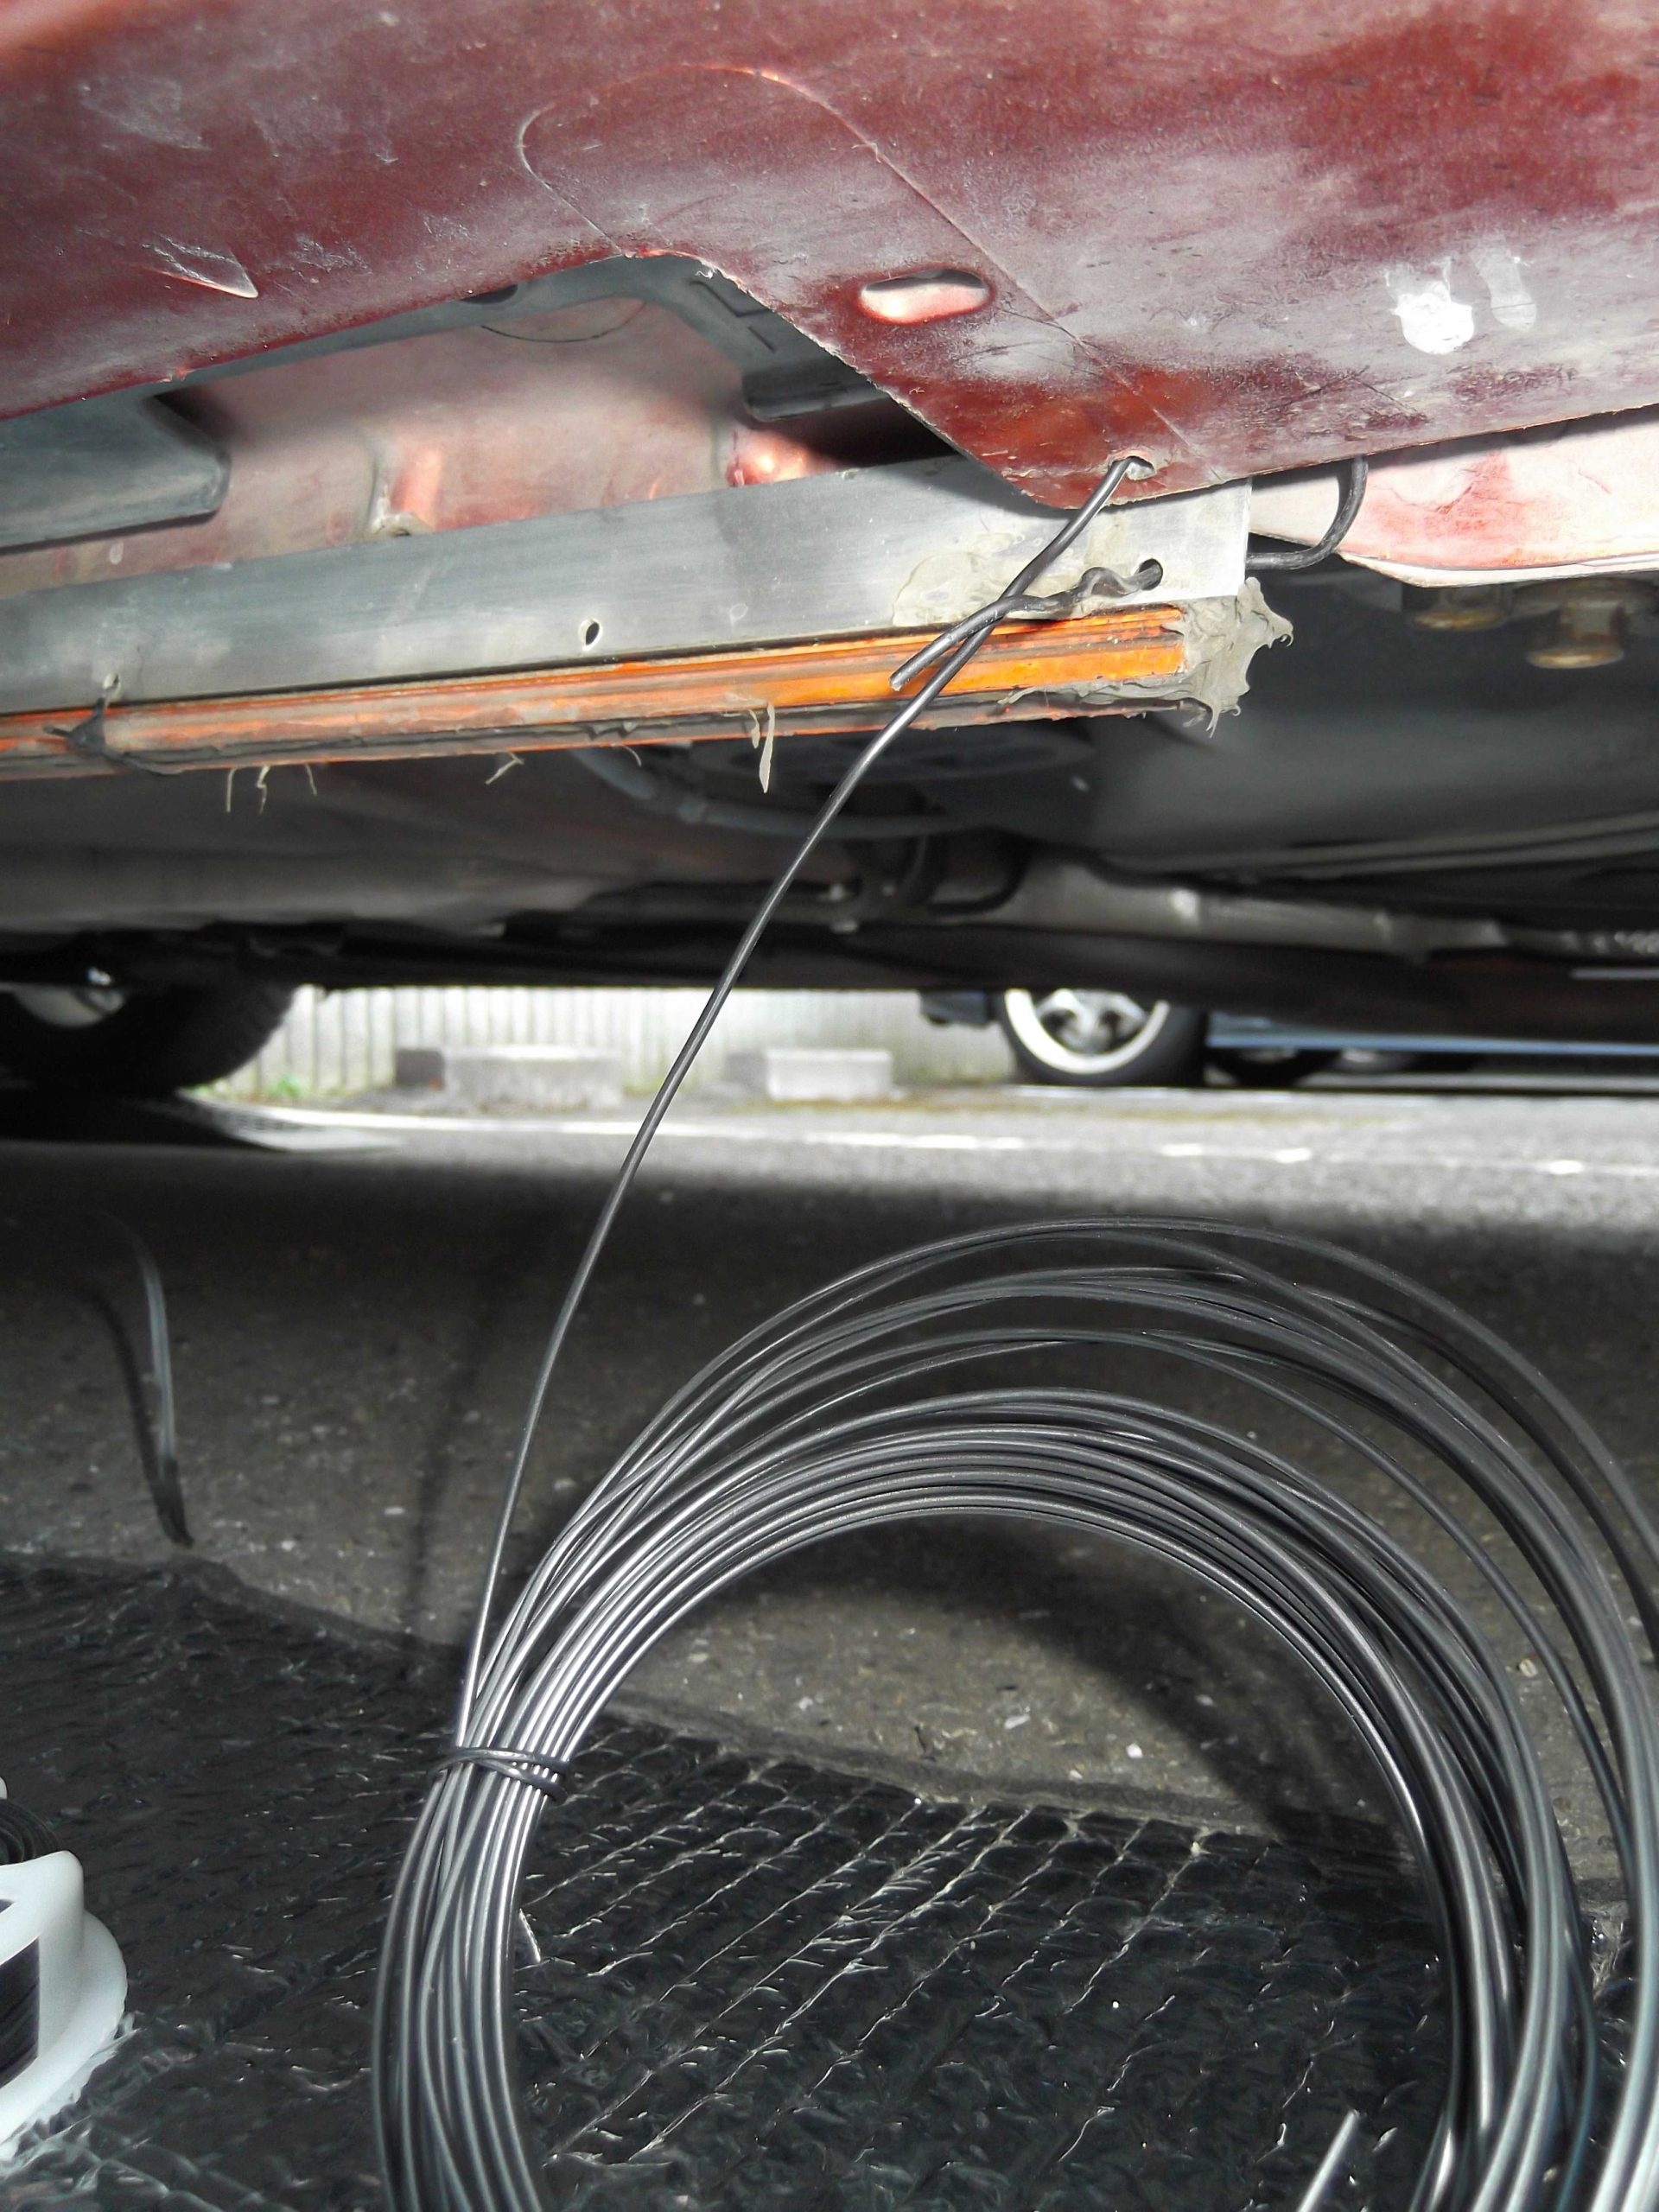
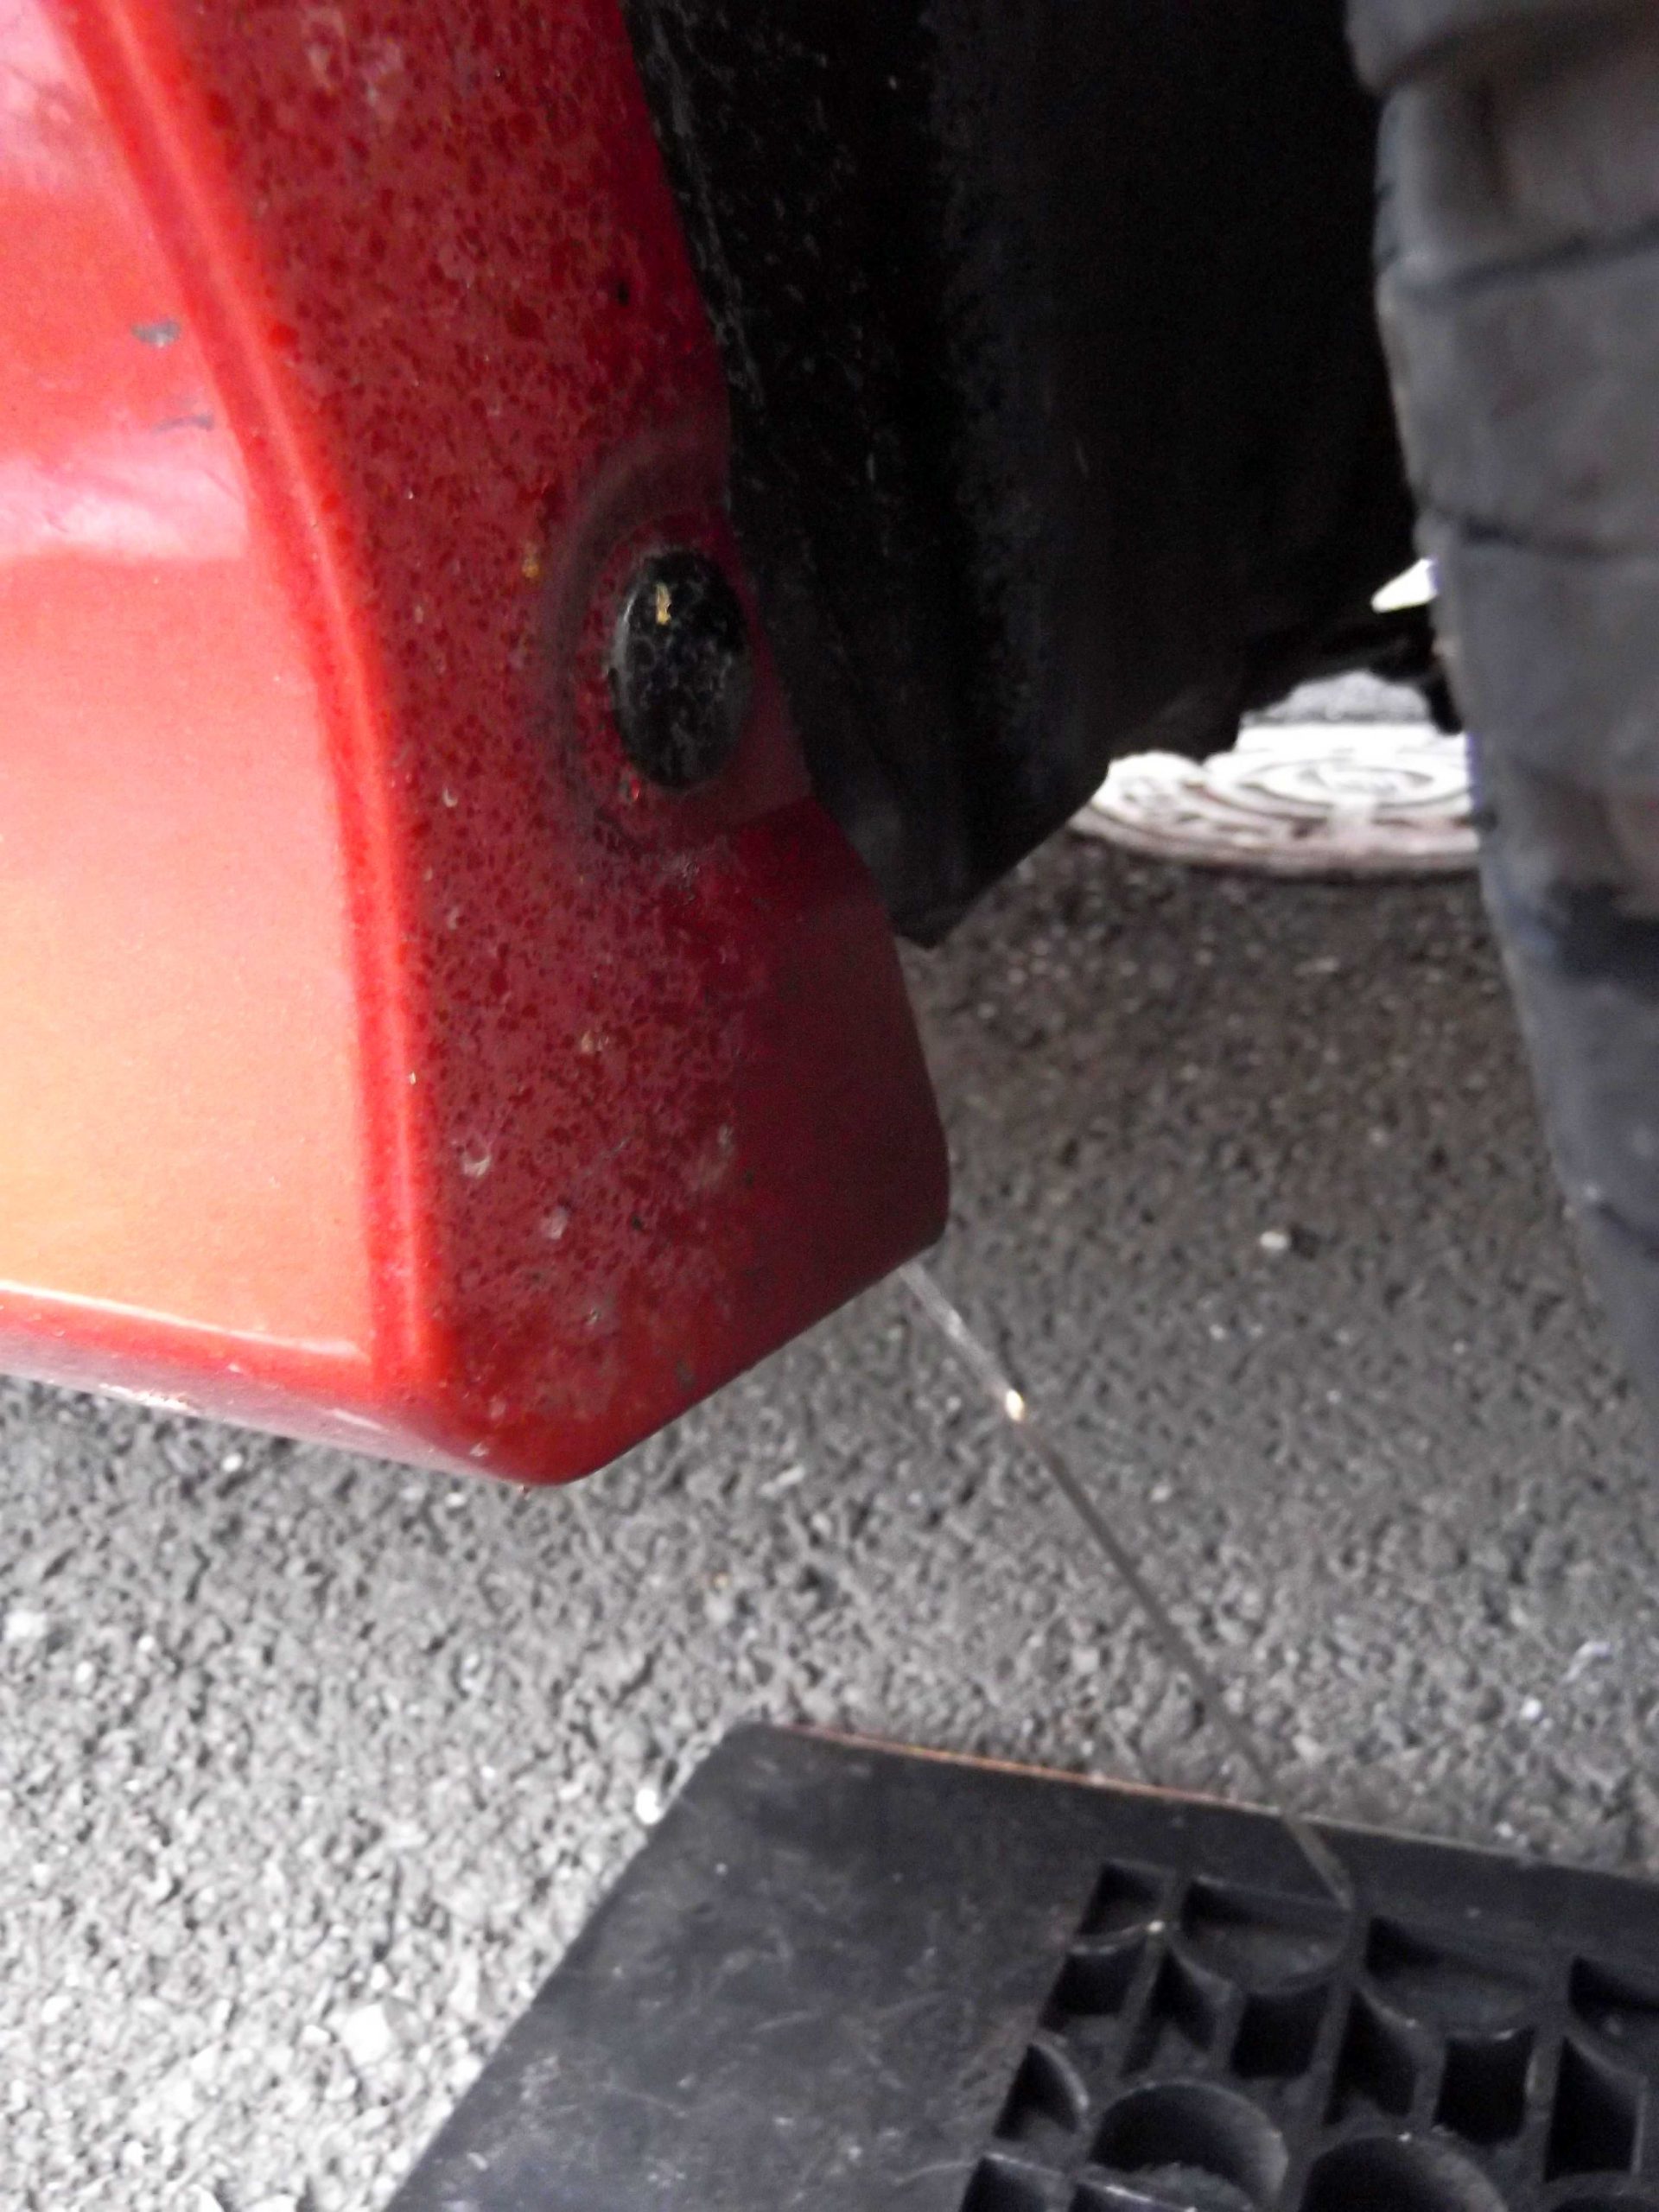
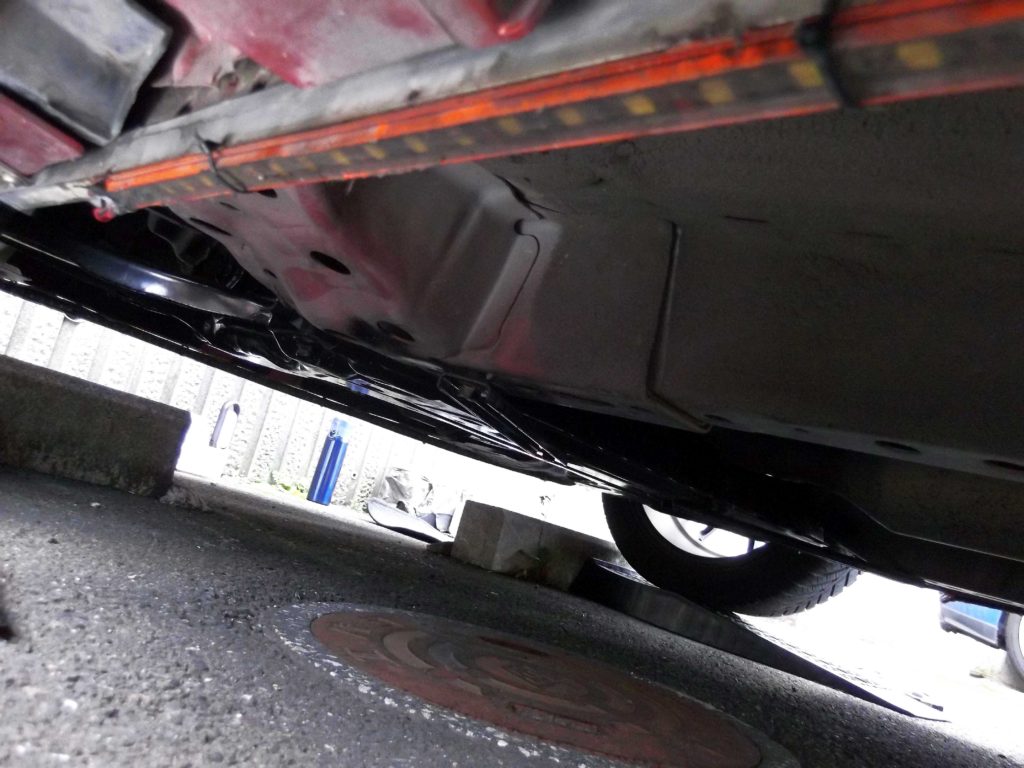
↓さすがに2年以上外装で装着していると汚れが目立ちます。防水処理を含めて,有線の接続部の端子は新しいものに交換しました↓

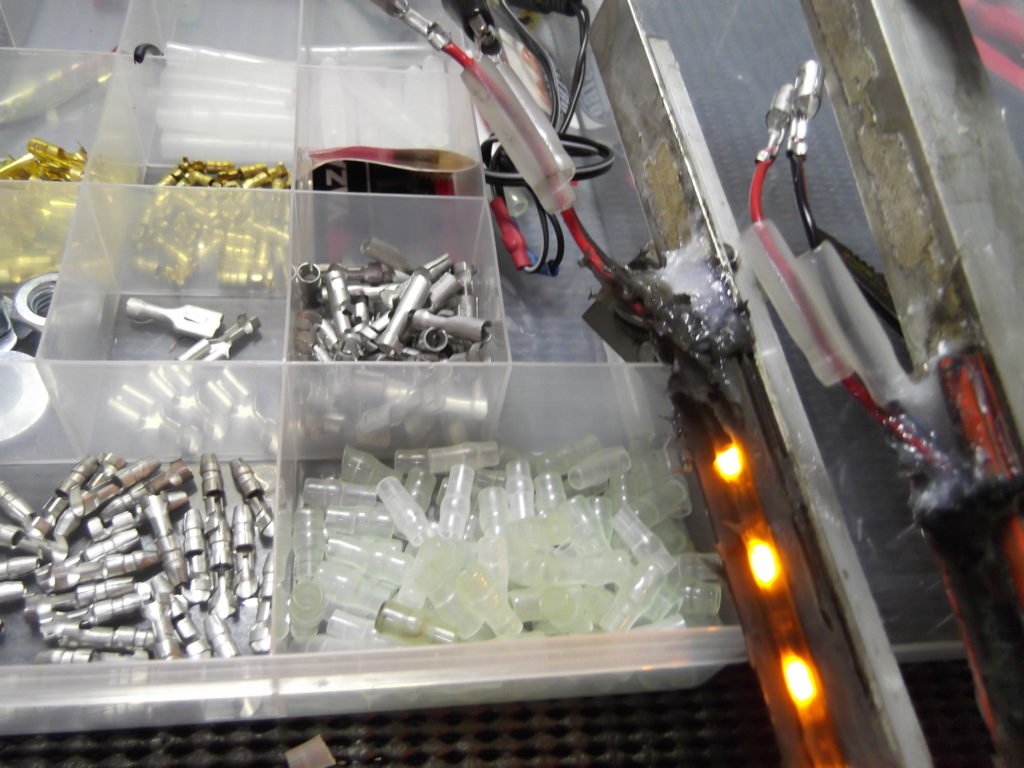


私の"細工"の手法は,
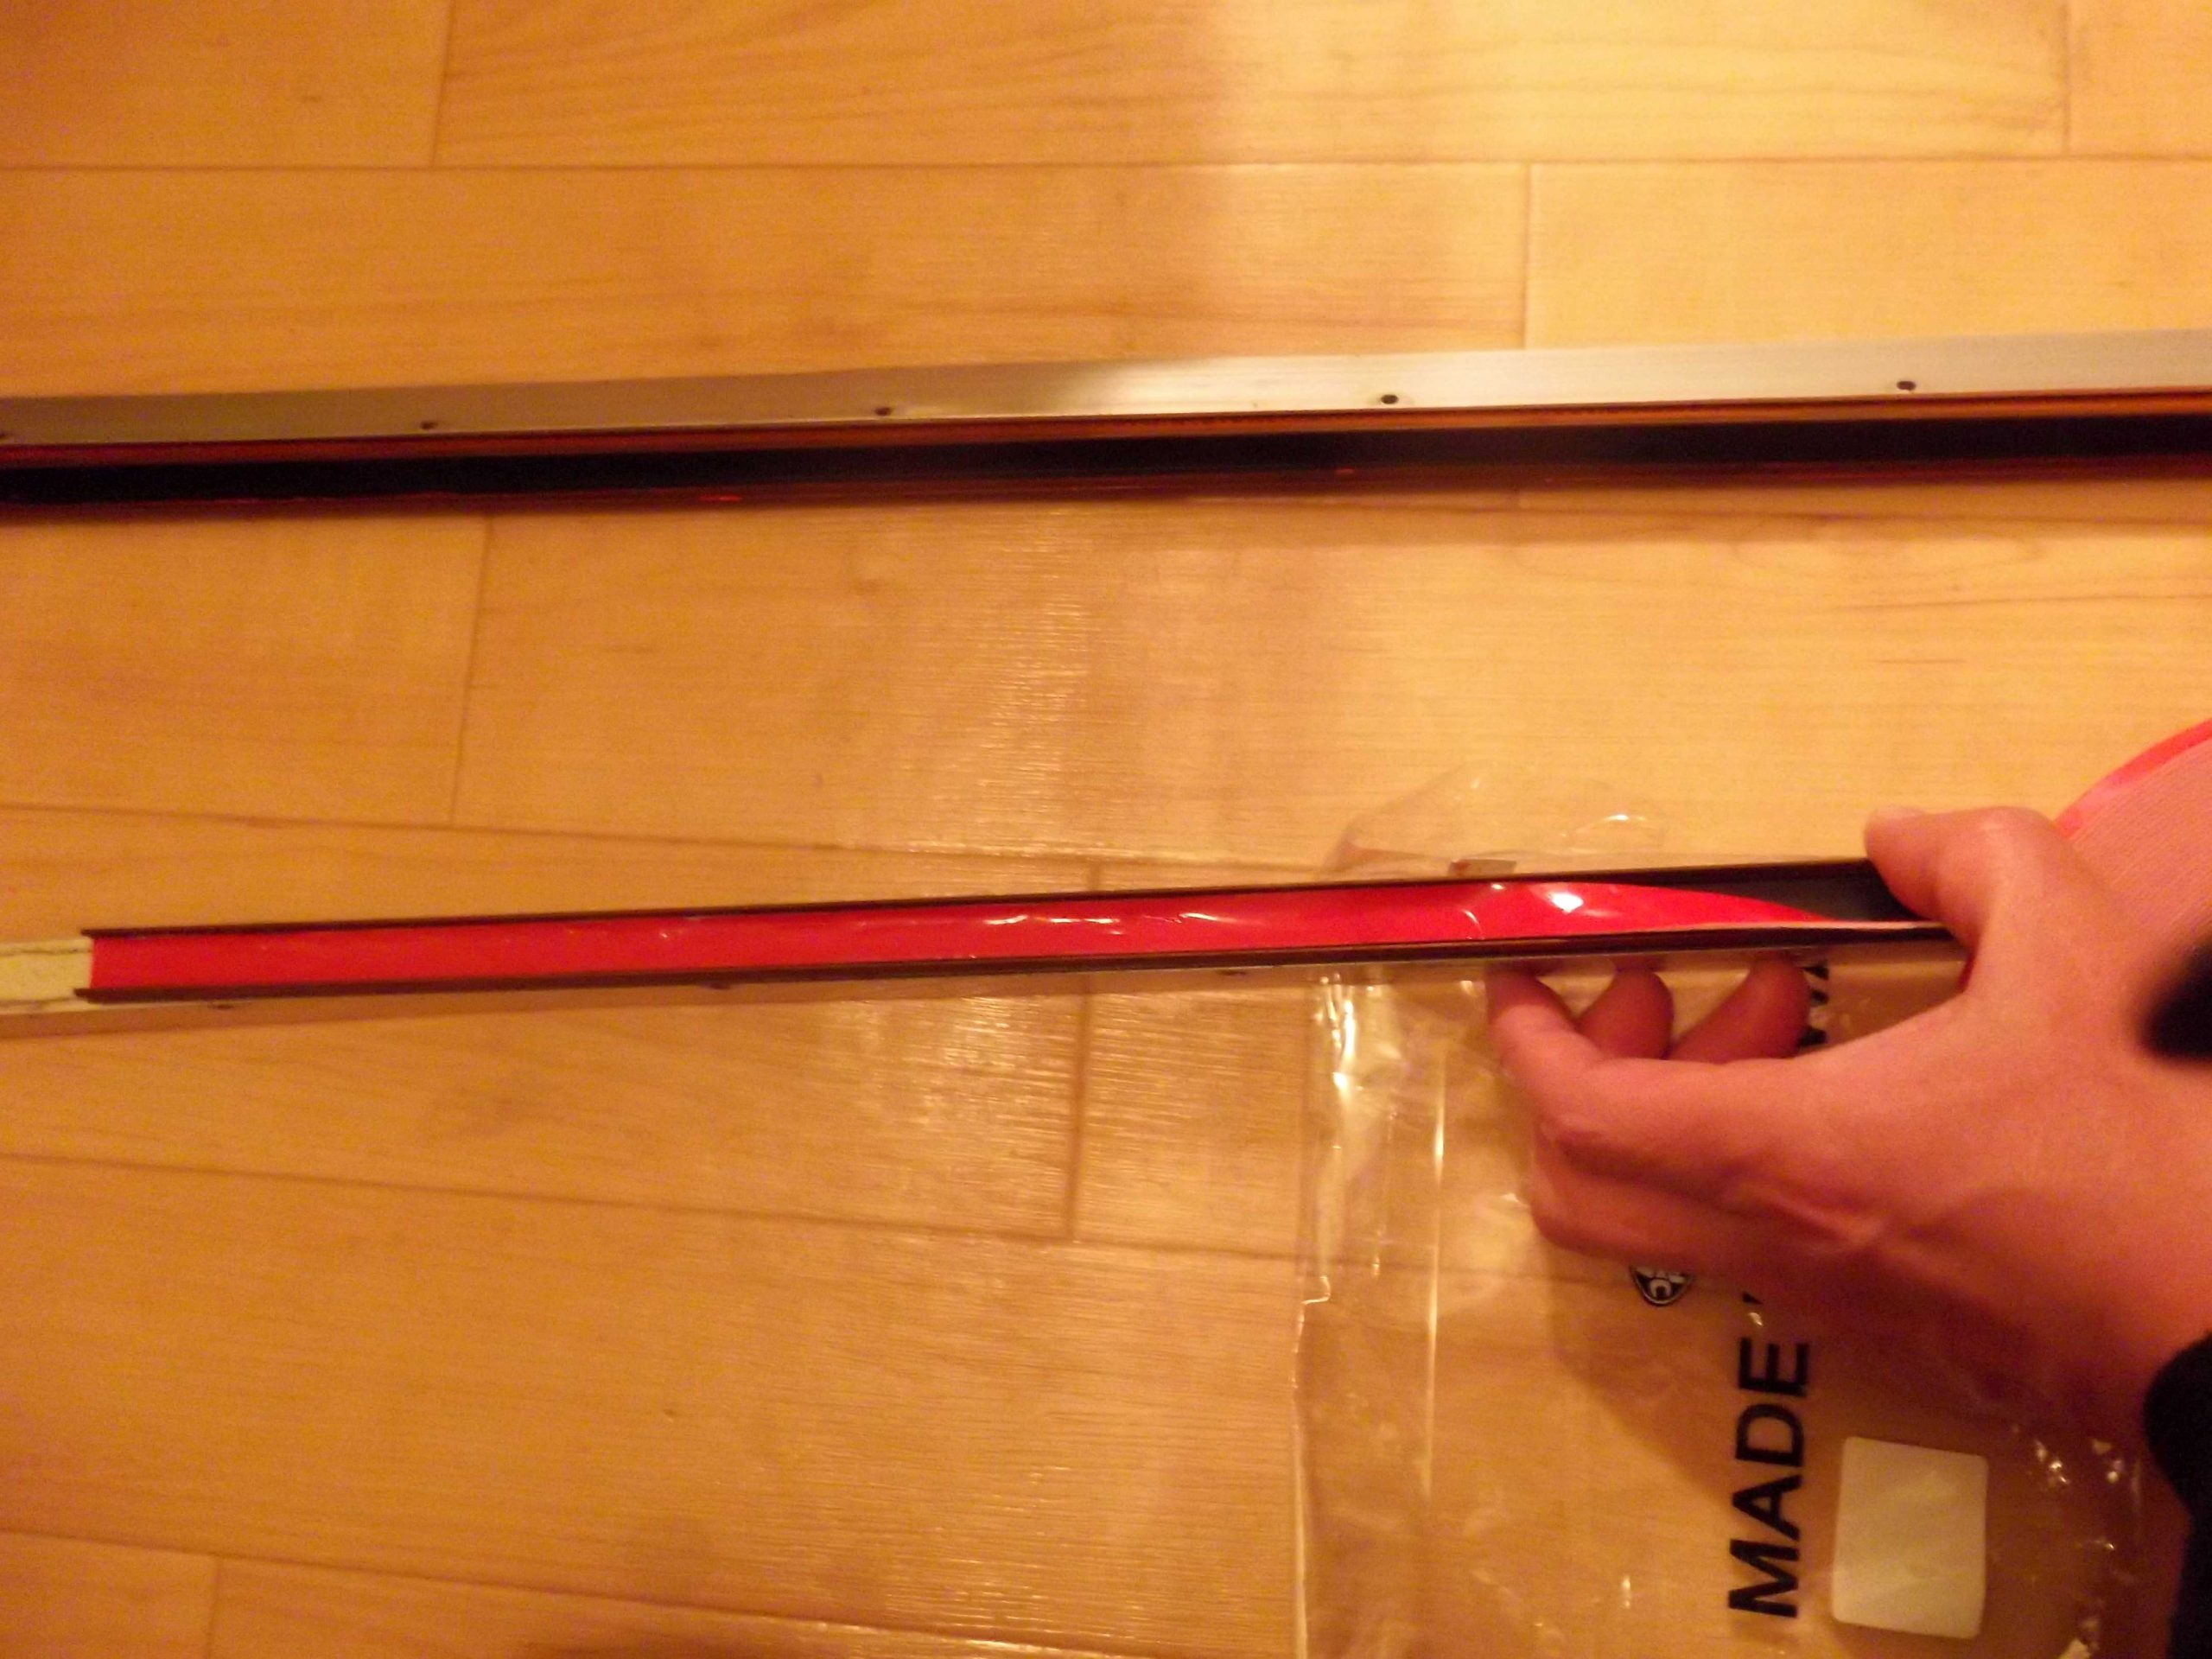
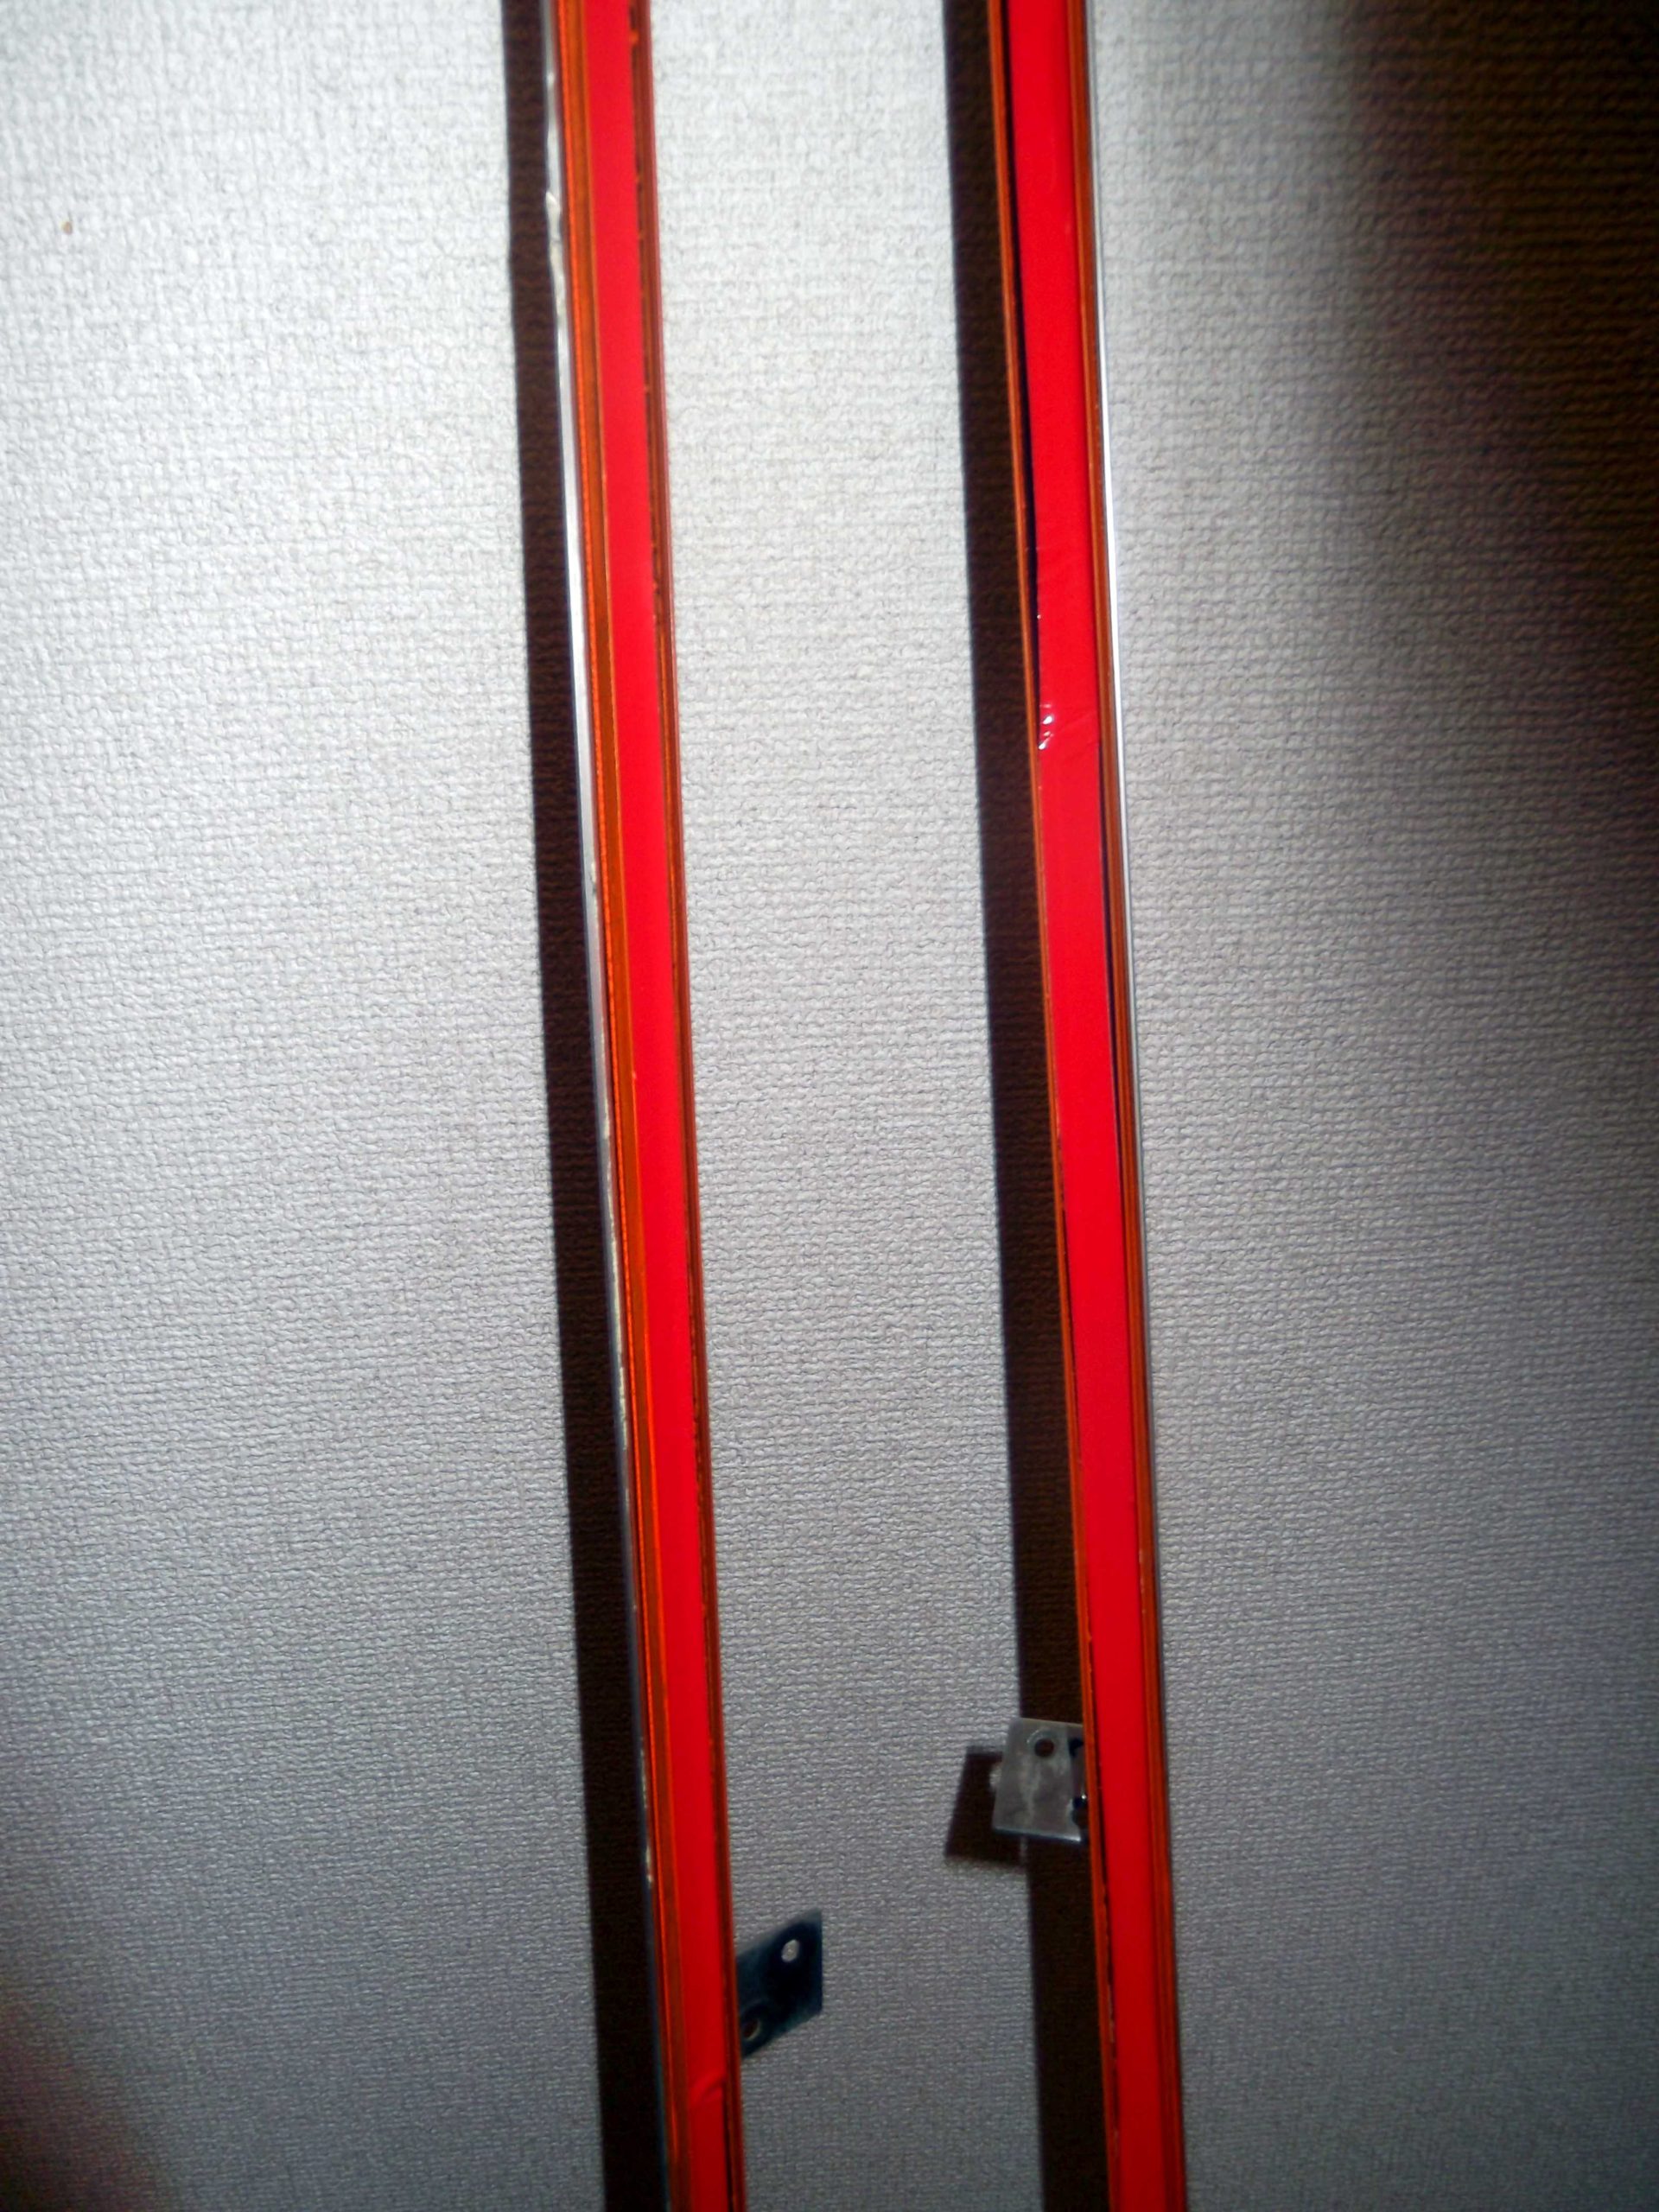
アルミ製のL型レールを使用しています。
その上にLEDが張り付いている様な状態です。

"光源"が横からあえて見えない様に工夫する為に,
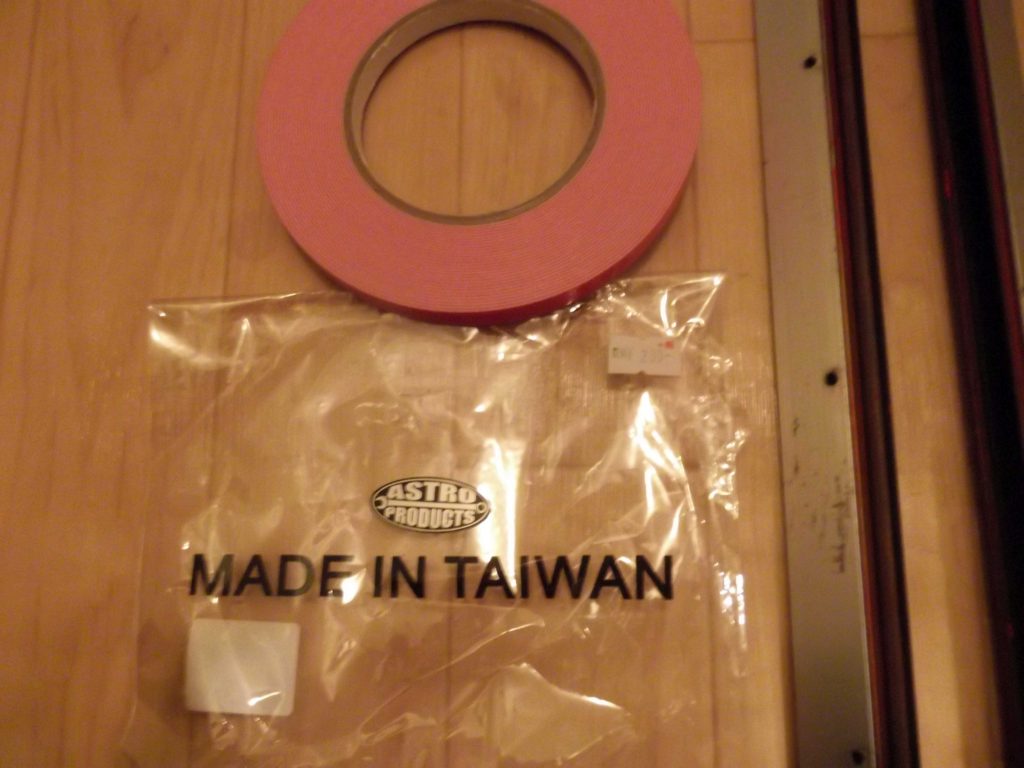
LEDを覆っているのは,ダイソーの100均で売っている
ケーブル隠しを用いています。
モール?と呼ぶのでしょうか?
これがテープLEDの幅の
1㎝とどんぴしゃり!に一致します。
"光源"がもろに見えるか,
見えないでほのかに?照らすかについては・・
これはクルマに乗っているオーナーの方の好みで,
美的センスに依るものですので,一概には
何がこれが正しいってお話ではございませんw。
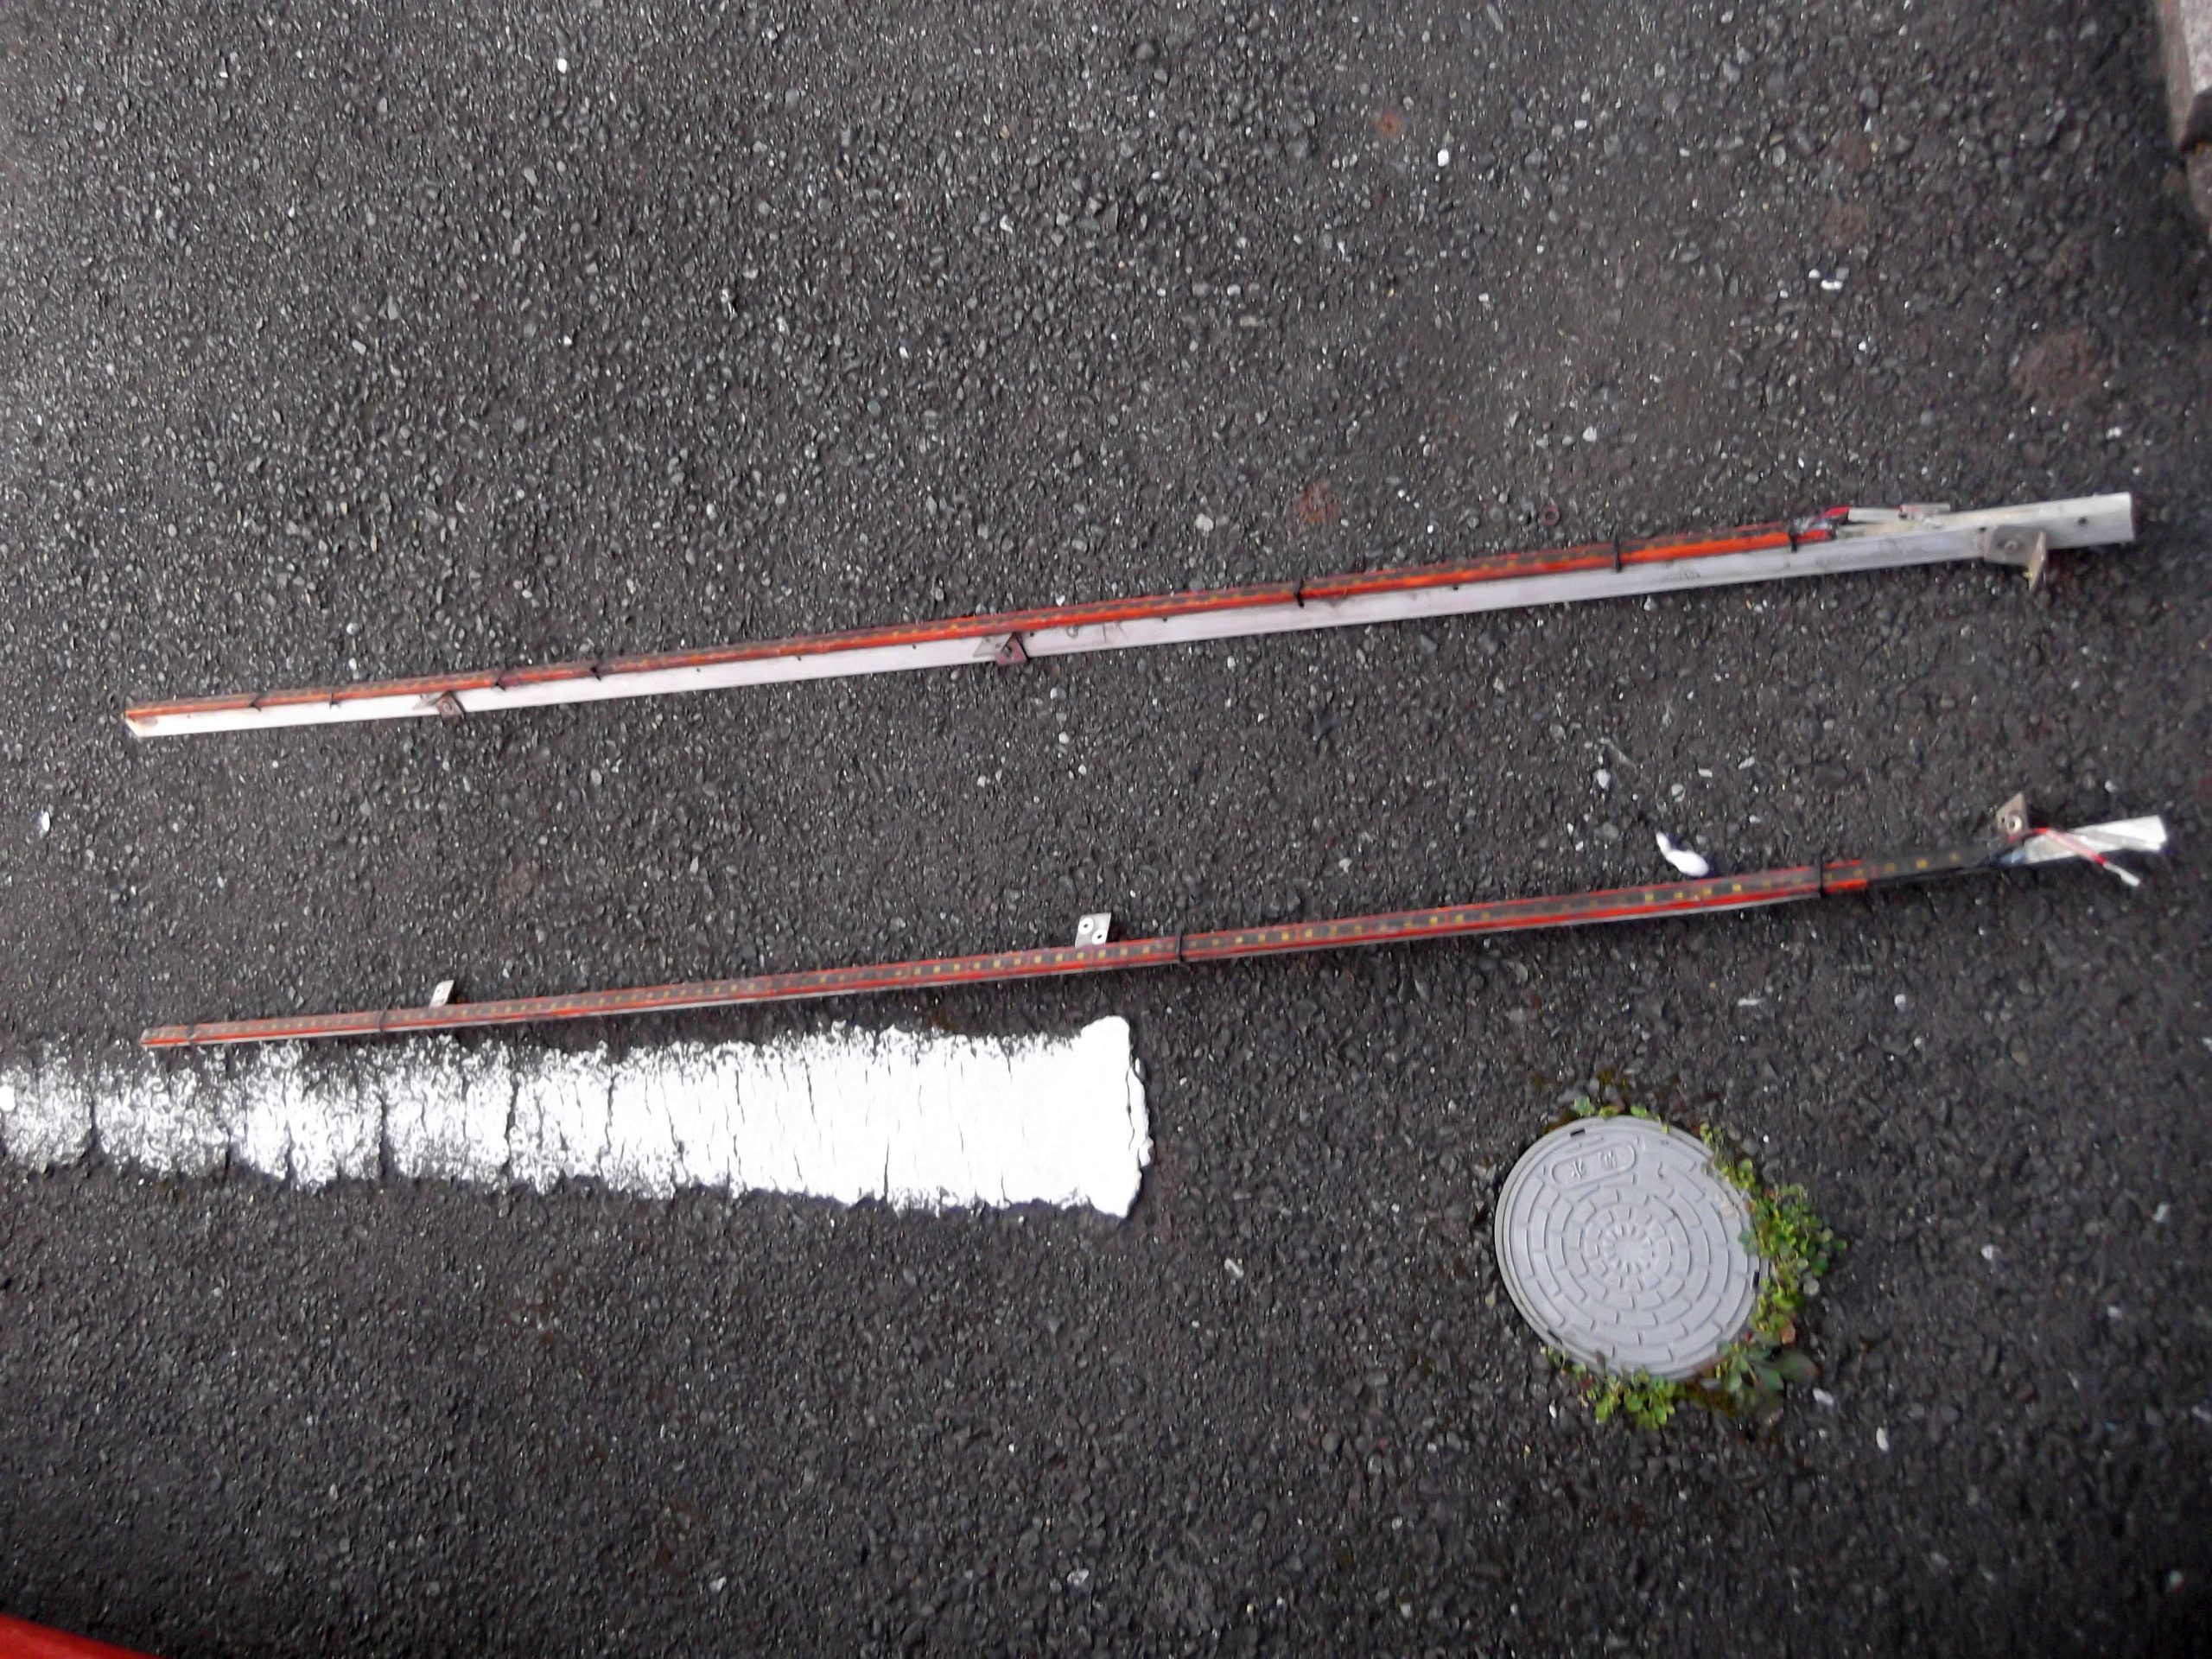
↓以下の画像は2年前に再び,今回
再利用したアンダーネオンの製作画像となります。
↓↓ The image following becomes the production image of under the neon recycled this time again two years ago.
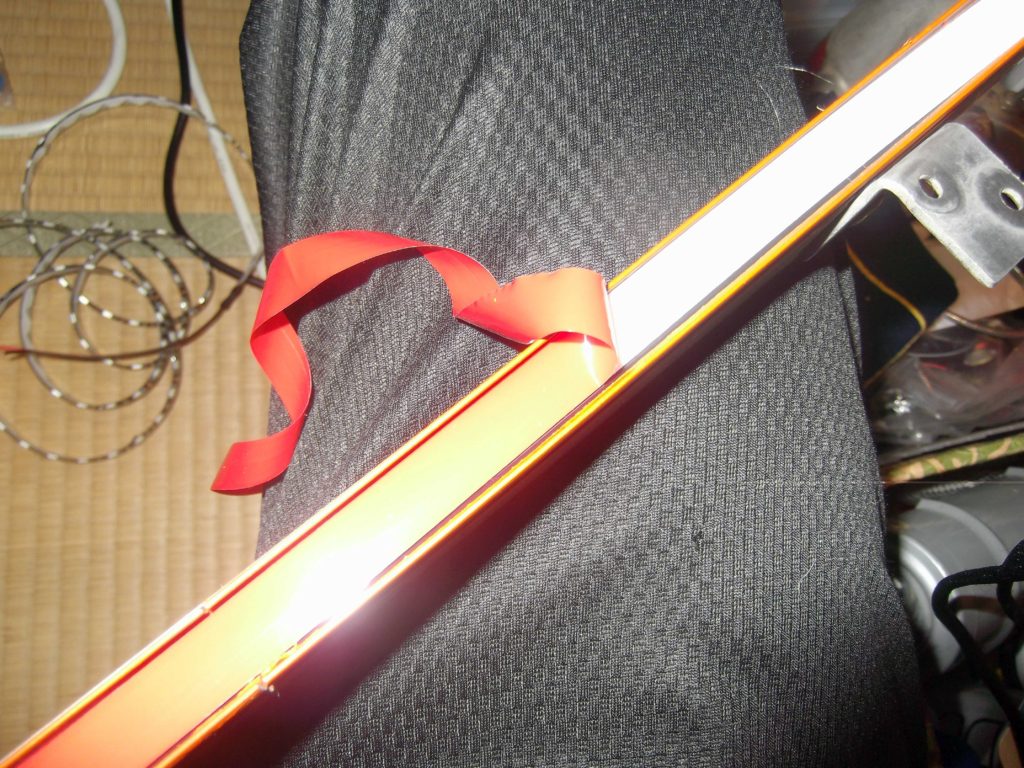
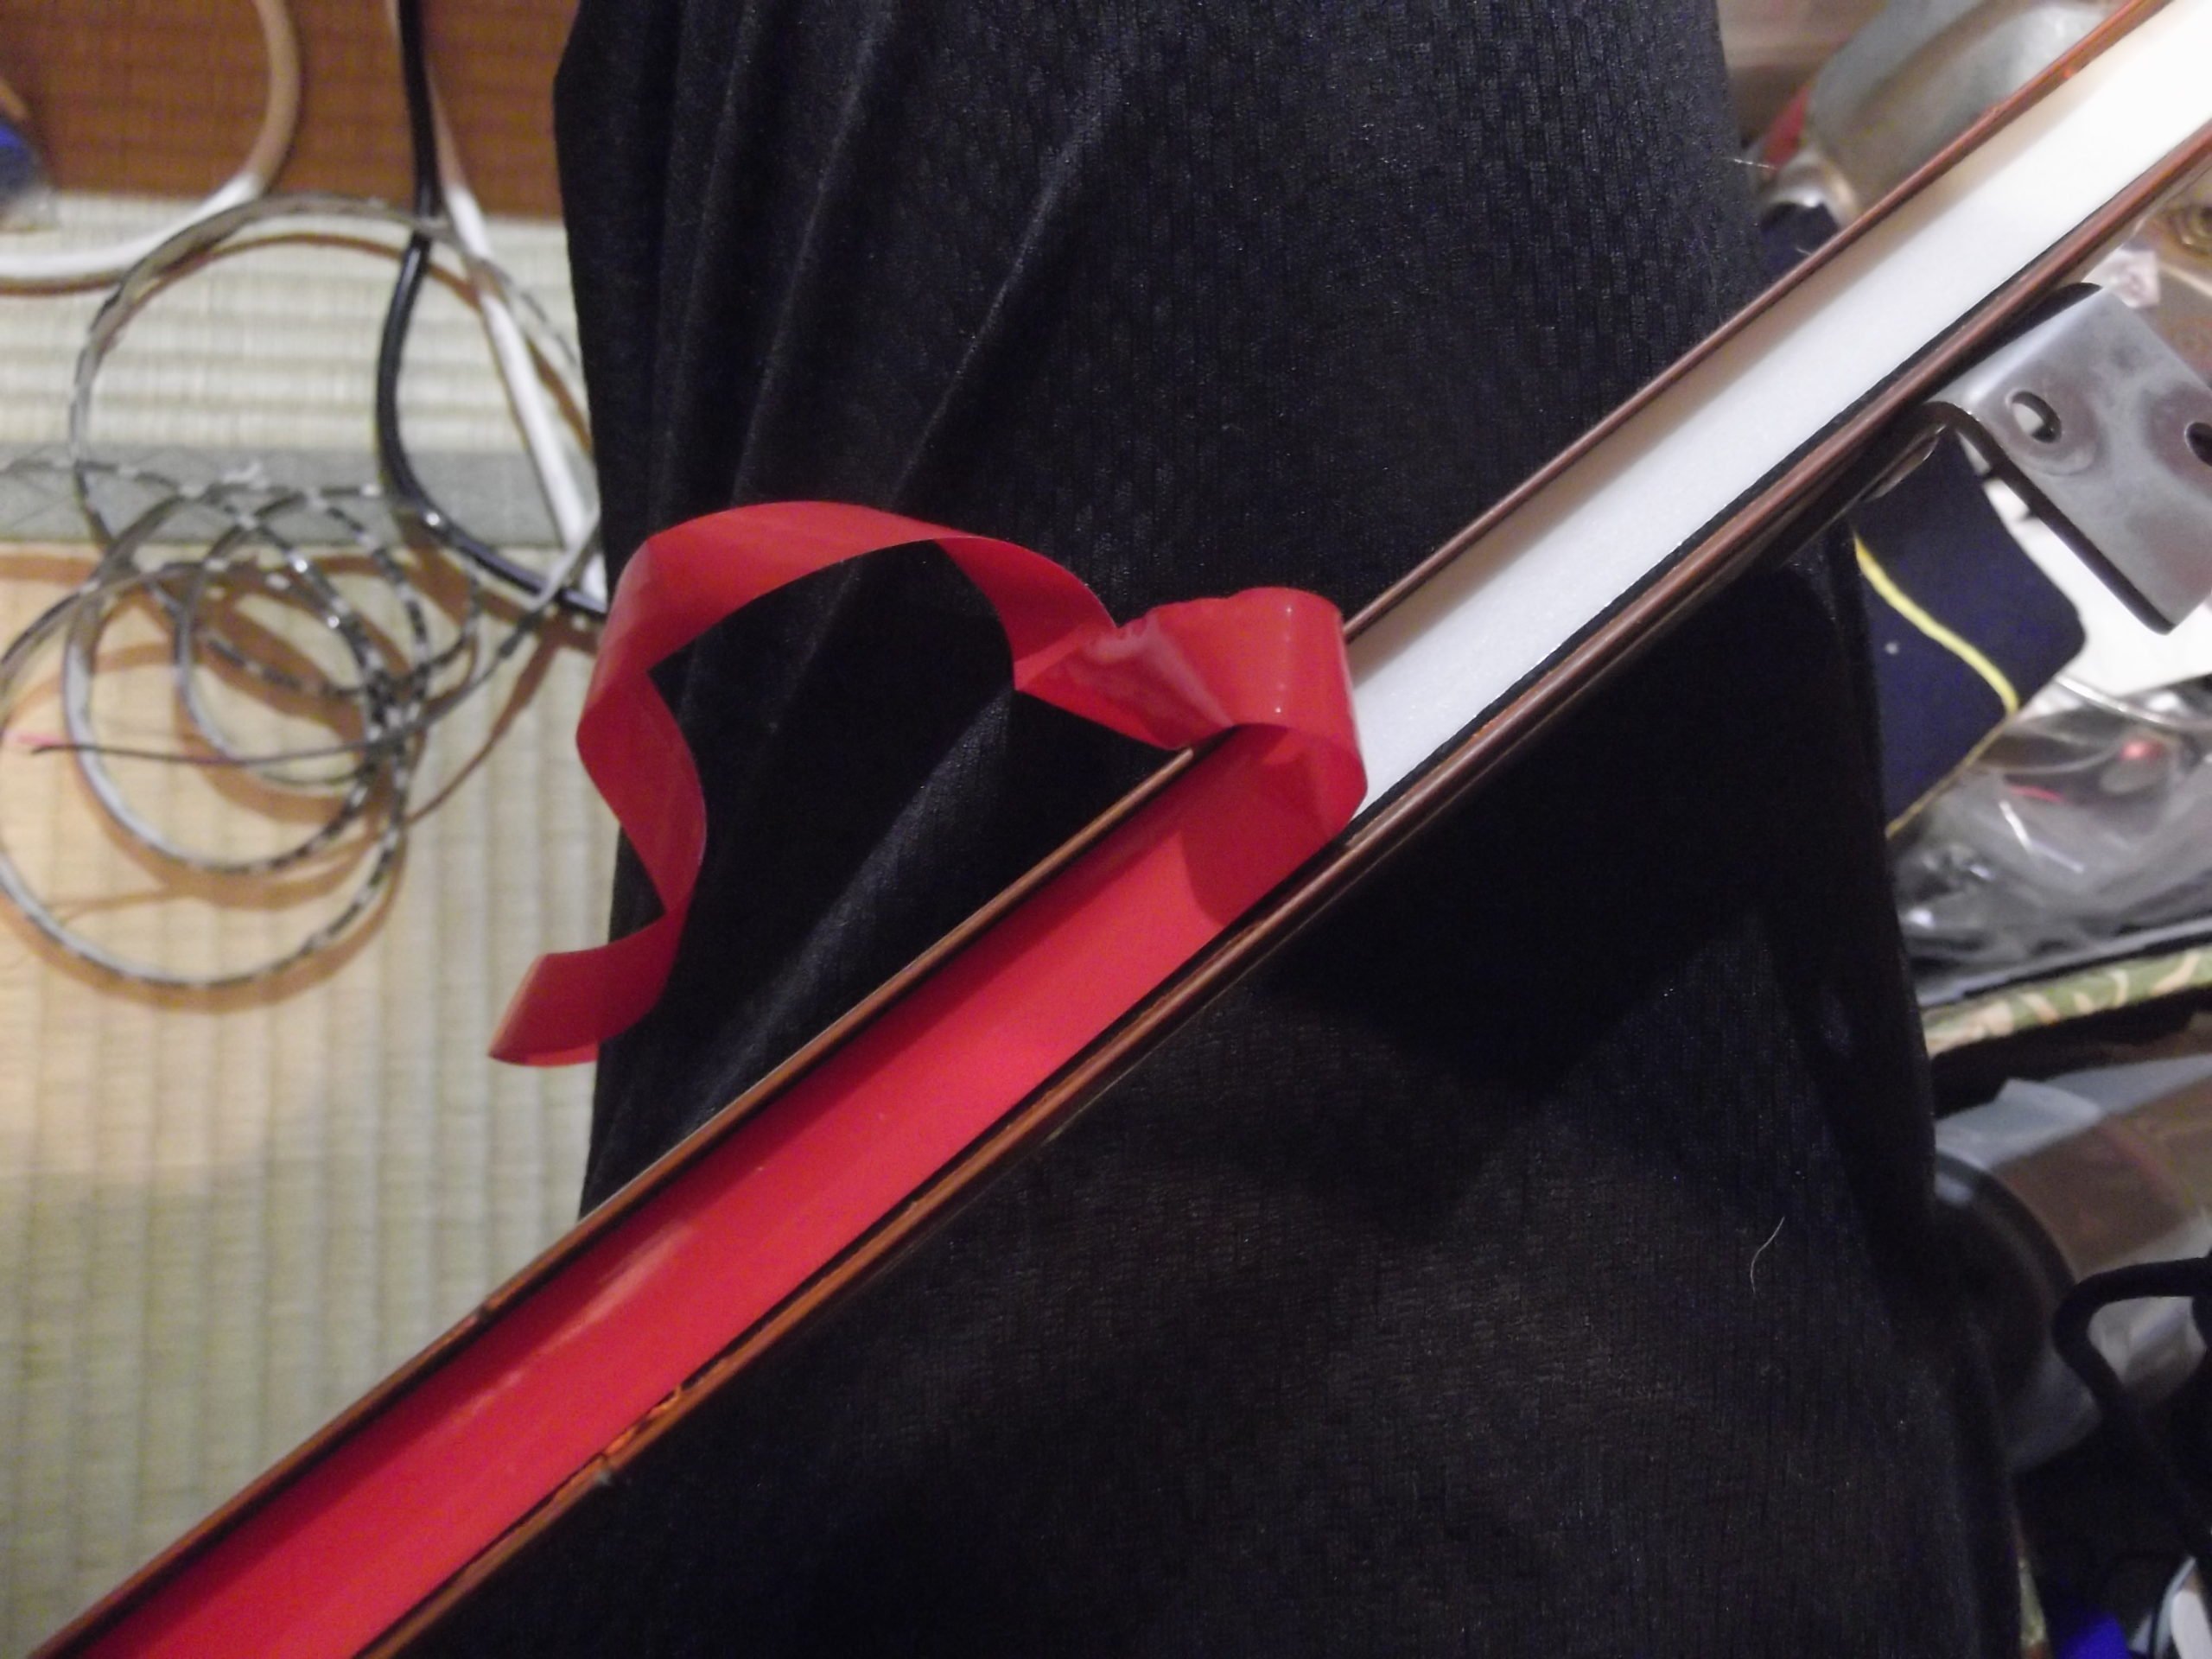


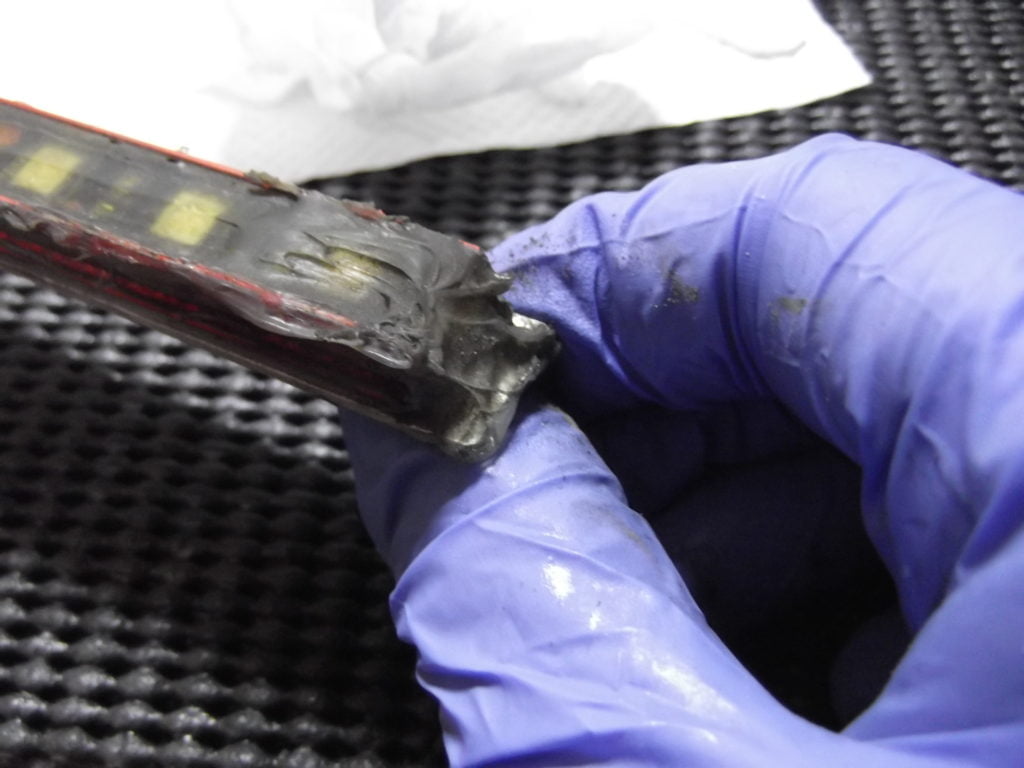
透明色の防水加工=コーキングは後日,徹底的に行っています。
↑ Because it is a character not trusted at all though it is tentatively a light emitting diode of the tape in which the waterproof is done, the transparent shade waterproof finish = is thoroughly caulked later.
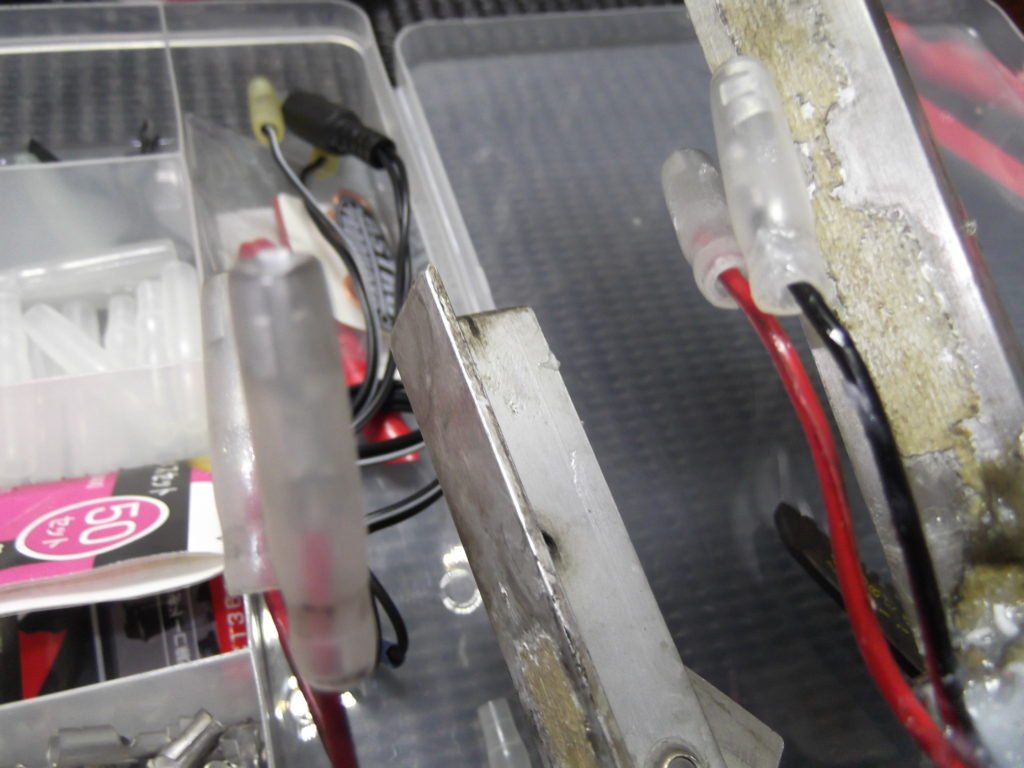
走行中においての落下防止の為,
両面テープだけではまるで信用出来ないので,
複数箇所を耐候性のある結束で結んでいます。
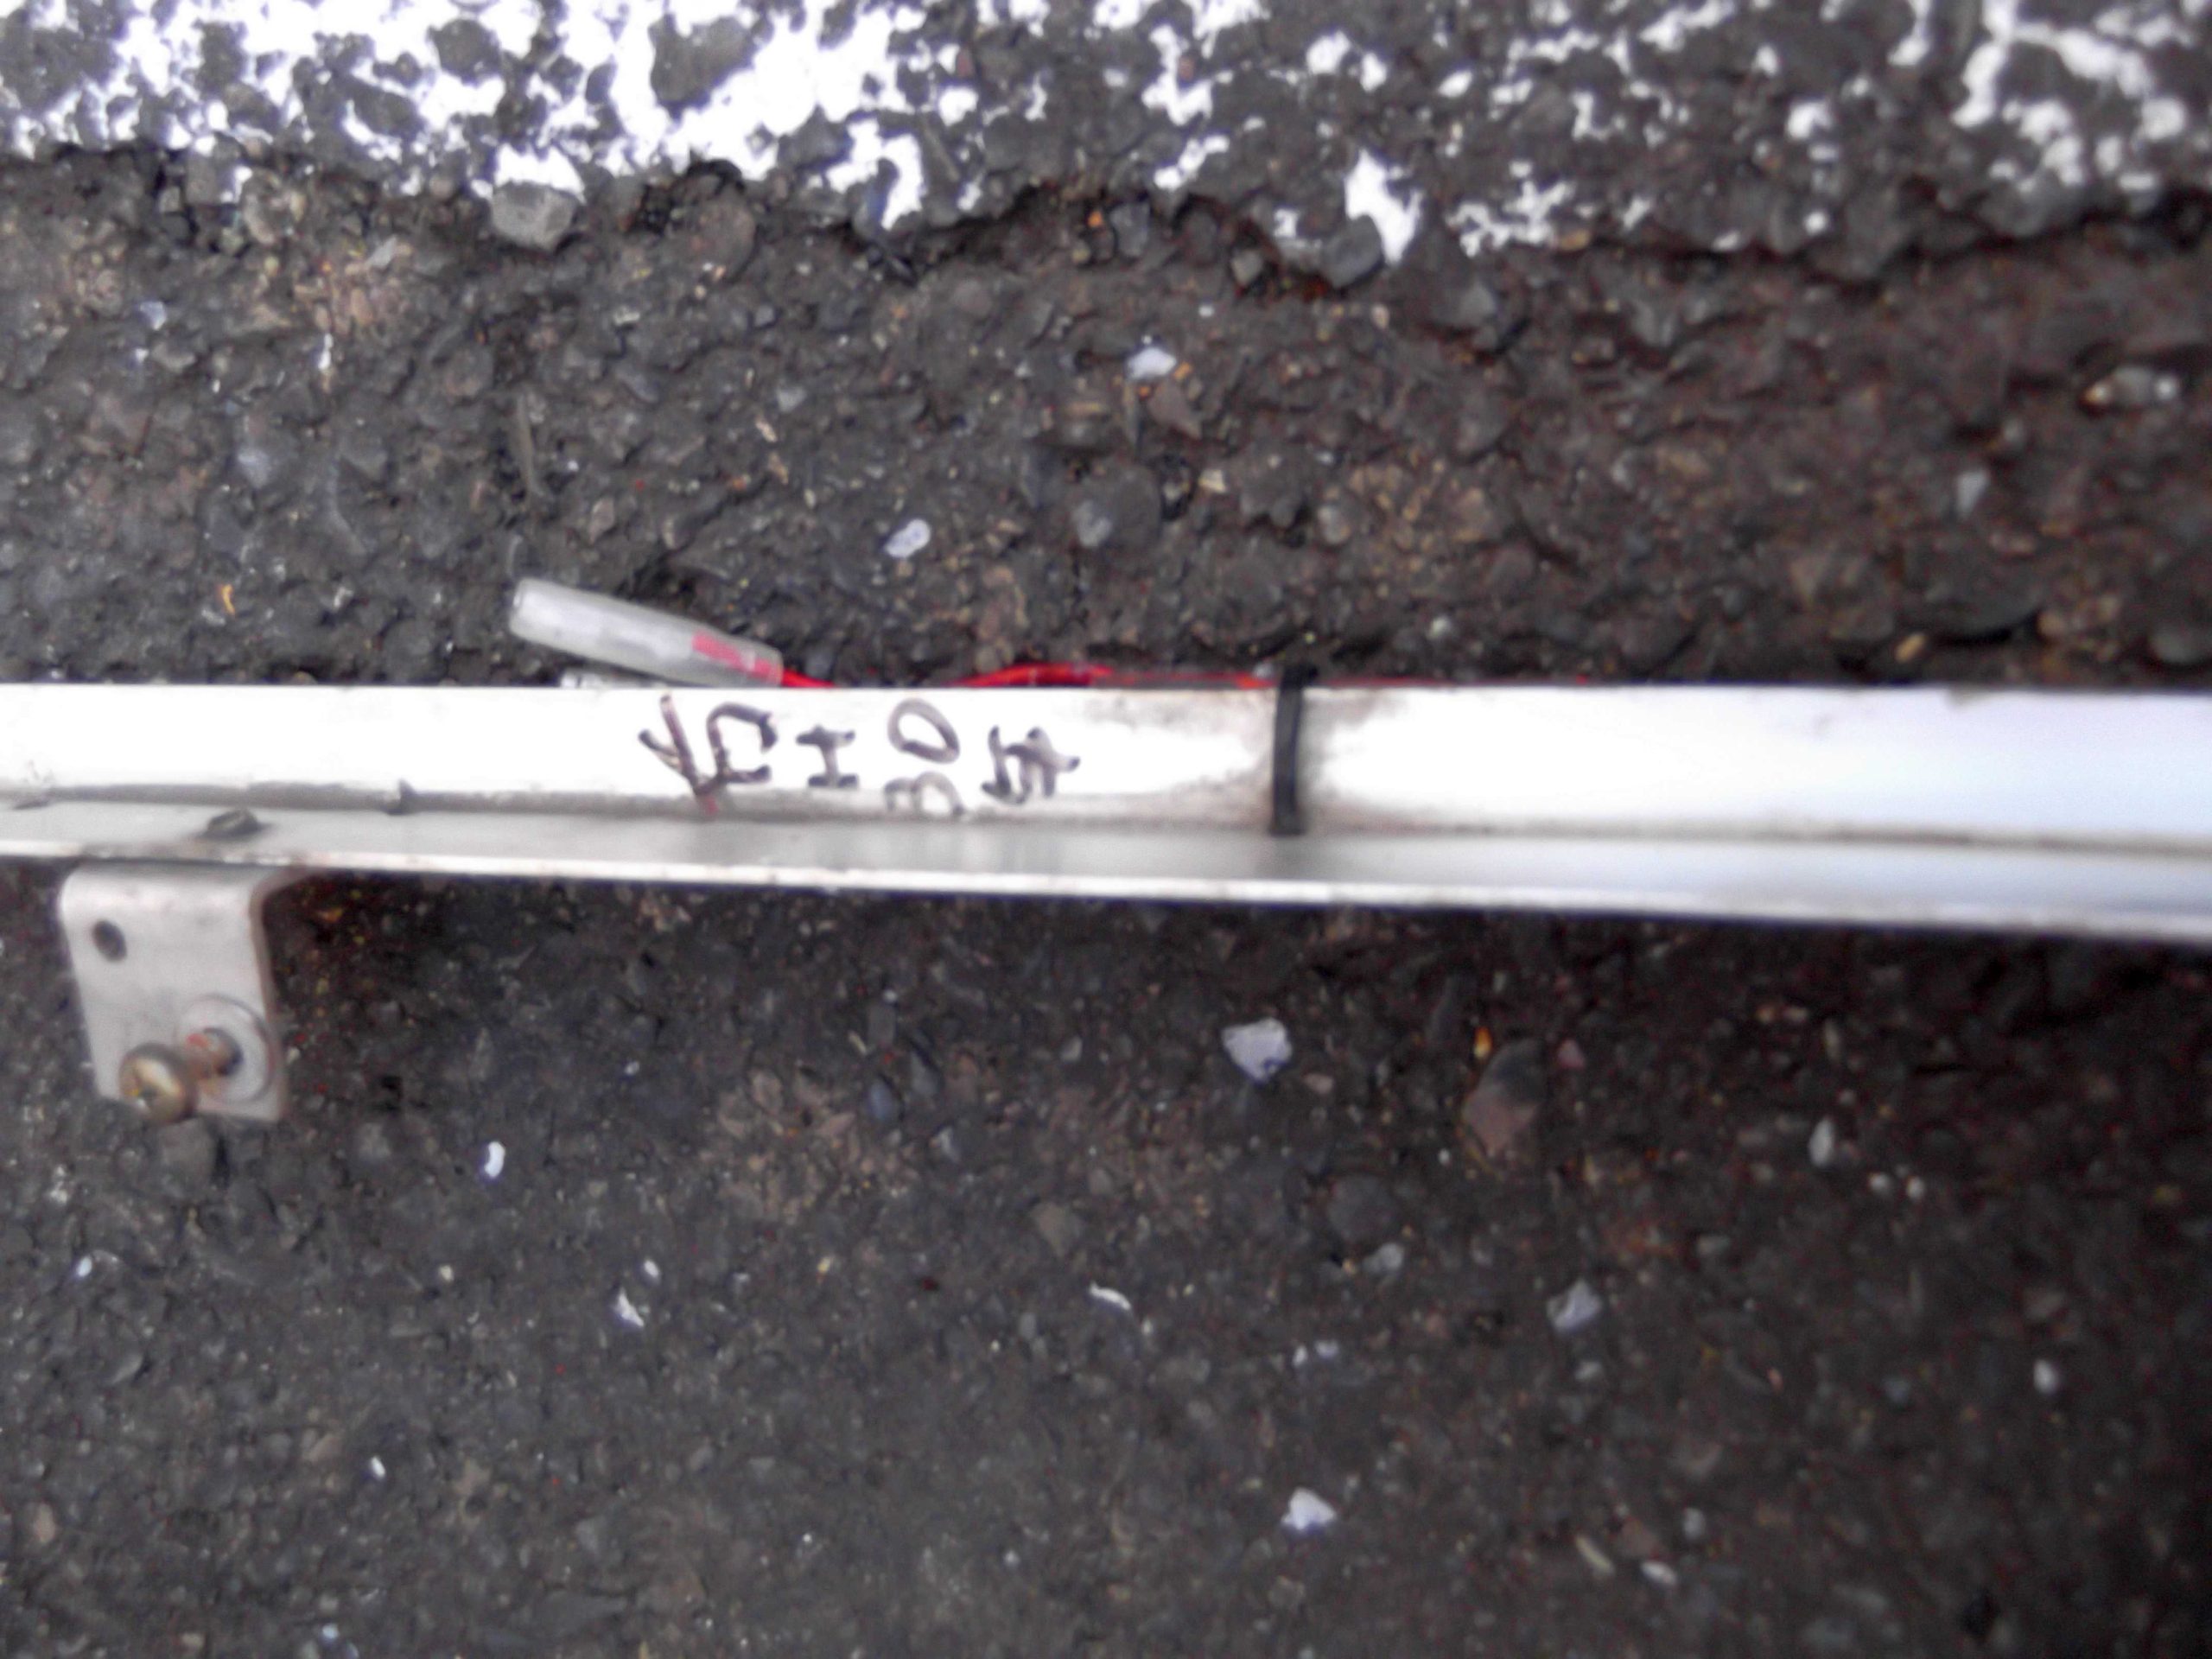
L型レールに穴を開けて結束帯を通し補強します。
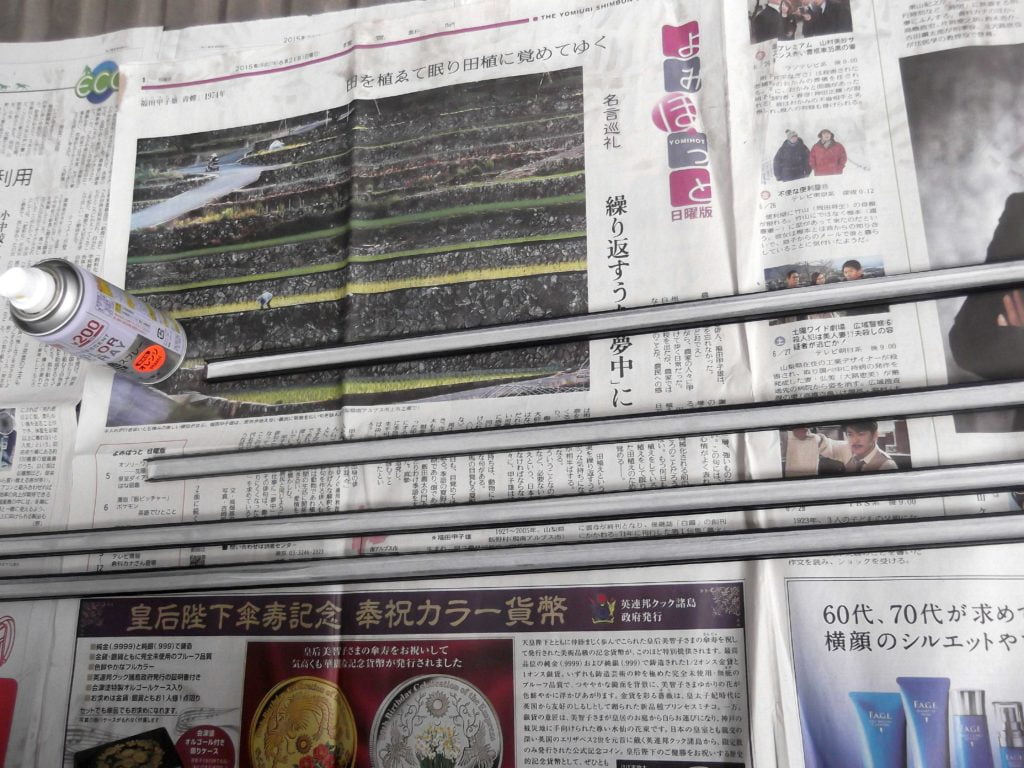
アルミ製のL型レールは,
ホームセンターで安く購入可能です。
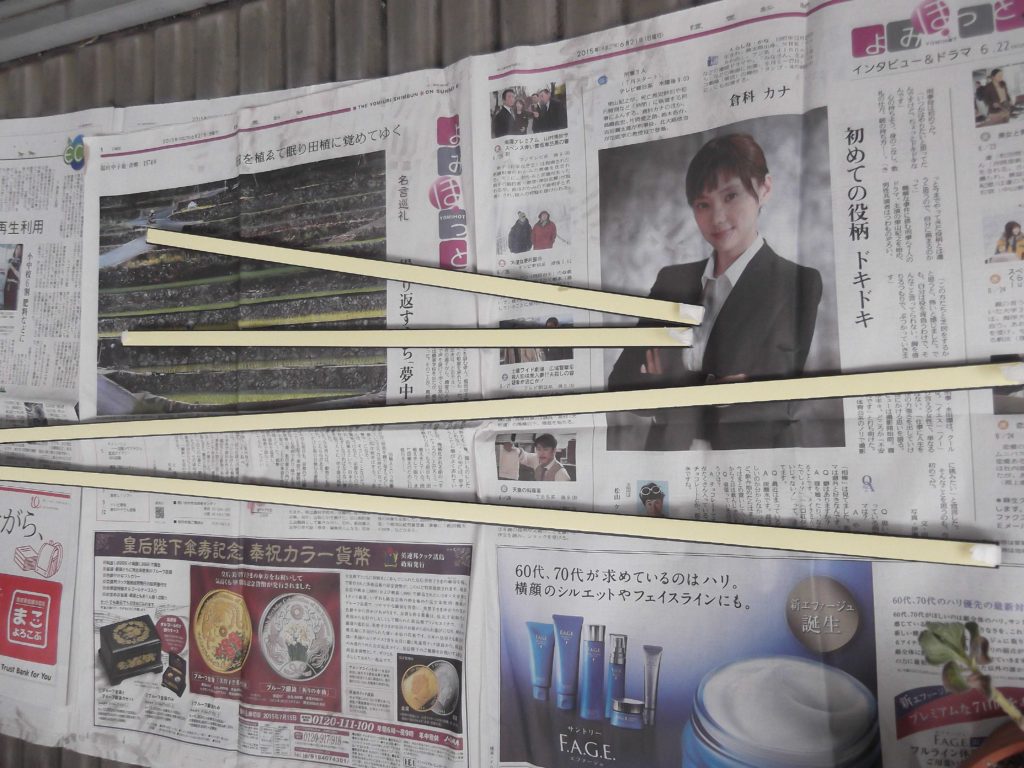
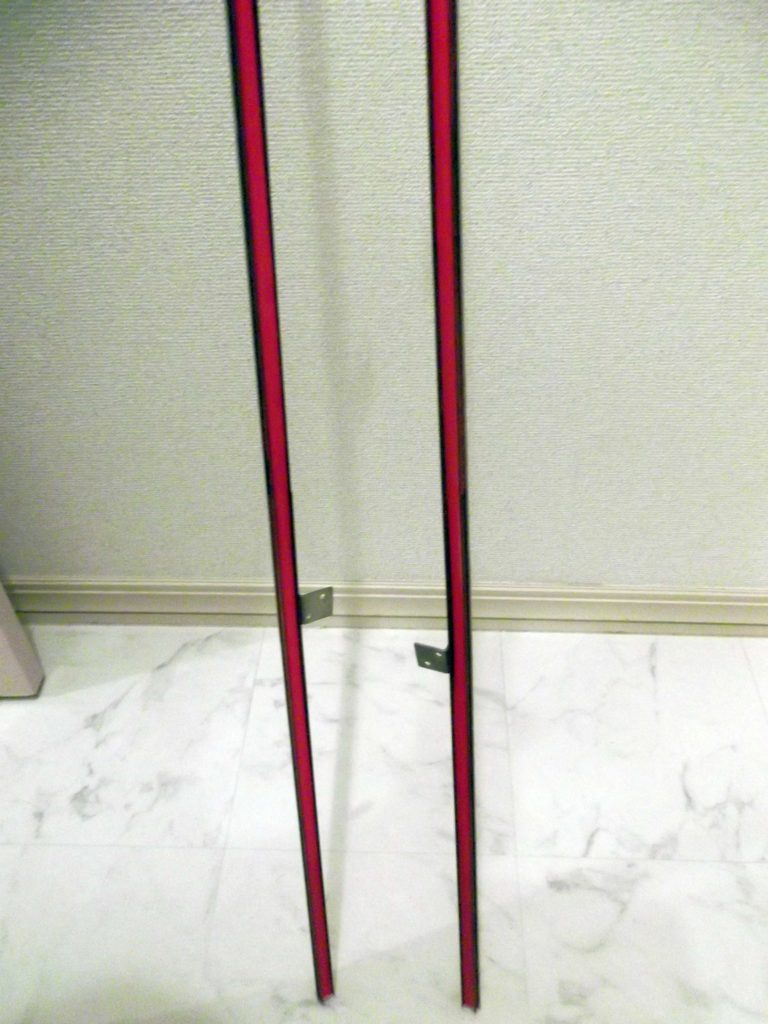
以前は170㎝を両サイドに装着していましたが,
乗っている車でははオーバー気味で,

現在は165㎝のアルミレールを
左右両サイドのエアロ部と本体の隙間に挿しています。
↑ It becomes an image with which this produces under neon of two the previous in year or more 170㎝.
そのアルミ製のレールに
L字型の金具を用いて
車体に接続しています。
L型アルミとL型金具との接点は,
"リベット"という日本語でいう
"かしめ"の手法にて接続しています。
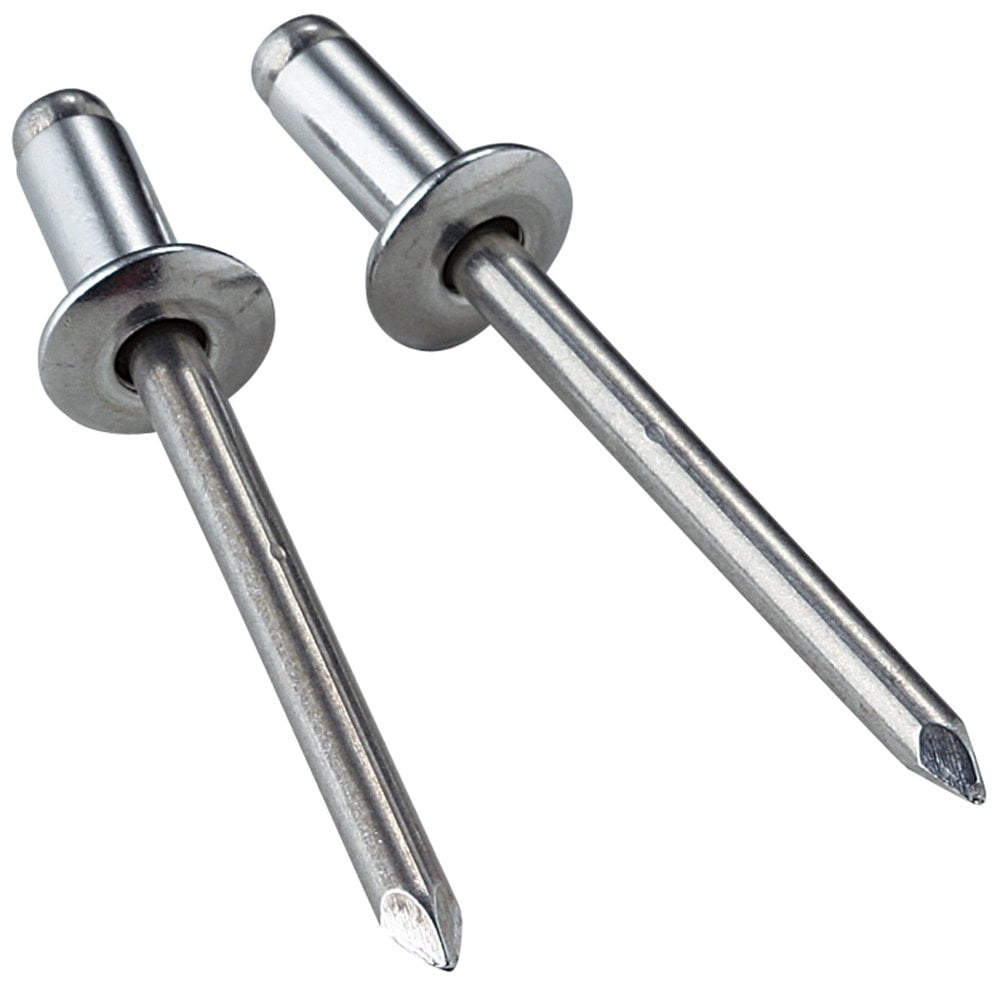
ご存じの方も多いと思いますが,
特殊な工具が必要ですが,穴を開けて
リベットそのものを挿入することに慣れれば,
誰でも簡単に鉄板と鉄板を密着=
"離れなく"させる事が可能です。
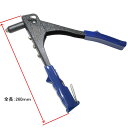
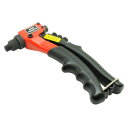
多用しない方であれば,"ハンドリベッター"で十分かと思います。
私がは大変価格の安いものも所有しています。
安いリベッターは不具合が結構ありますので,余裕があれば上位機種を購入なさった方が賢明です。↓だんだん商品価格は上がりますが,その分,使い勝手の良い商品を掲示します。

私は溶接技術と工具を所持していないので
こうした手法を用いています,
そのL字金具以外の部分では,
先端とラスト(後部)はエアロ樹脂に穴を開け,
針金を通し,激しい走行での落下防止に備えて補強をしています。

L字型の金具に関しても,
ホームセンターで楽に入手可能な具材です。
私が凝っている部分は,
ネジを強固なコンクリート用のものを使用している点でしょうか。
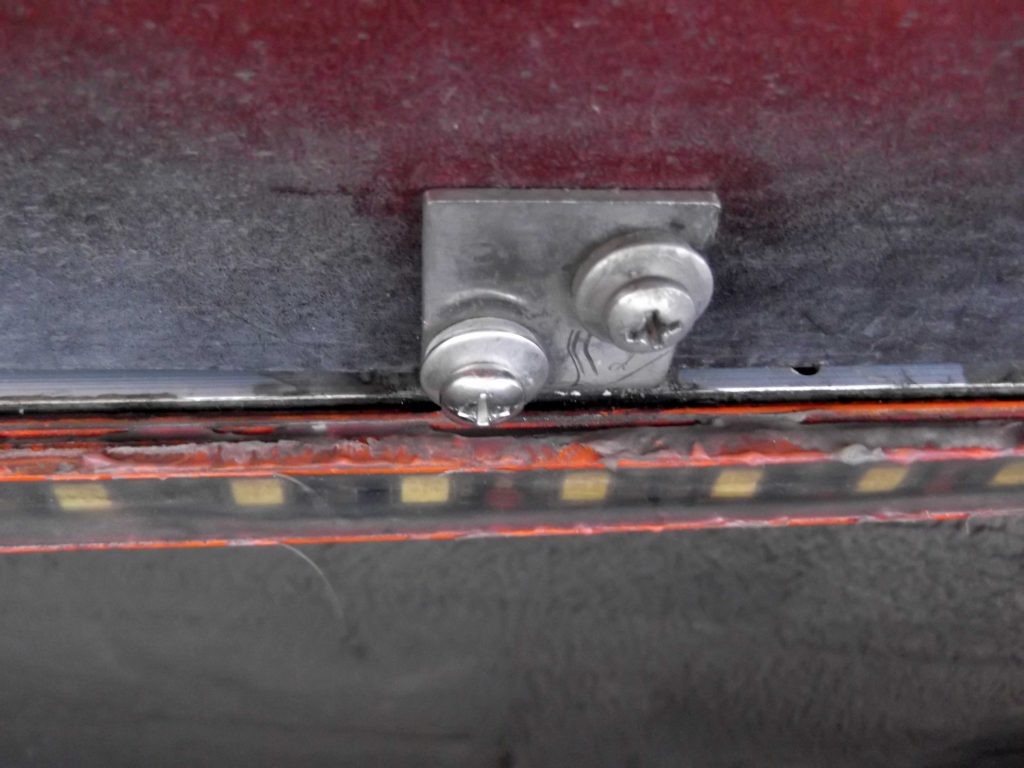

錆びず屈強です。
ただ,ボルトではなくネジ・タイプですので,
裏部でナットで完璧に固定
するには至っていません。
エアロを全部外す事が可能ならばボルト&ナット式の方が強固ですが,
私の場合は取り外しがかなり困難と判断し,ネジ式を採用しています。
当然,挿す対象の相手はエアロ(樹脂)ですので,
強度面においていささか,不安要素は残ります。
今回は,頭(ヘッド)=レールの先端箇所で,
従来使用していたネジより太いものを
挿して補強しました。
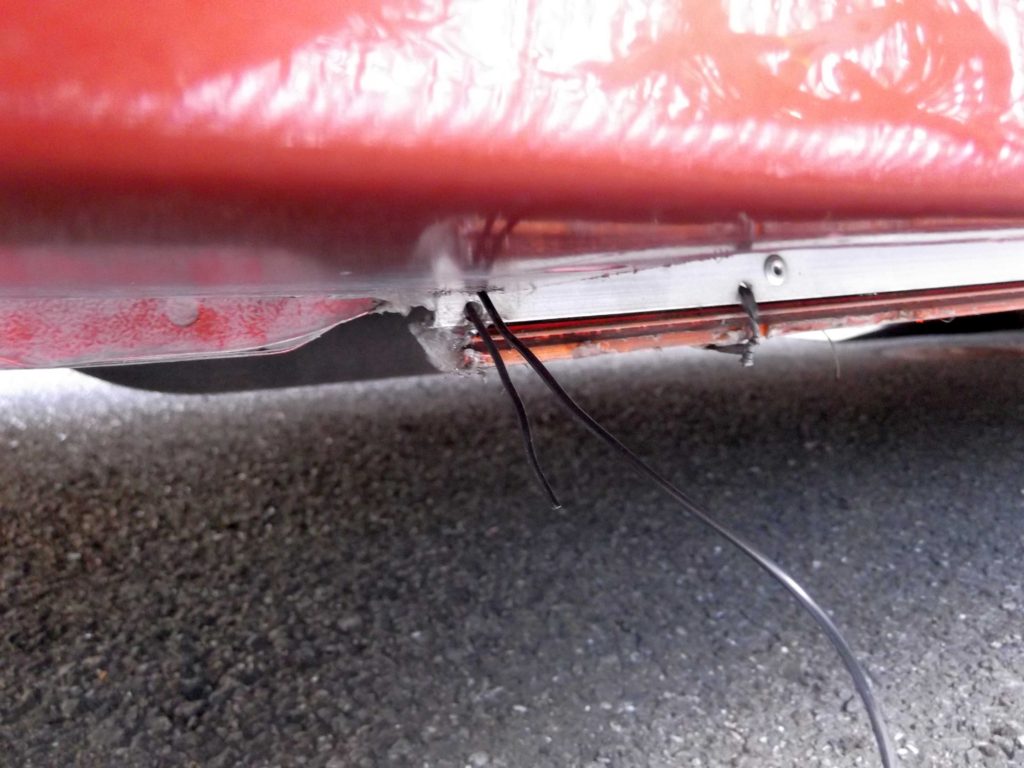
車のリア部に相当するお尻(最後尾)は針金を通しエアロ樹脂とレールを固定しています。
導通面では"電気トラブル”かなと思う面が一瞬ありましたが,
さして大きい課題ではありませんでした。
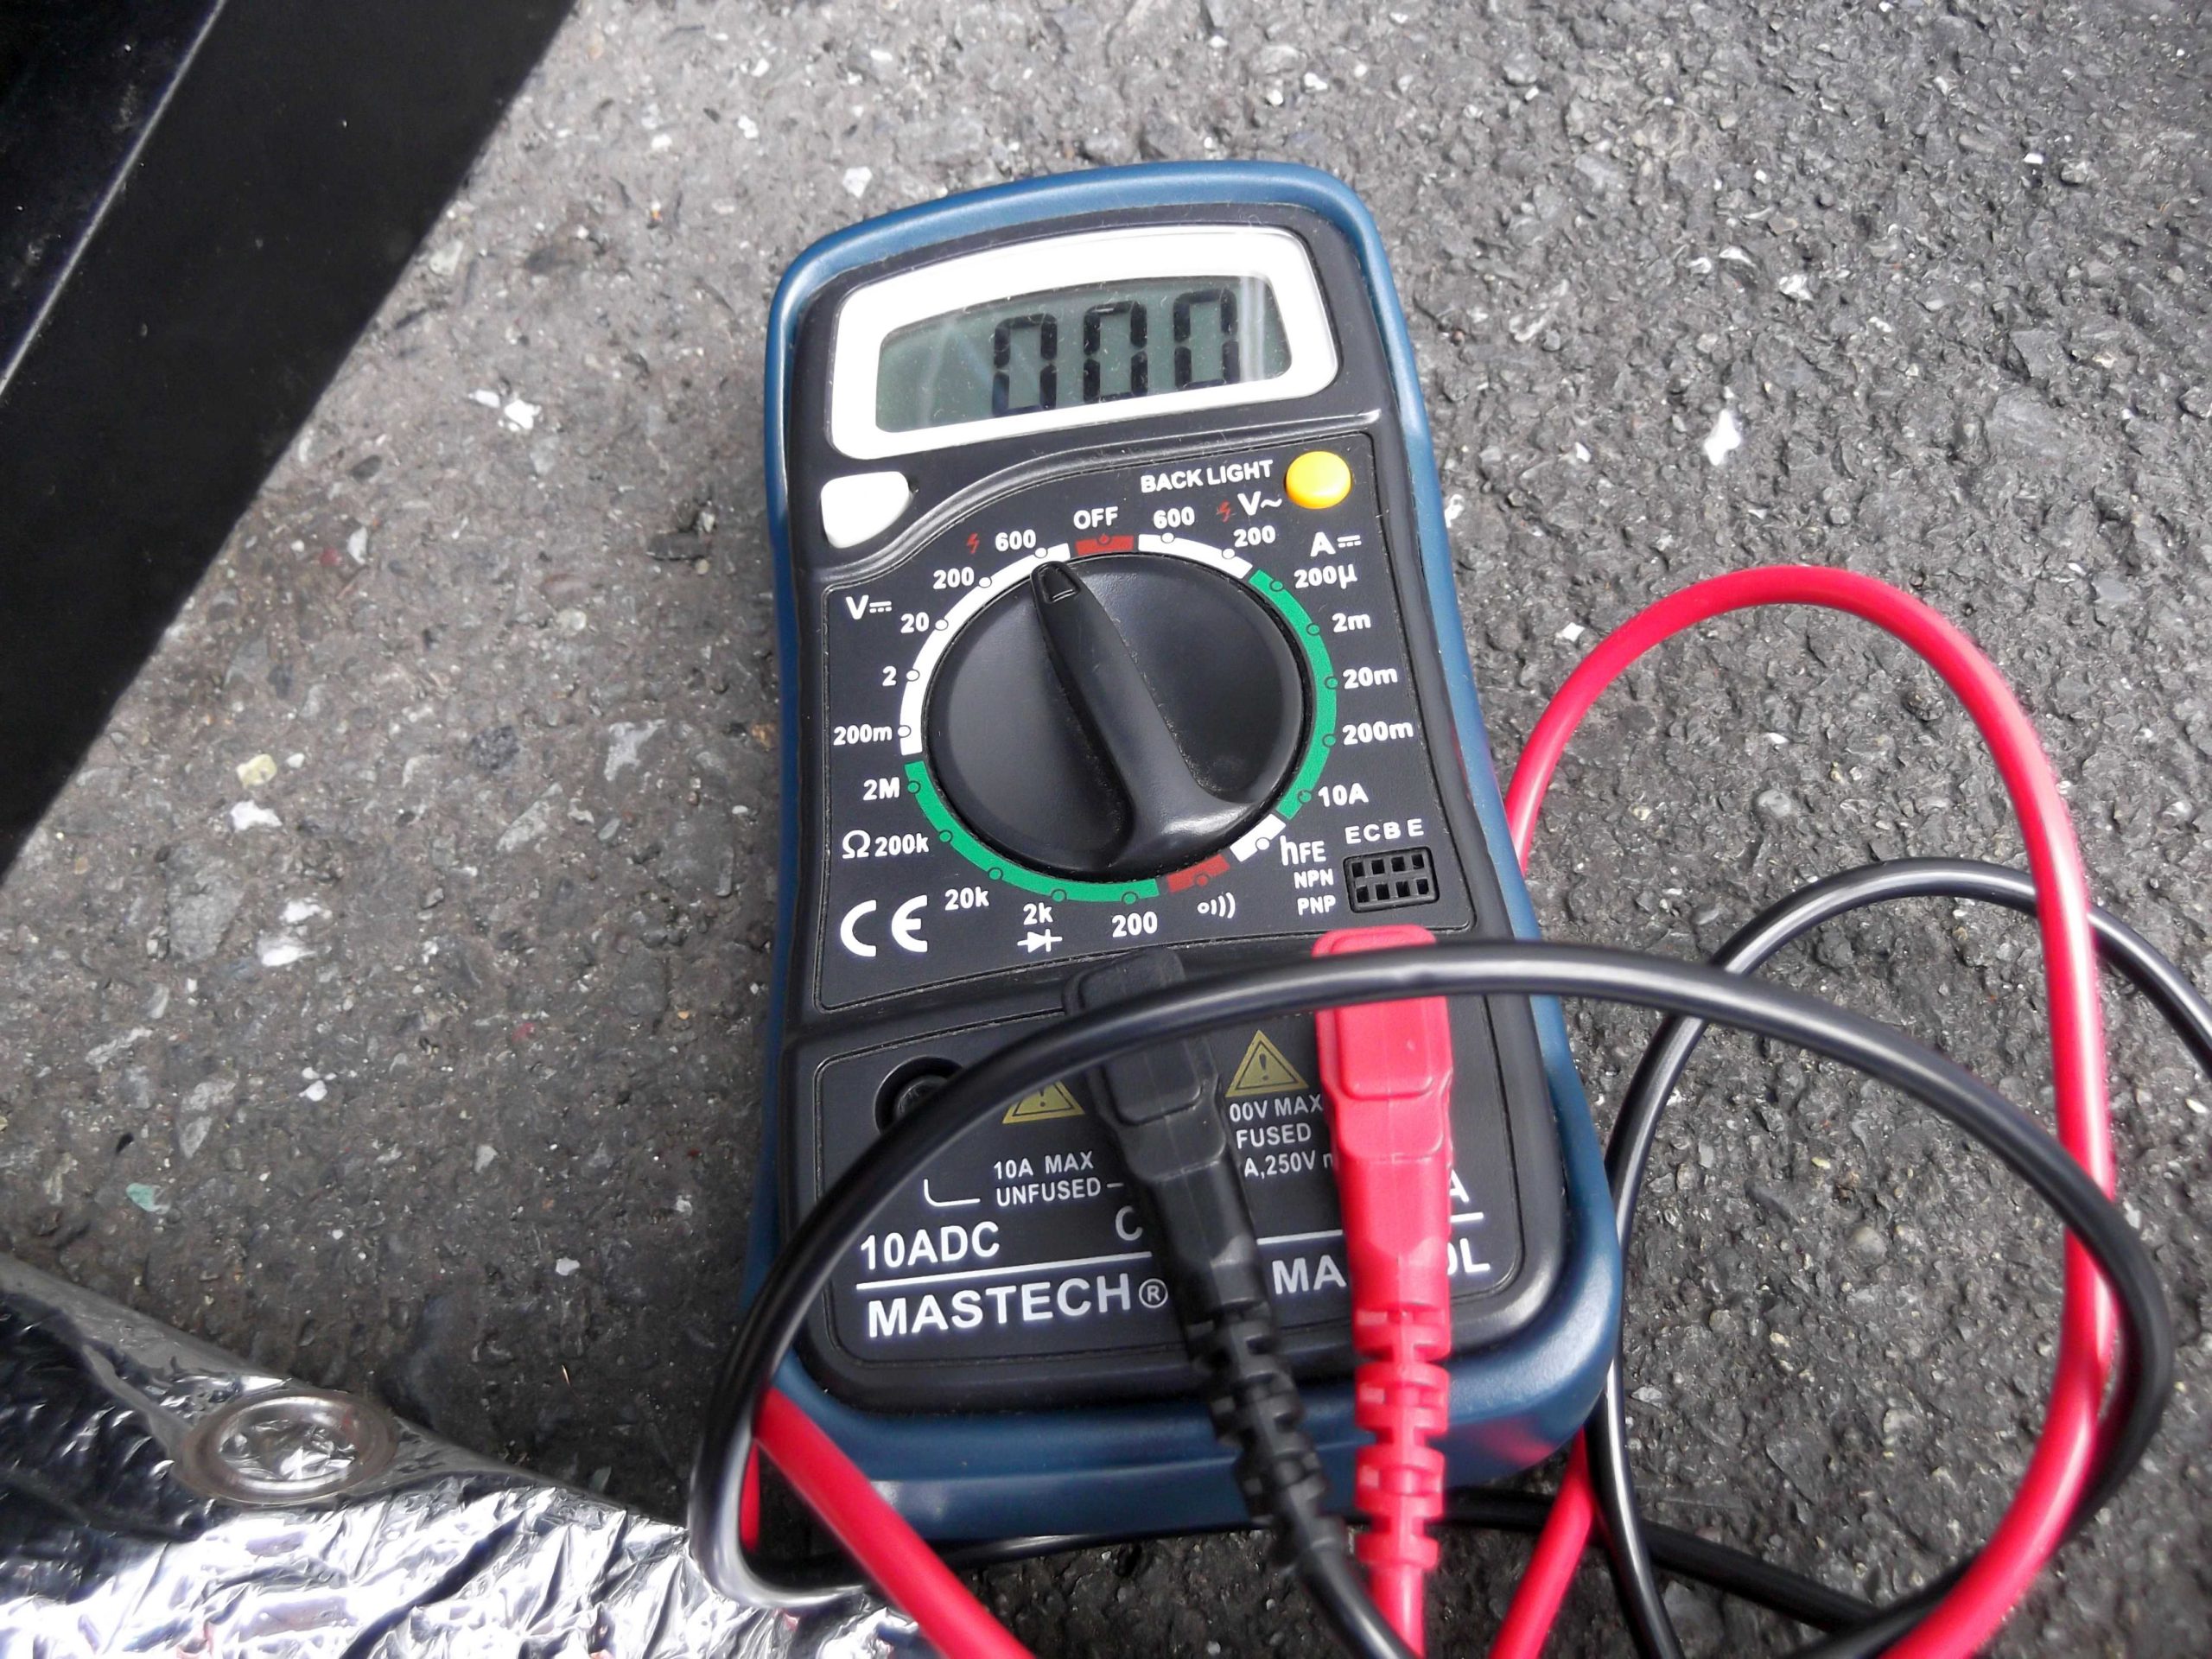
↑ State of simple digital tester offset mode.

改めて装着し直しています。
Under neon of right and left ↑ is ..power supply.. grateful by each of one system.
I think that right "+" was short-circuited to the body because it worked of "Removal" because I hurry up before the car inspection.
The fuse tube of 3A cut.
It tries to mount again.

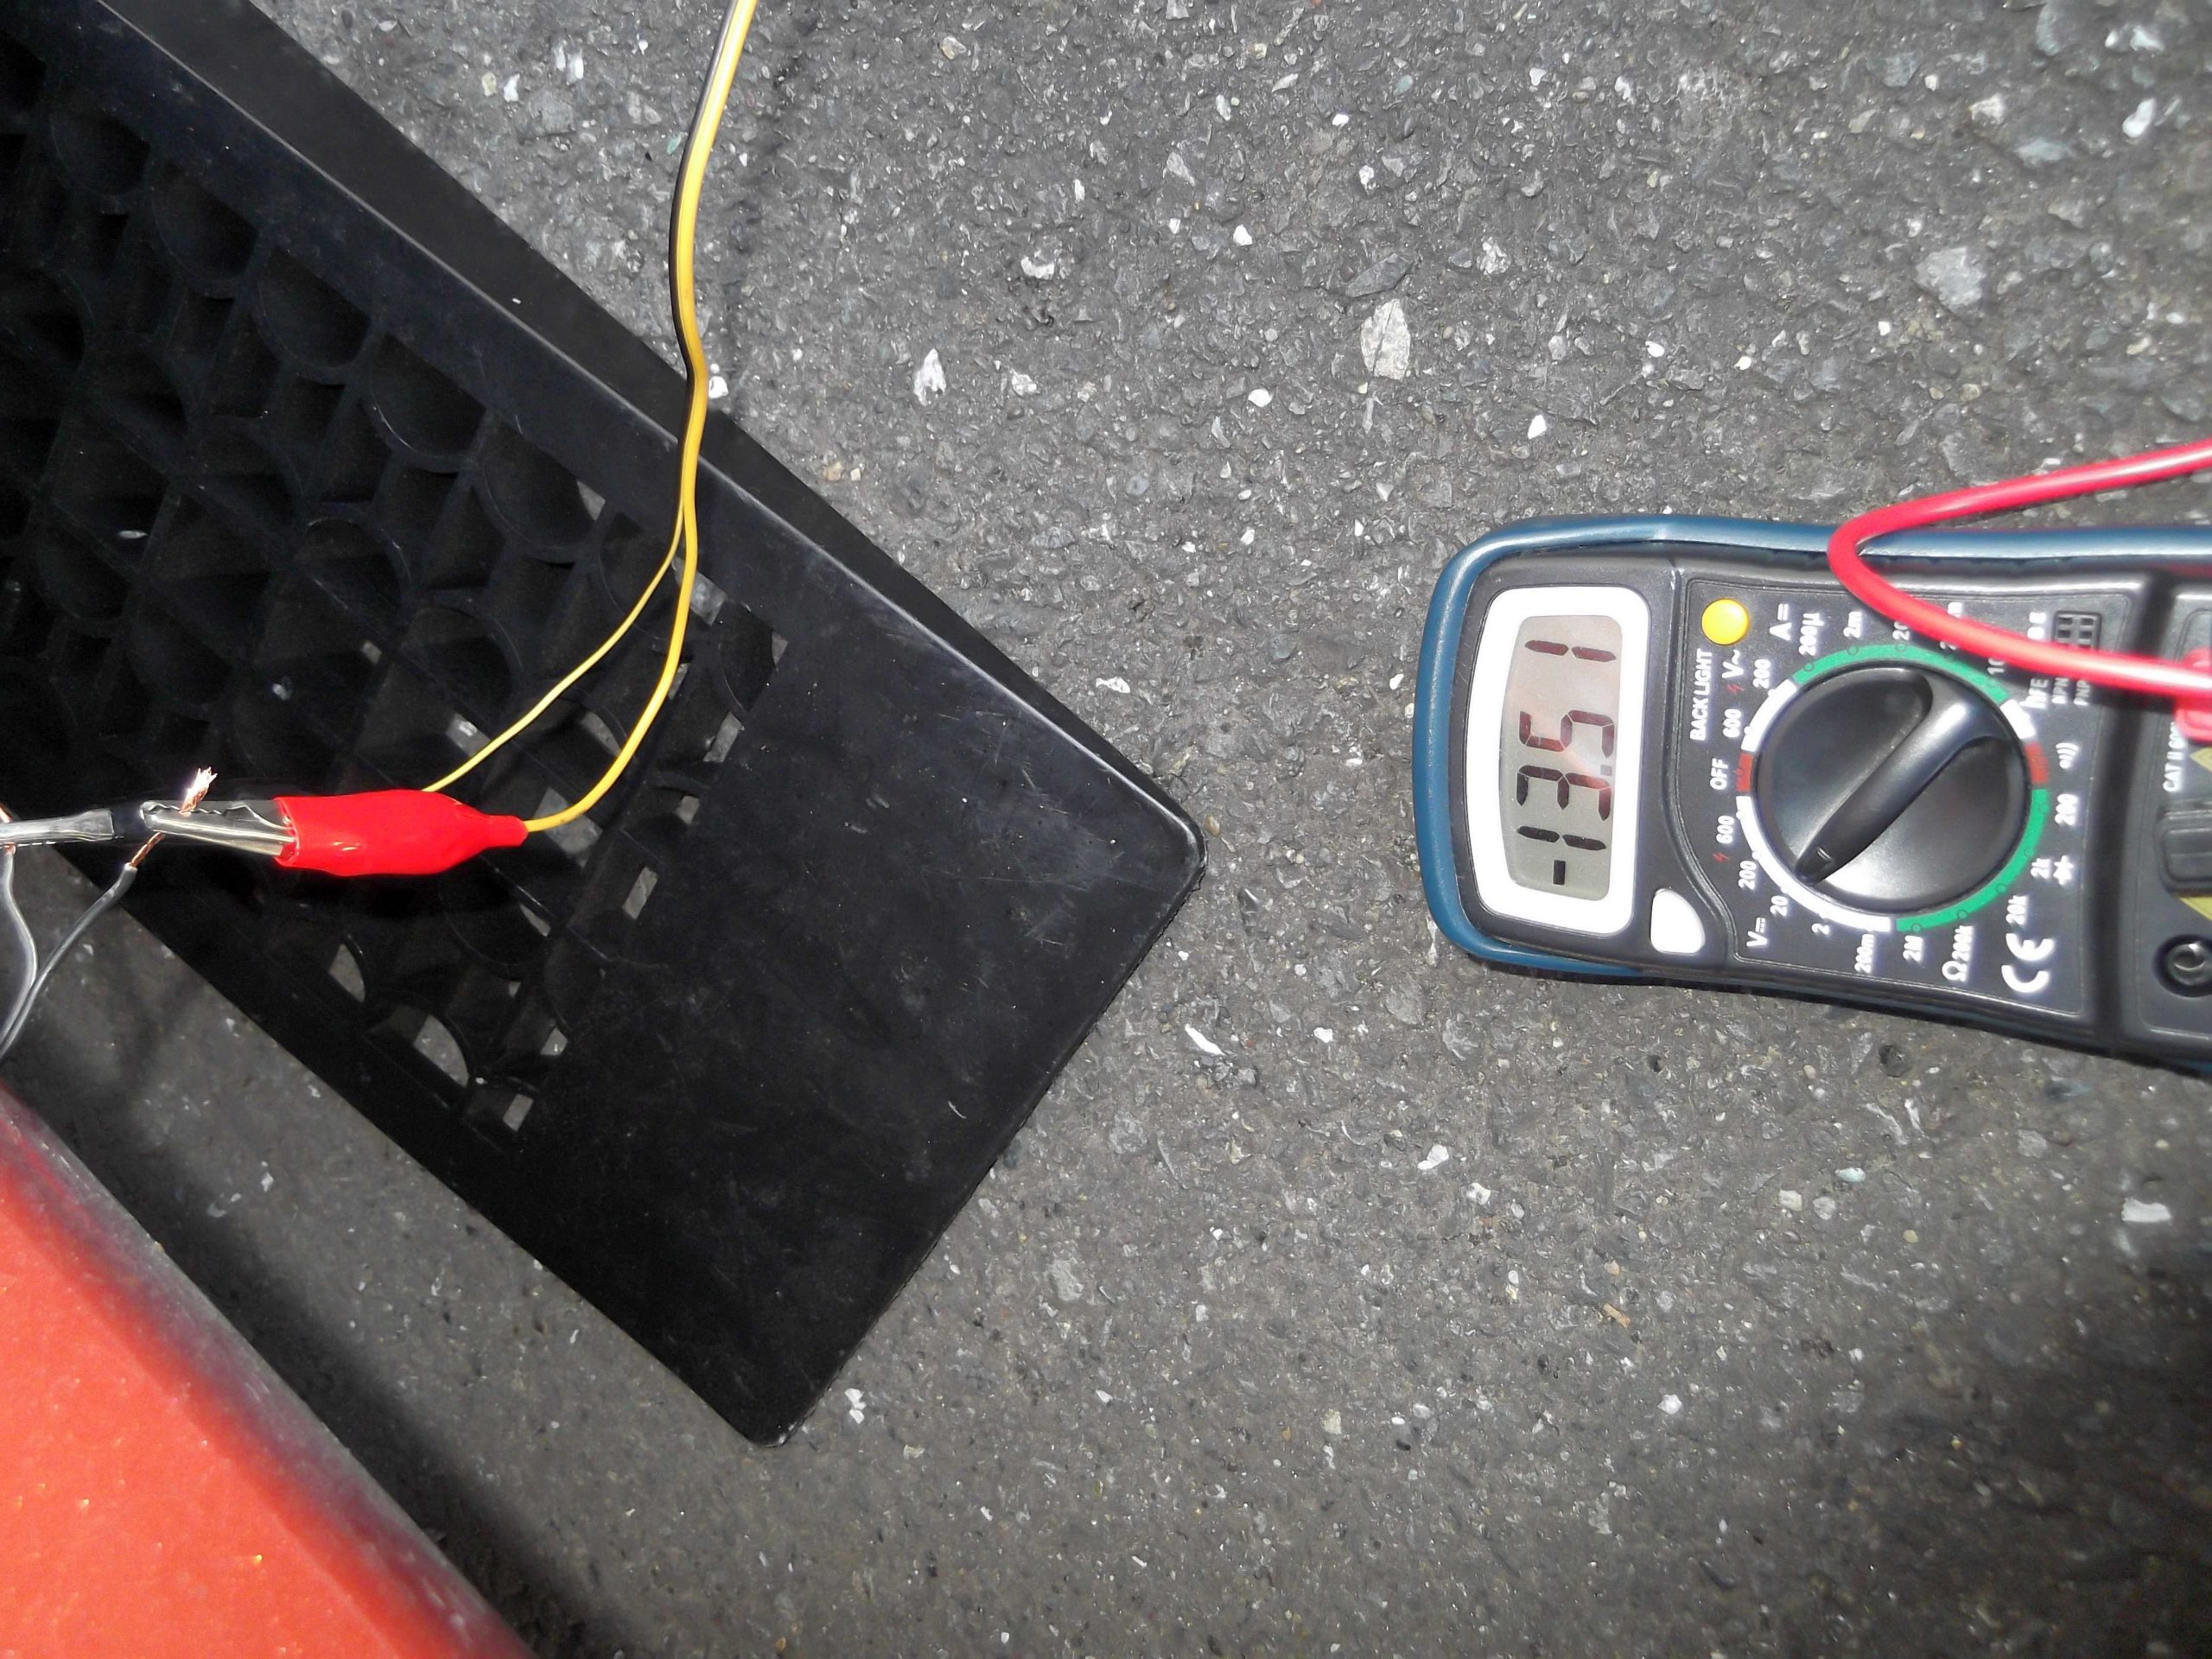
↑ The engine is started, and the cable check.
A ..one.. minus display is done about the favor of the digital tester.
‥ It explains and it exists.
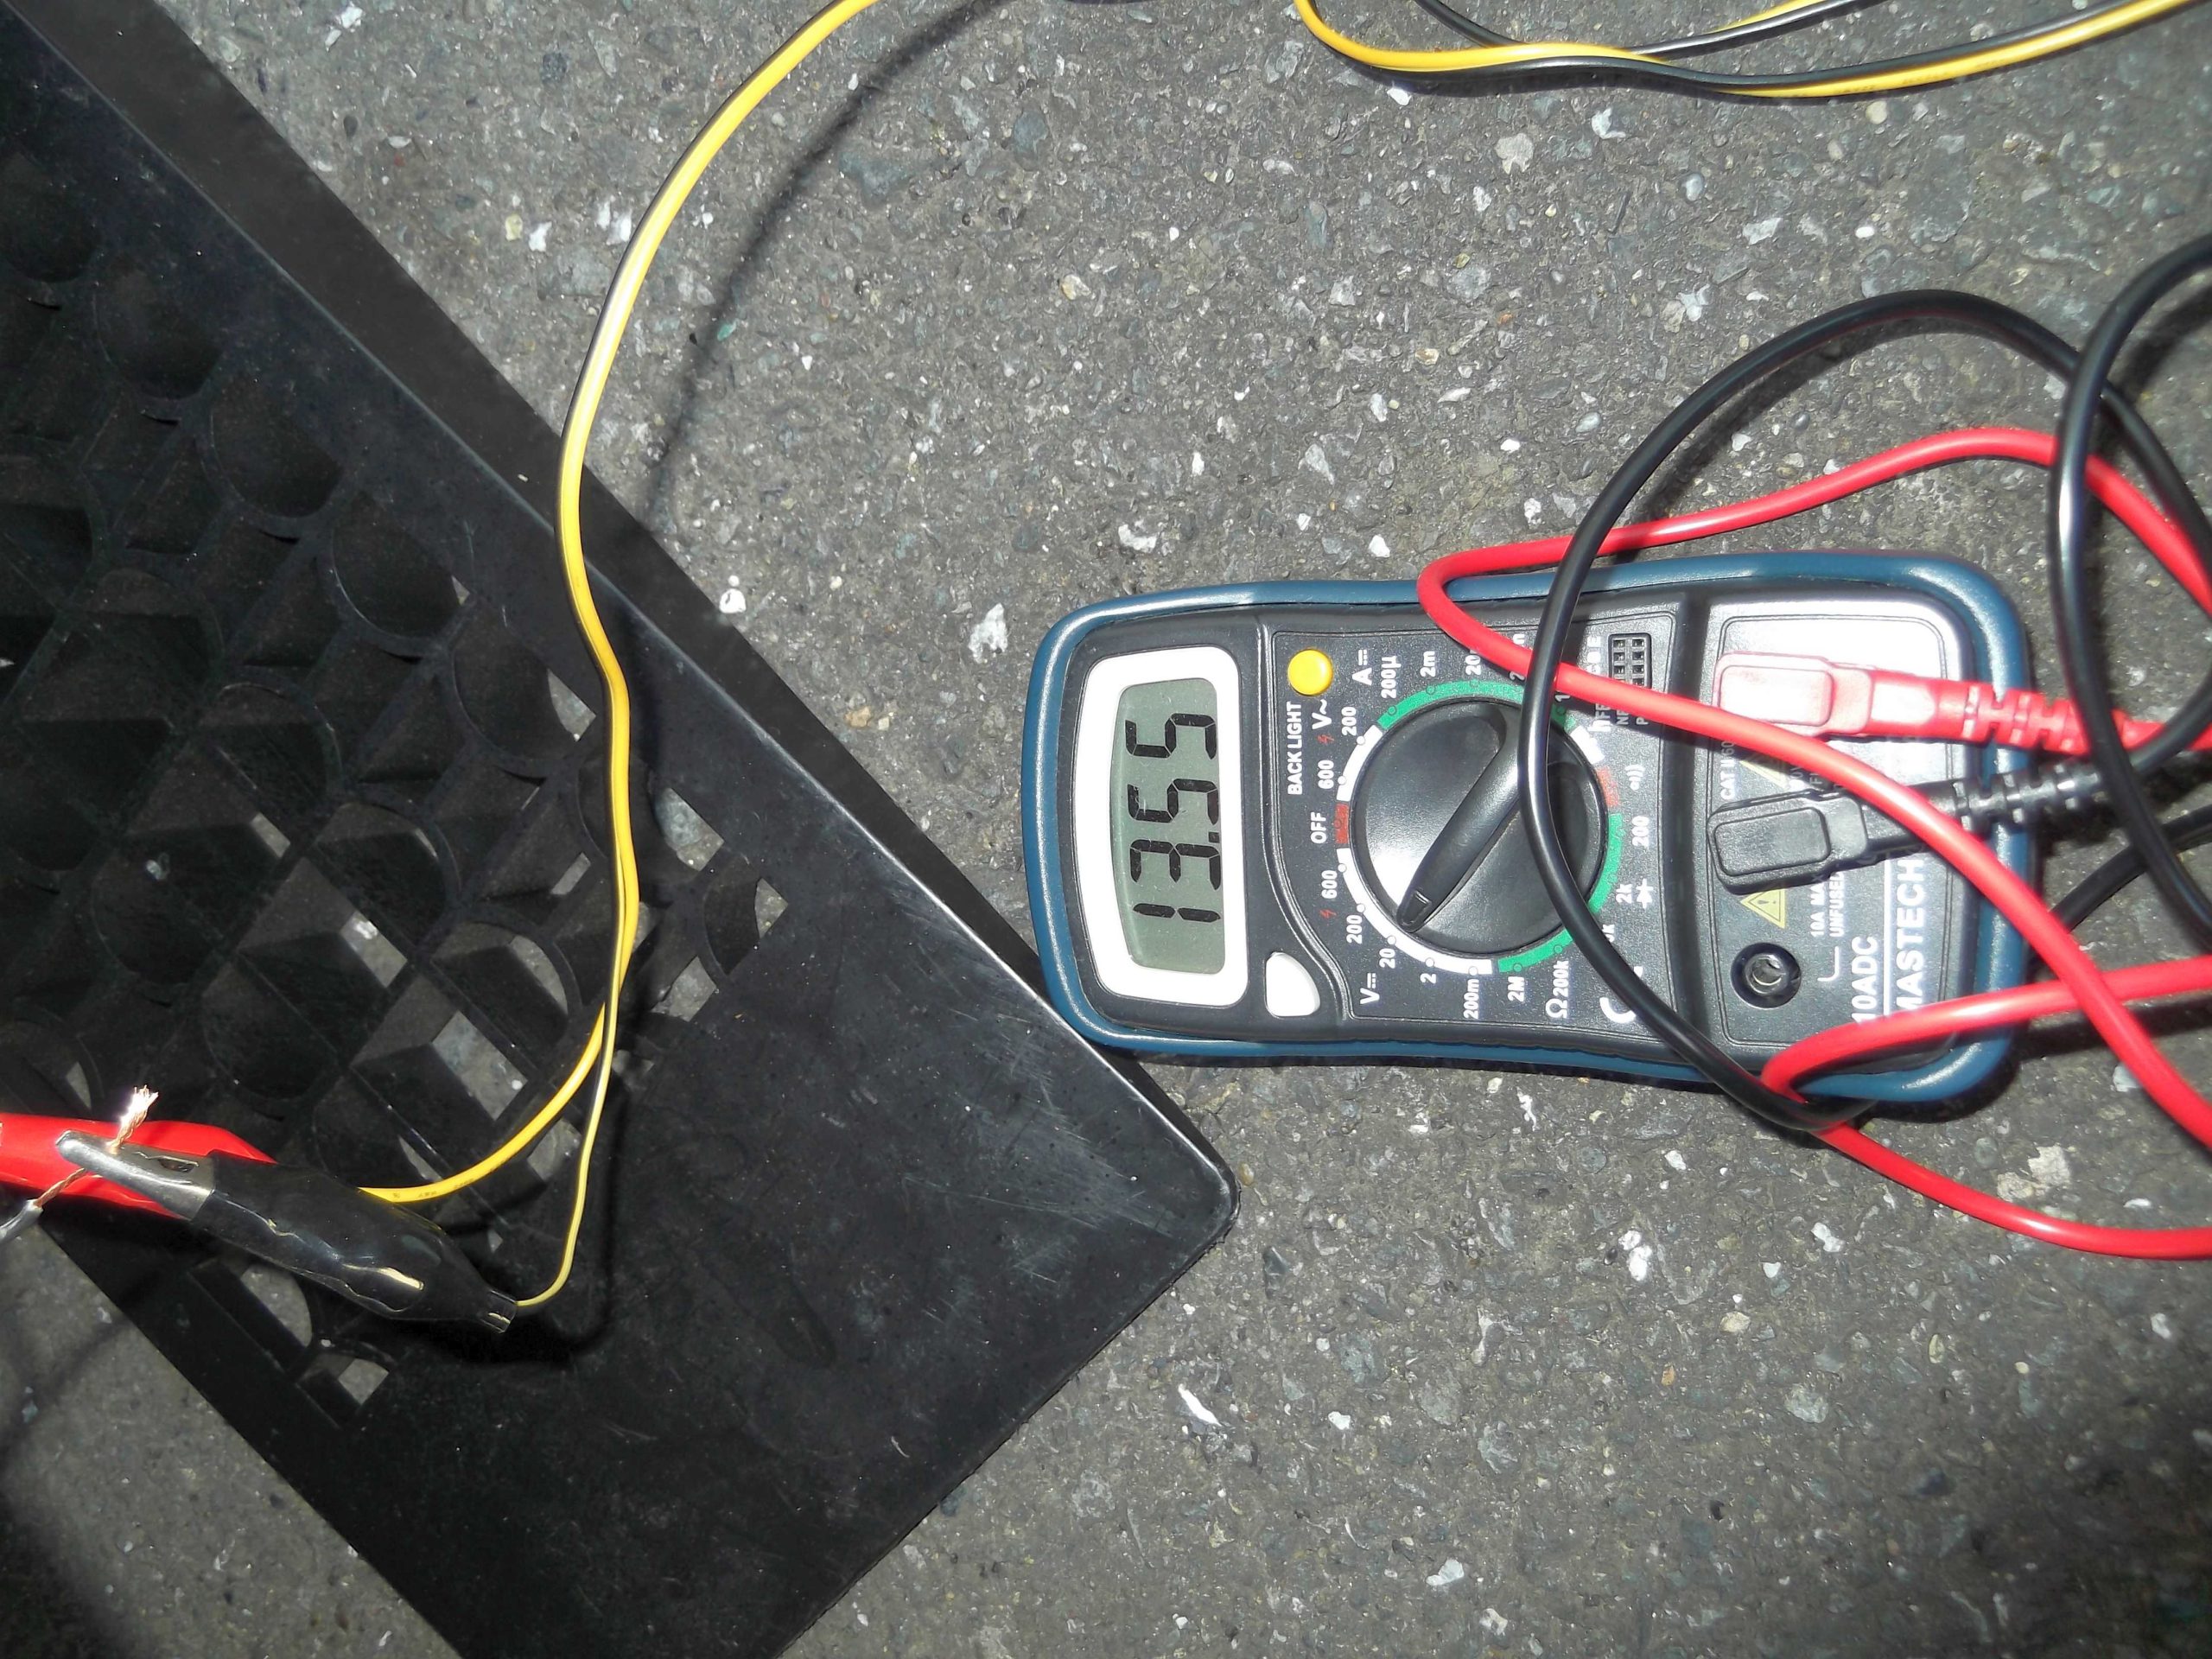
しっかり電気(電圧)が流れていることが分ります。↓
It put and it substituted it as ↑ ..red (hot)+.. black -(cold) was opposite.
It is firmly understood that electricity (voltage) flows. ↓

↑ The value of this voltage is important though a simple digital tester is used.
If it is a car equipped with the weakening battery, this value should be unstable, and the wandering immediately discontinue working before and behind 12v when it is though it doesn't reach say.
There is a possibility that some damage = "insulations" has occurred to the cable because it is a translation to pass cable through the part that cannot be watched.
0.5 The problem might be torn off internally of cable even in case of not being and hang on the film in case of the sq= AWG20 line class.
It pushes and if the voltage is insufficient, retrying in "It is new" line bravely is wiser because it becomes pull work.
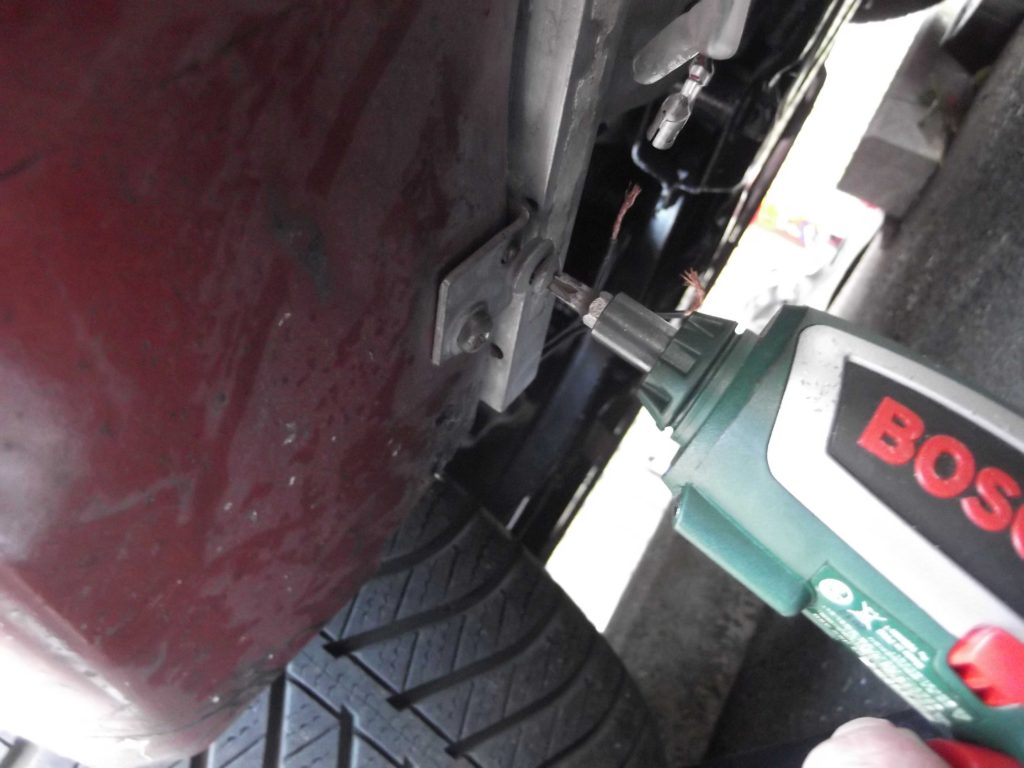
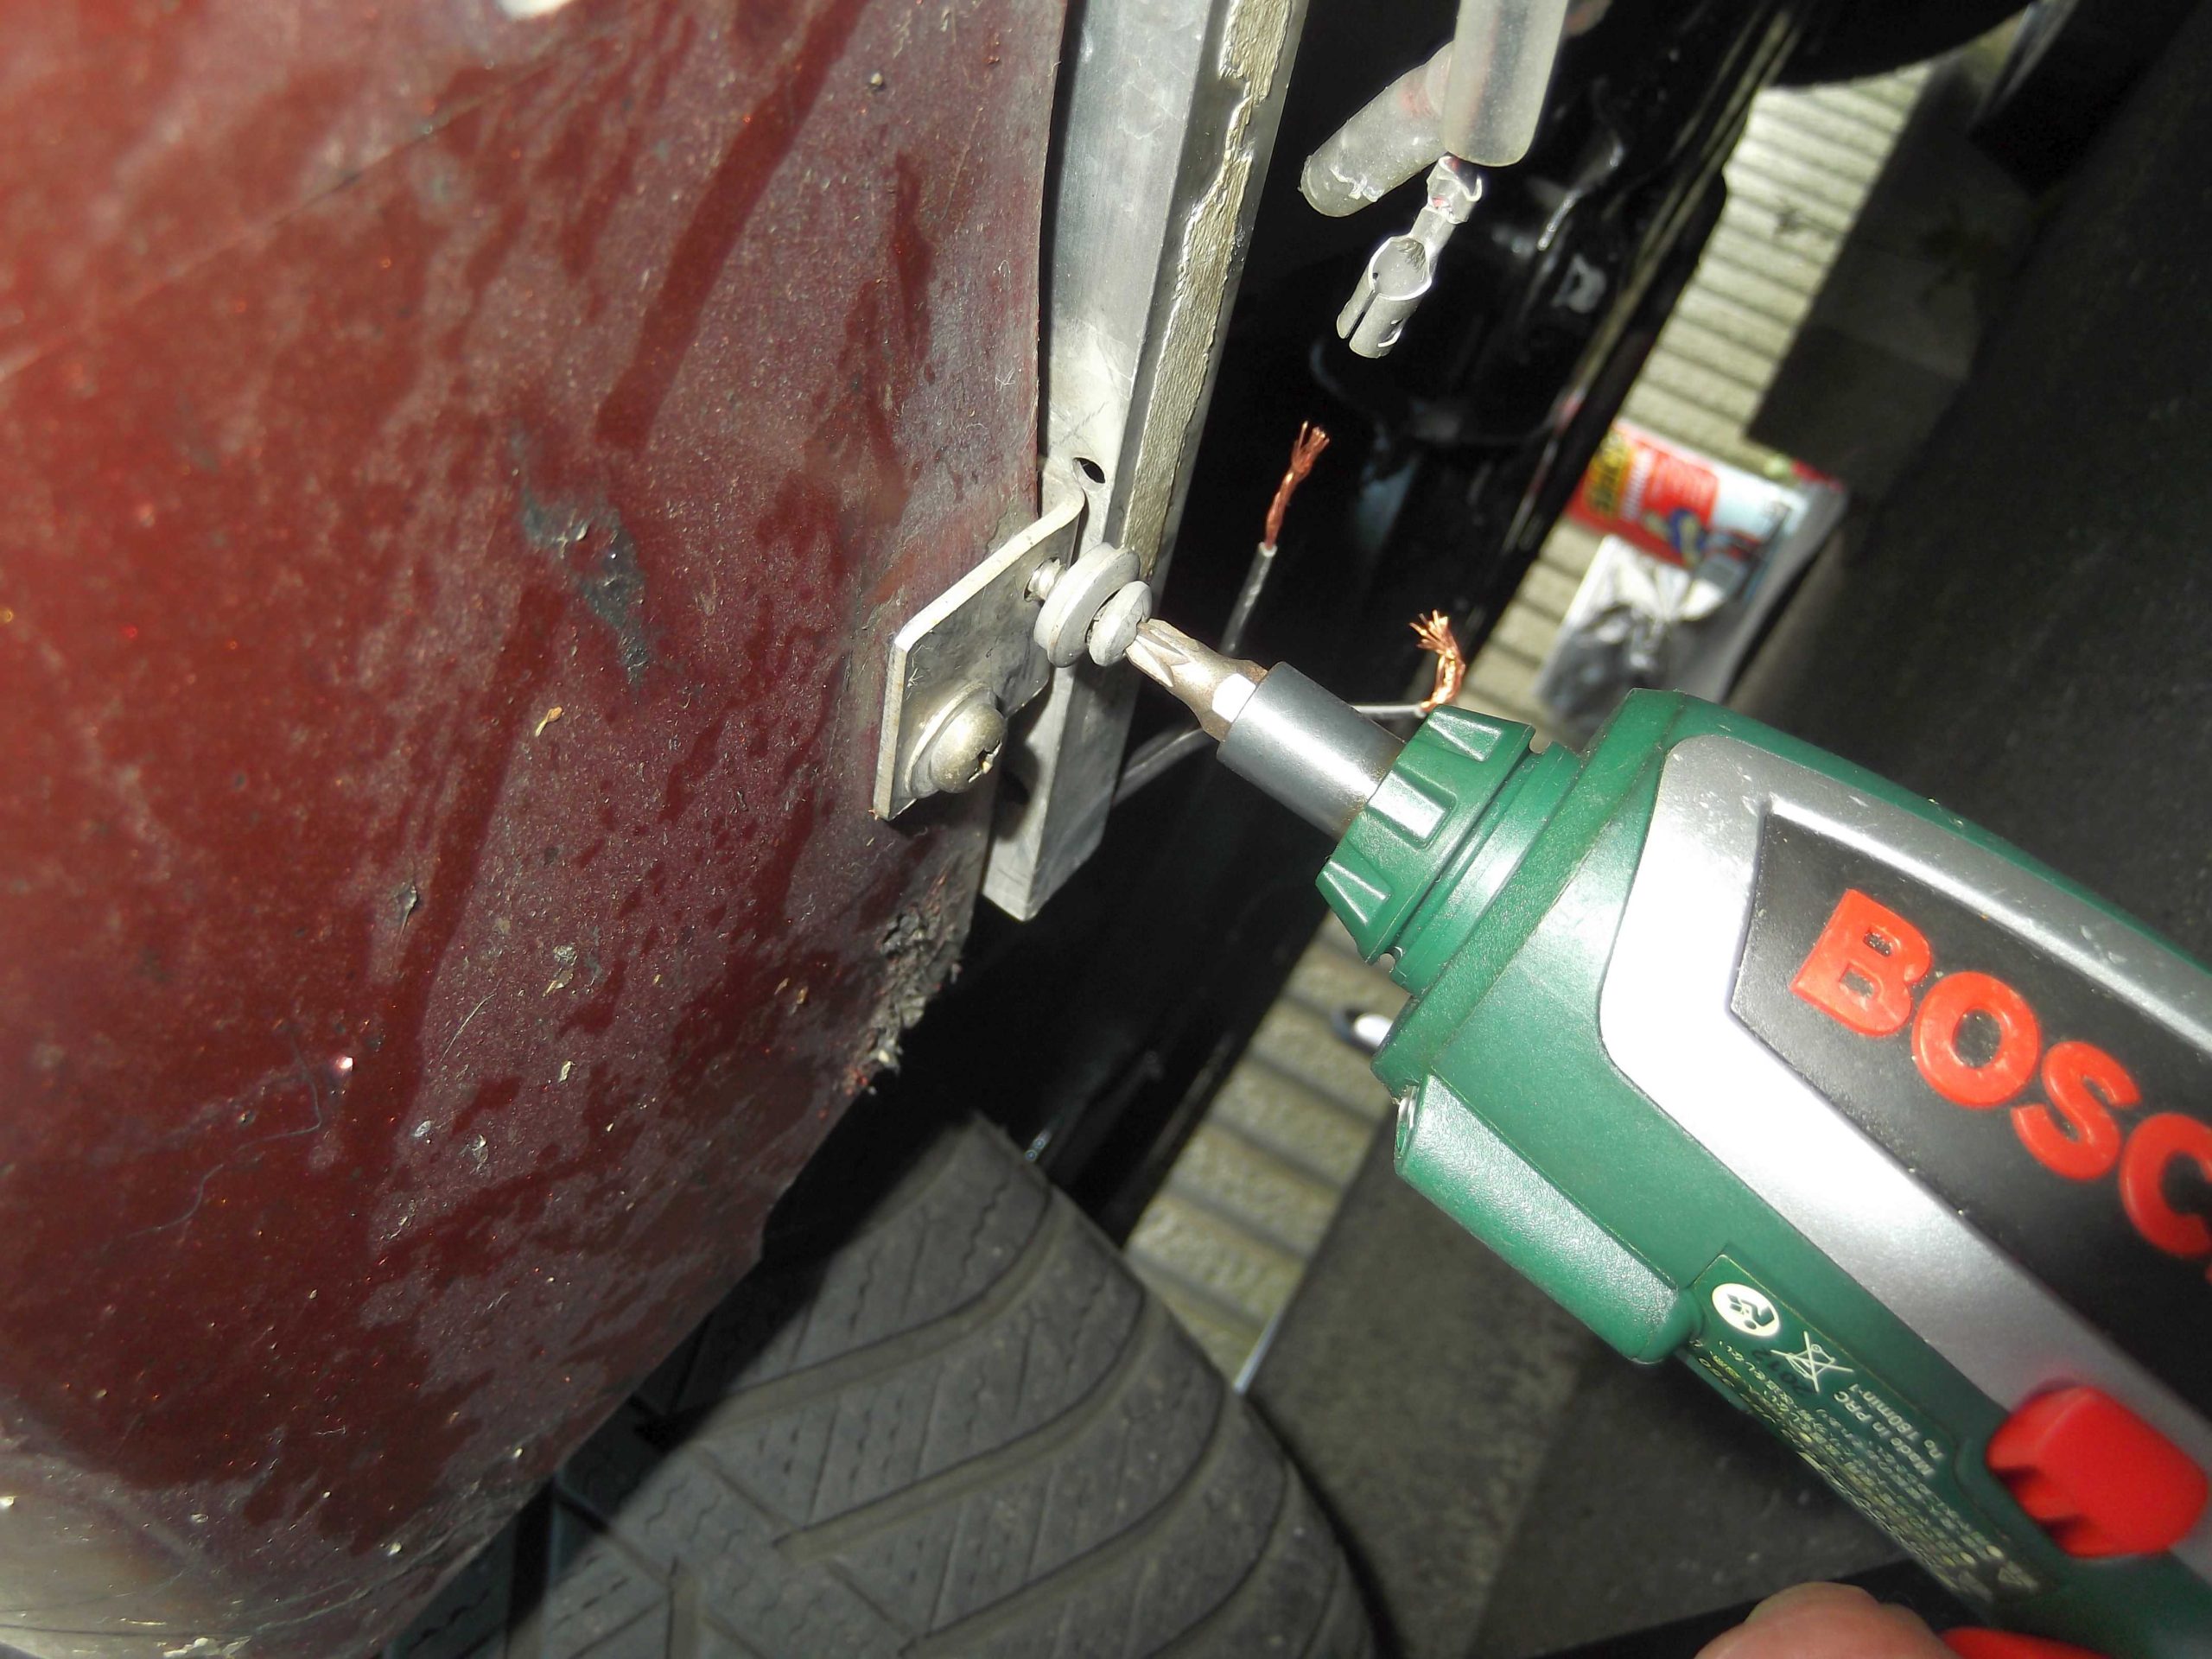
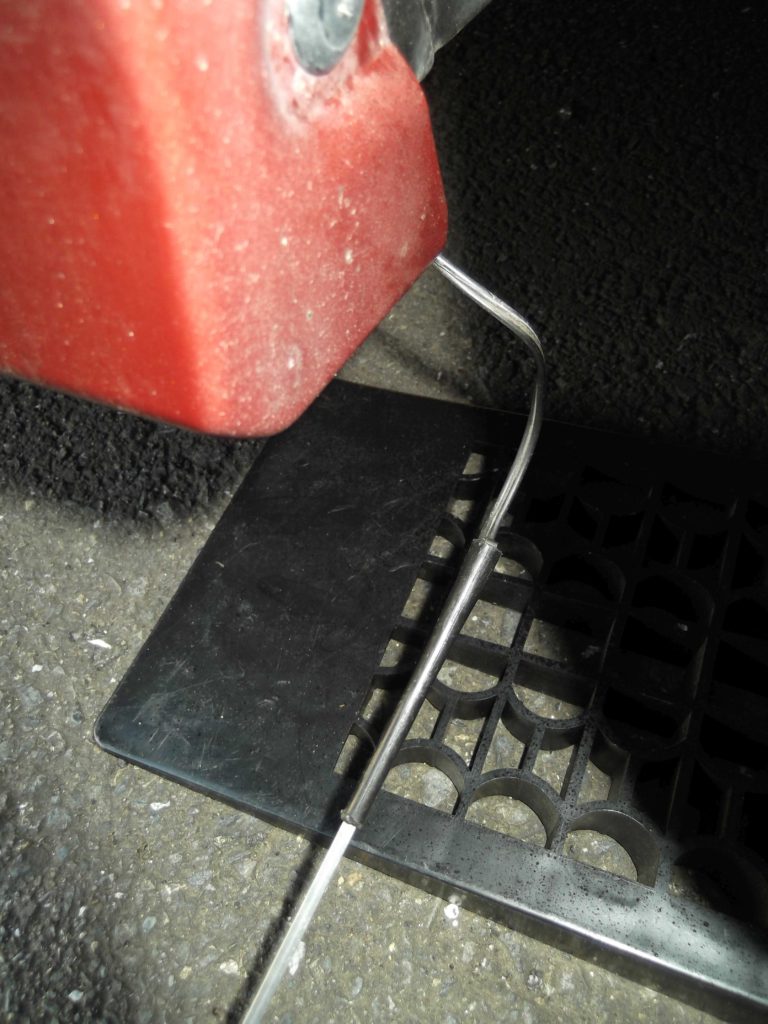
↓自動車の車体内部からエンジンルームへの有線の貫通,及び,エンジンルームからドアの内部を通して地面などへの配線などは,
人間の"手"だけの能力では絶対出来ません。
希望通りの配線を行うには,関連する全ての部品を分解・解体する必要性が生じます。外国でのアイテムにも存在すると思われますが,日本では"配線ガイド"と呼称される道具があります。私はこれらを"神の手"と呼んでいます。
It can never wire ground in the ability only of man's "Hand" through the inside from penetration and the engine room from the inside of the body of the car to the engine room to the door of cable.
To do wiring the same as hope, the necessity for decomposing and dismantling all the relating parts is caused.
There is a tool named "Wiring guide" in Japan though it seems that it exists also in the item in the foreign country.
I am calling these "God's hand". ↓

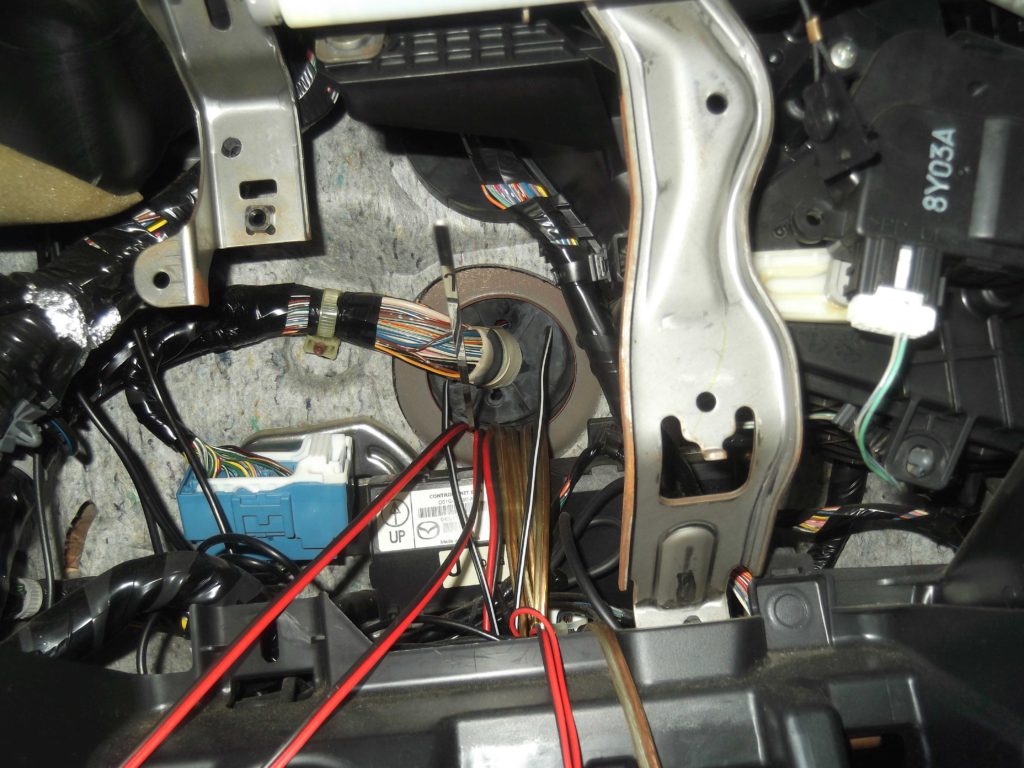

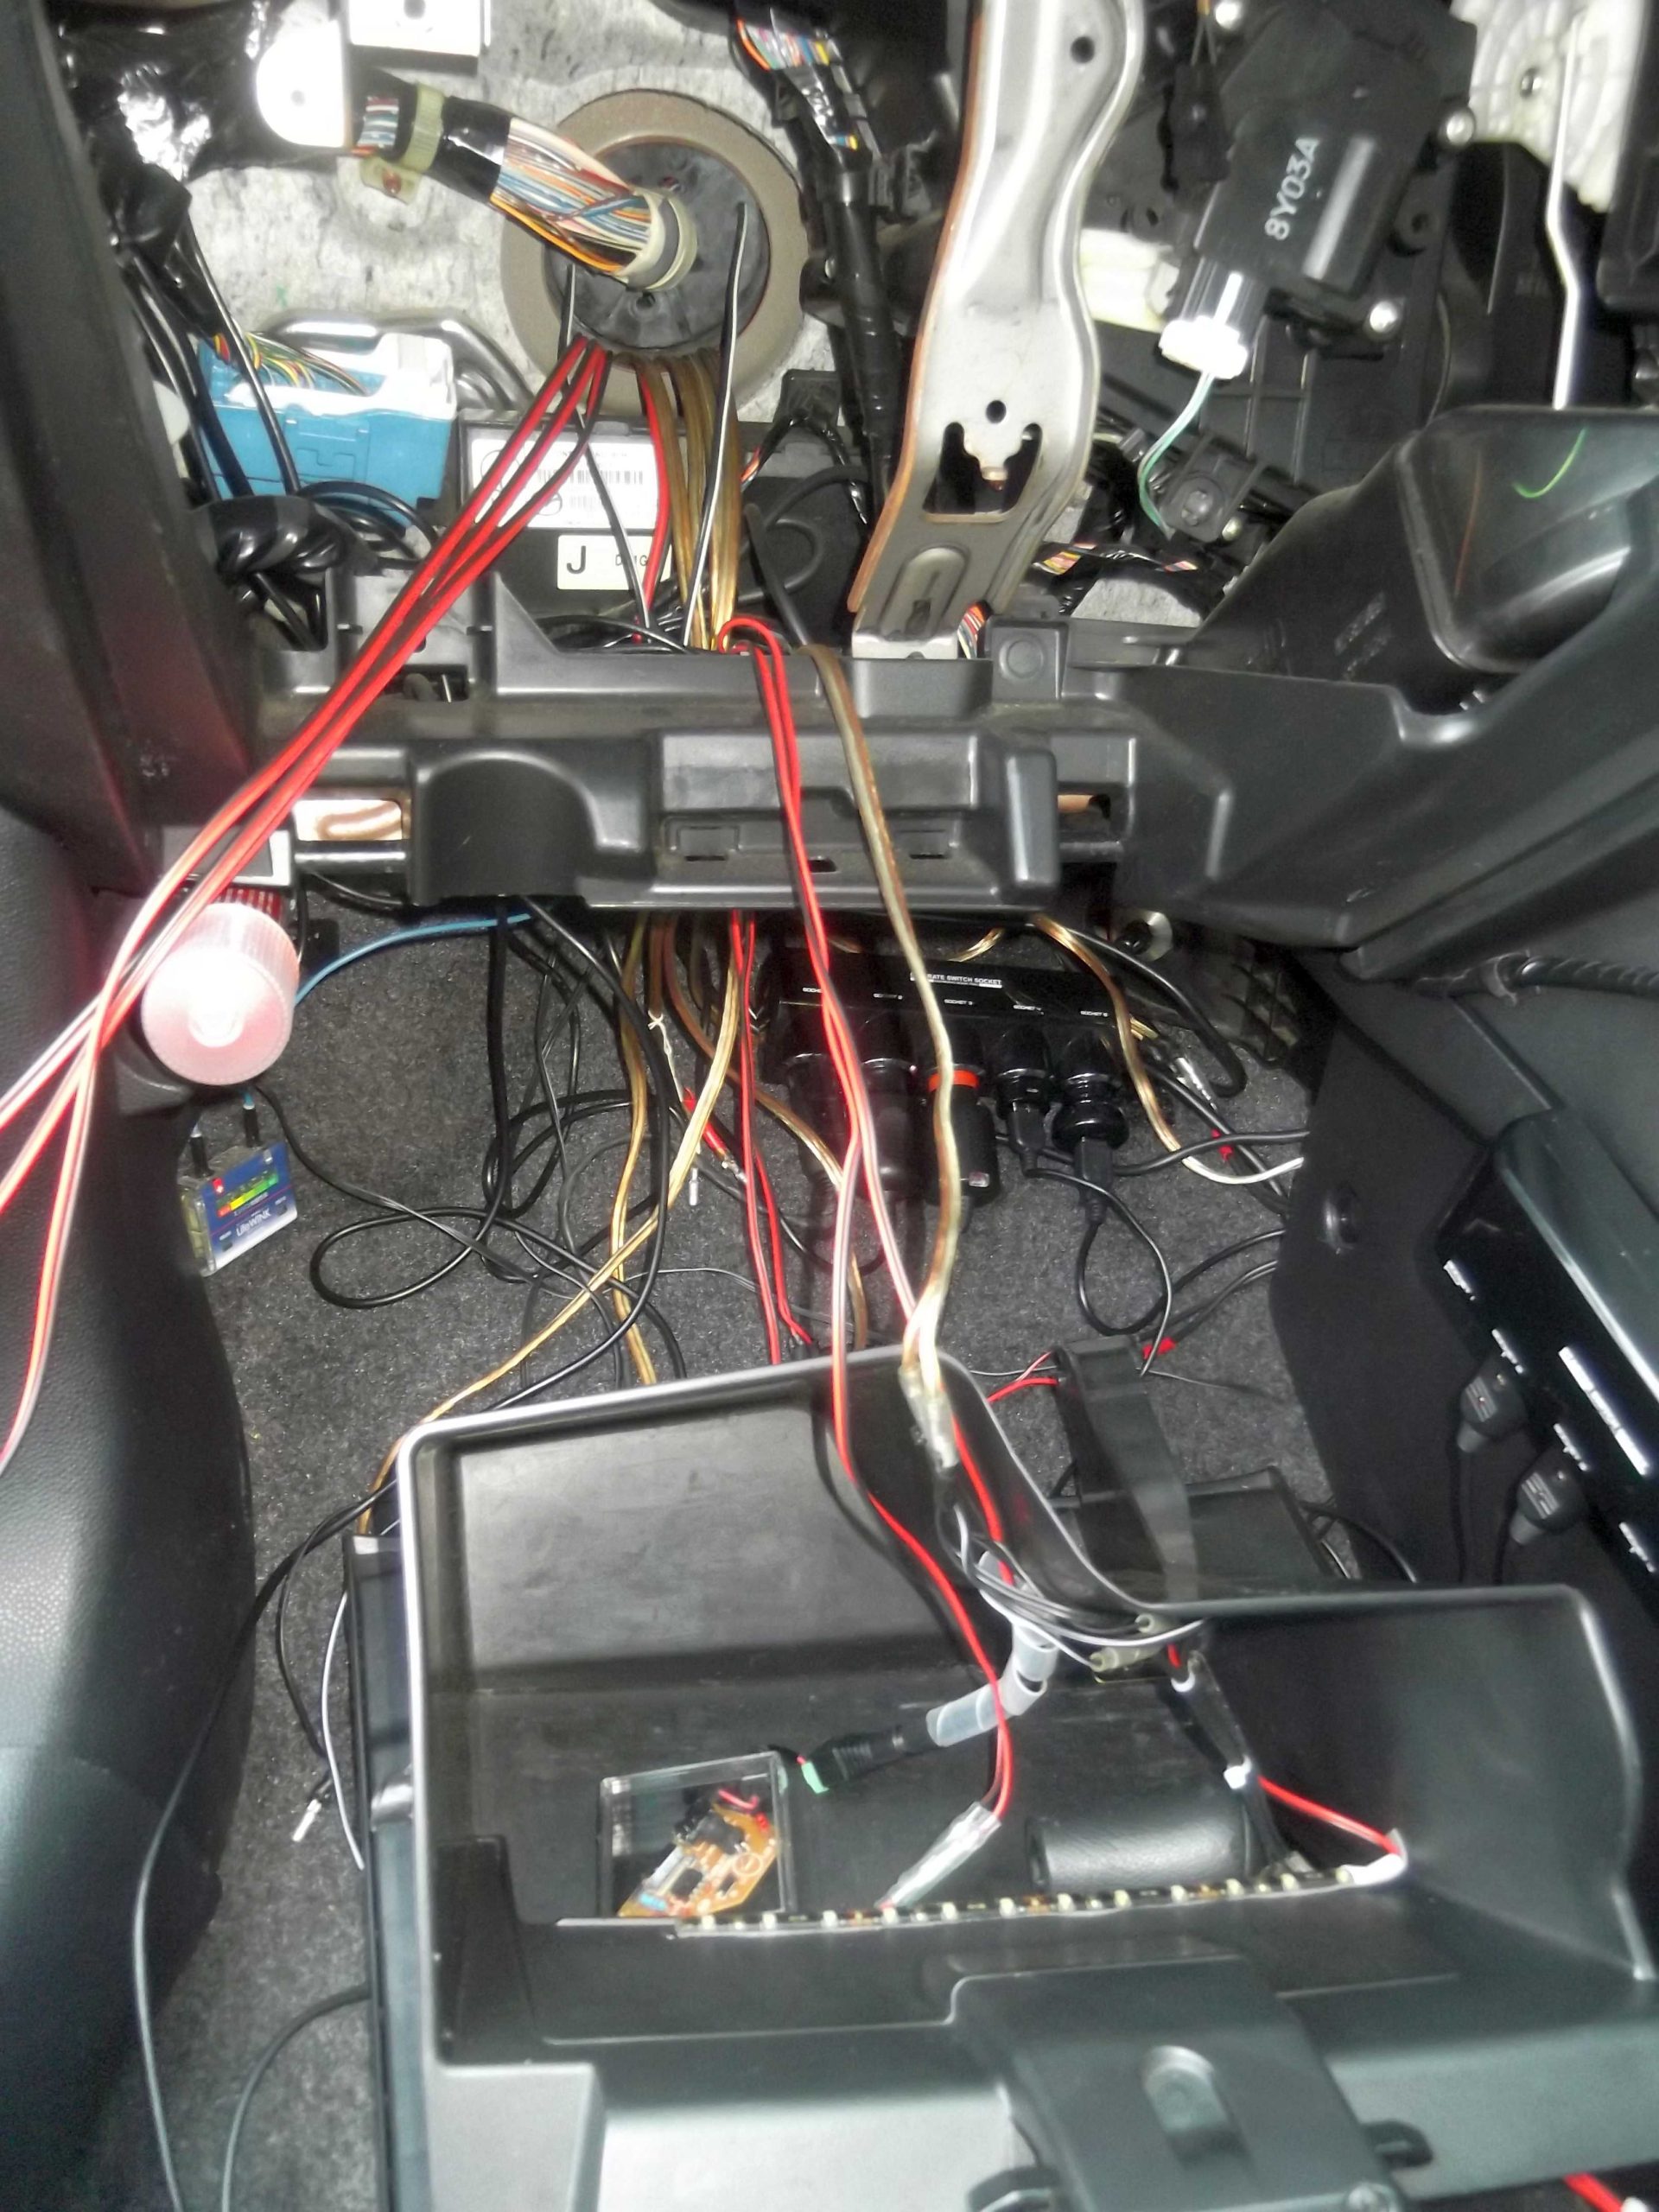
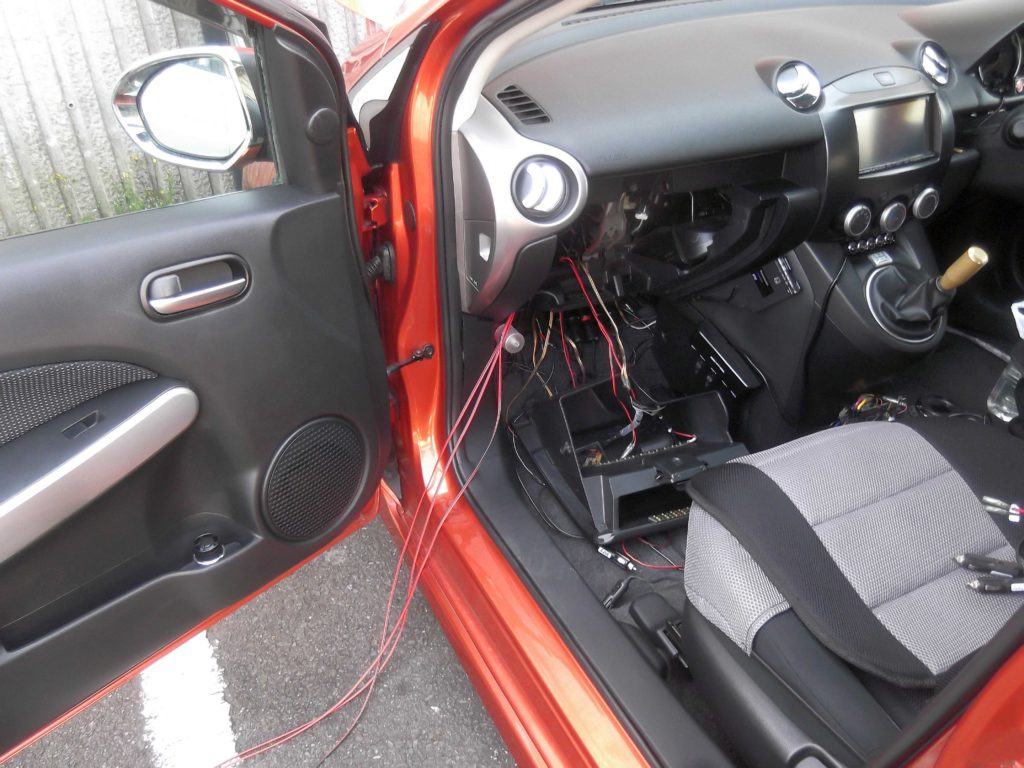
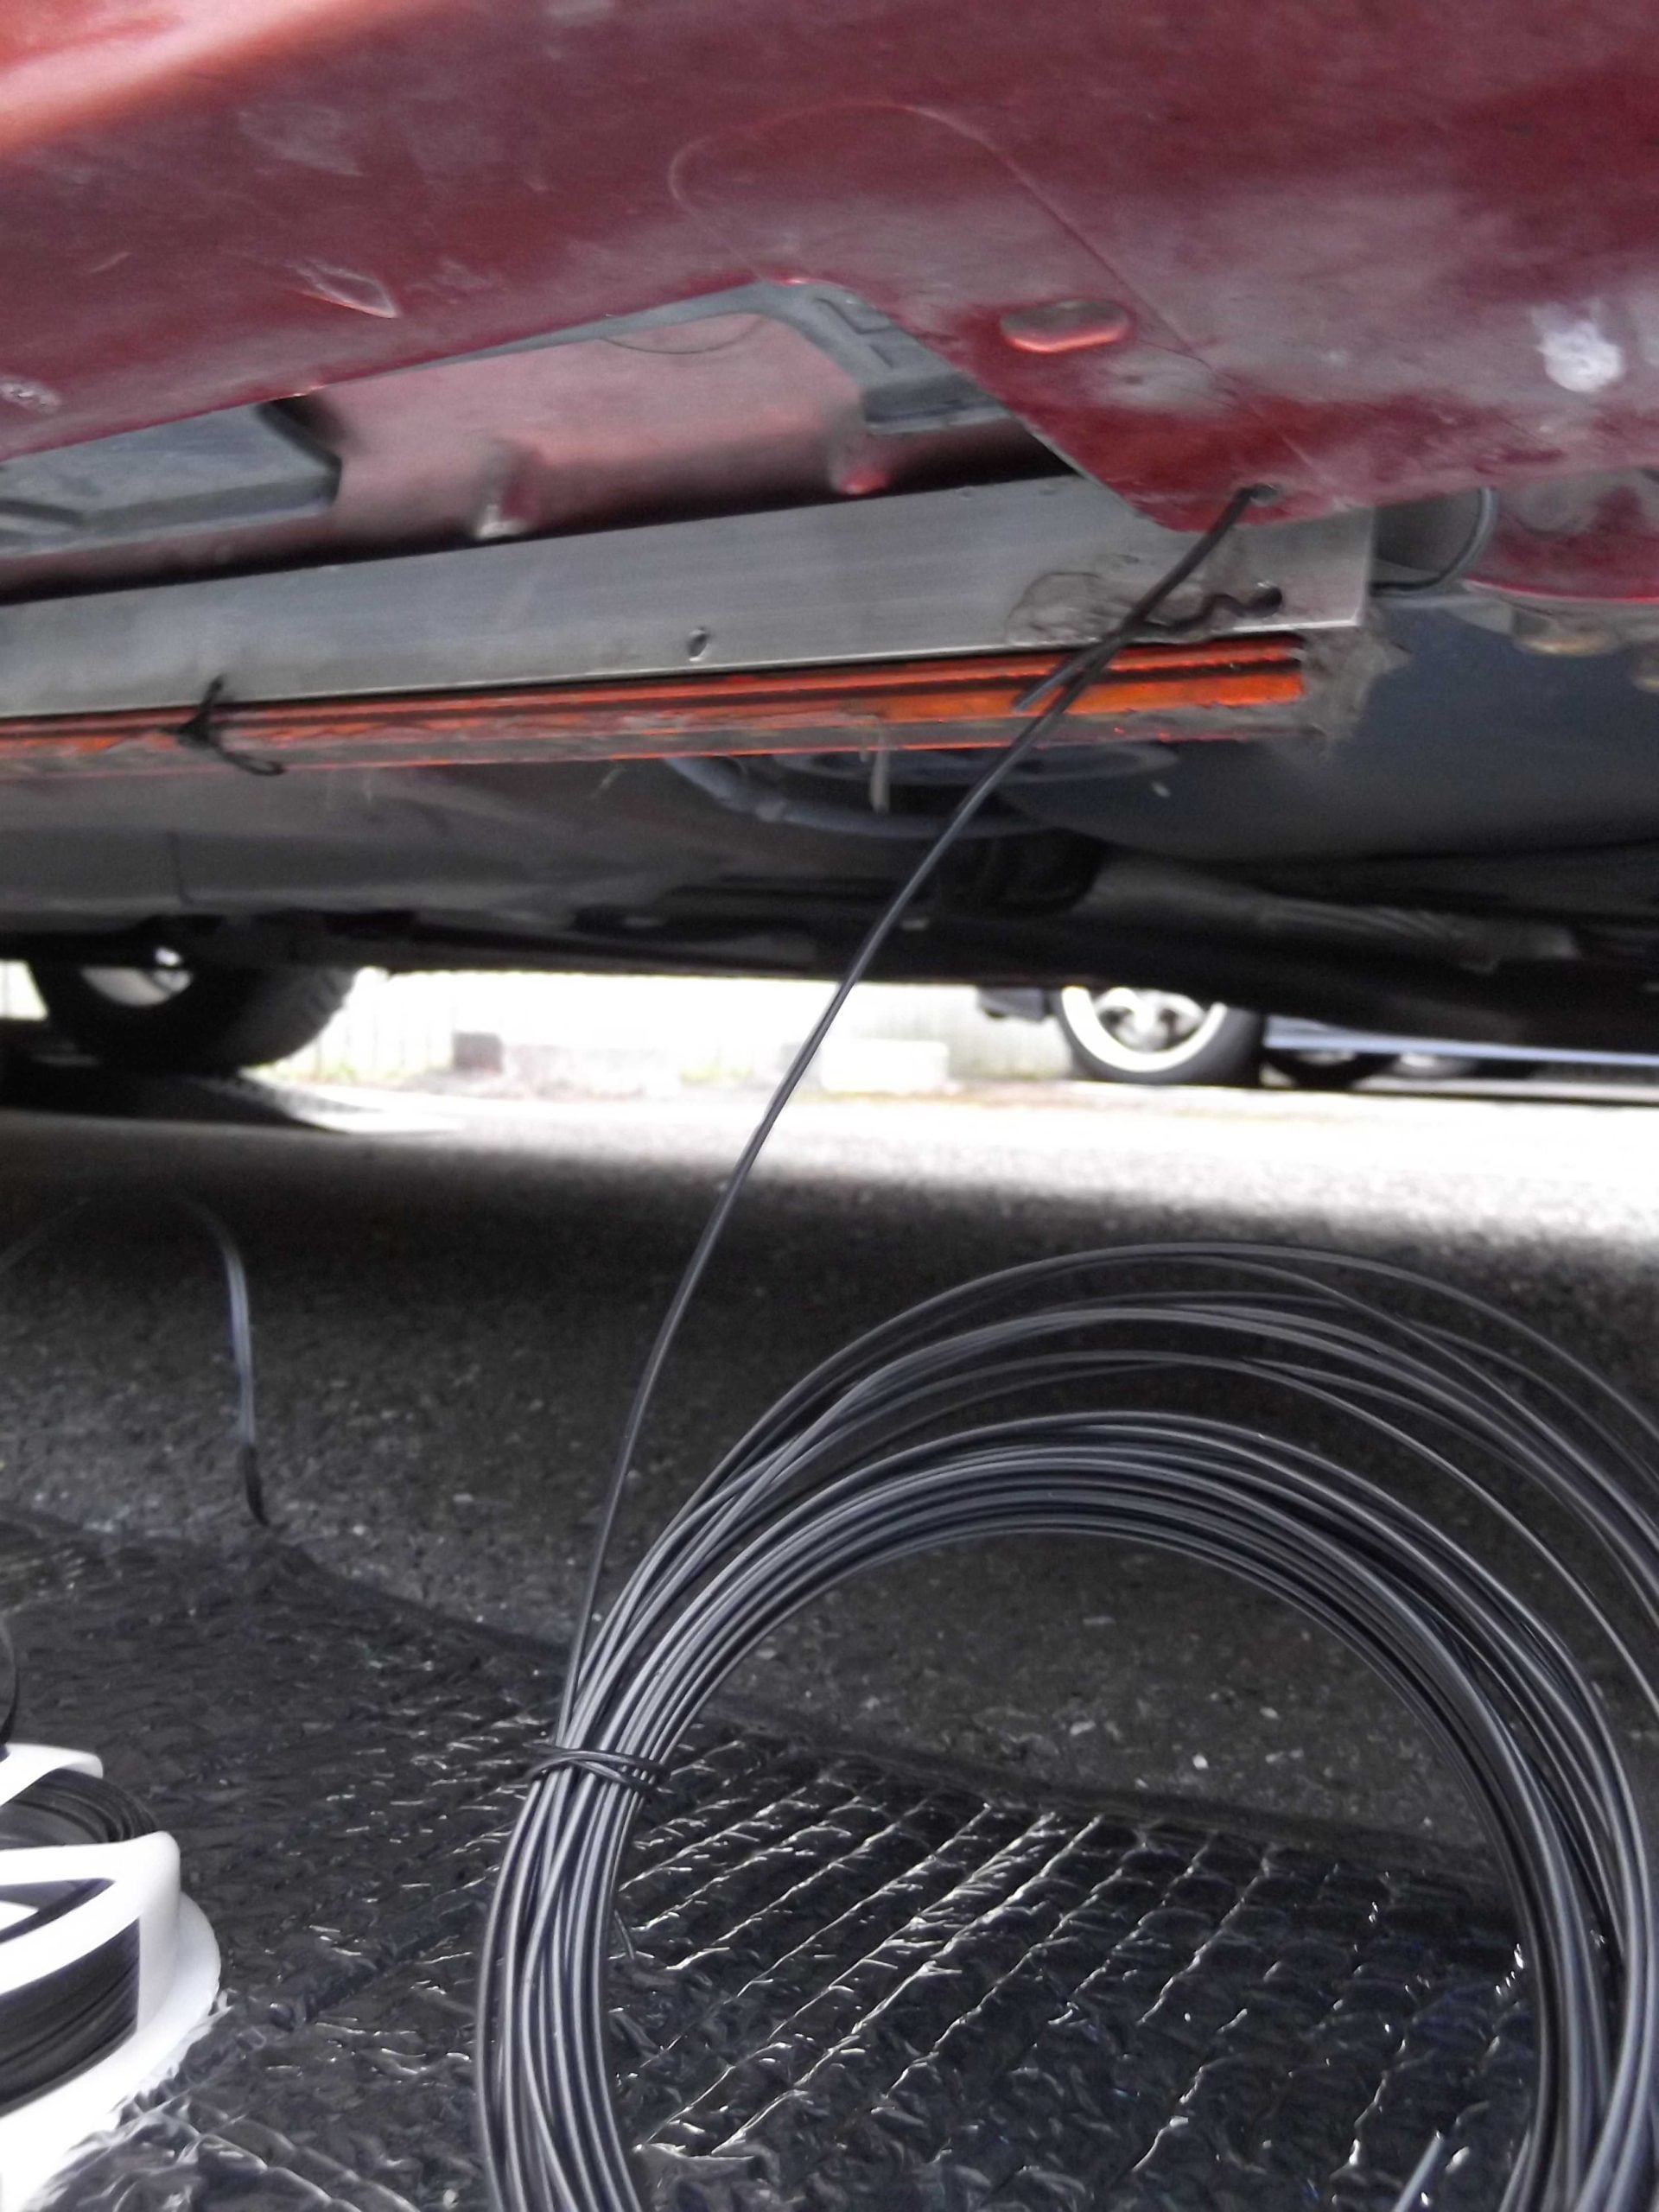
こうした作業では "配線ガイド" は必須の道具となる。
Cable harness (Britain: ↑ It's a wire harness "Wire Harness"="Cable Harness" ).
Image that throws cable from the part to the engine room.
The harness is the one that "ASSY set parts =" was done bundling two or more electric wires used for the power supply and the signal communication.
It's used with various machineries that need a lot of electric wirings of wiring in the car of the car etc.
Image while cable management is done.
"Wiring guide" becomes an indispensable tool in such work.
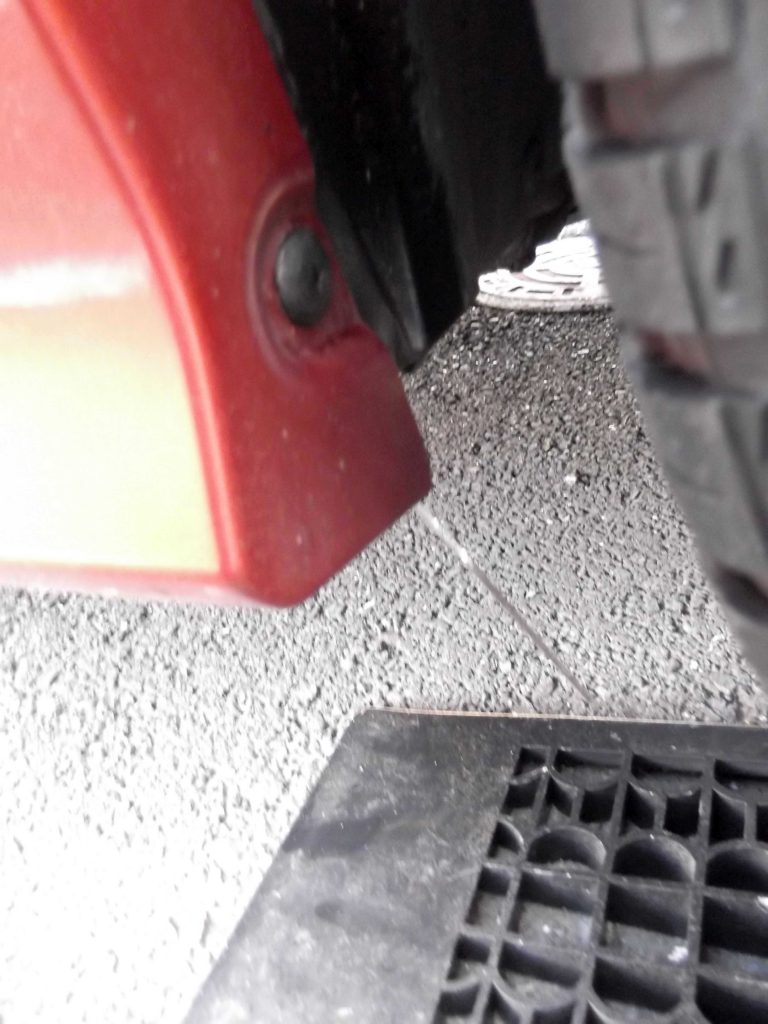
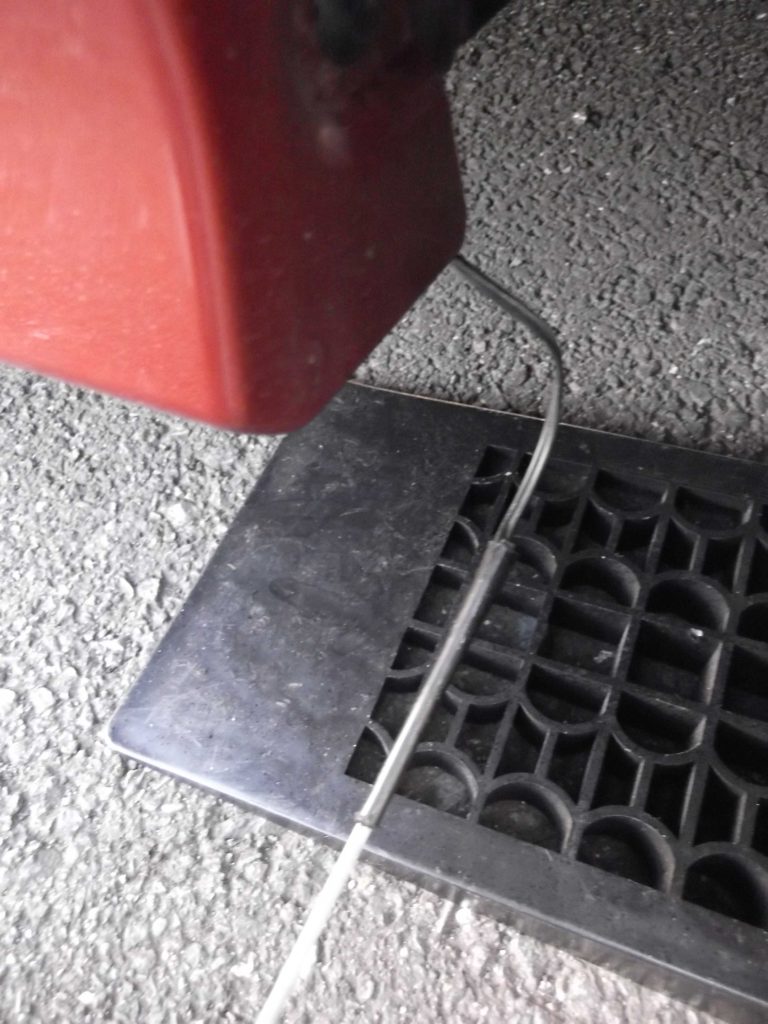
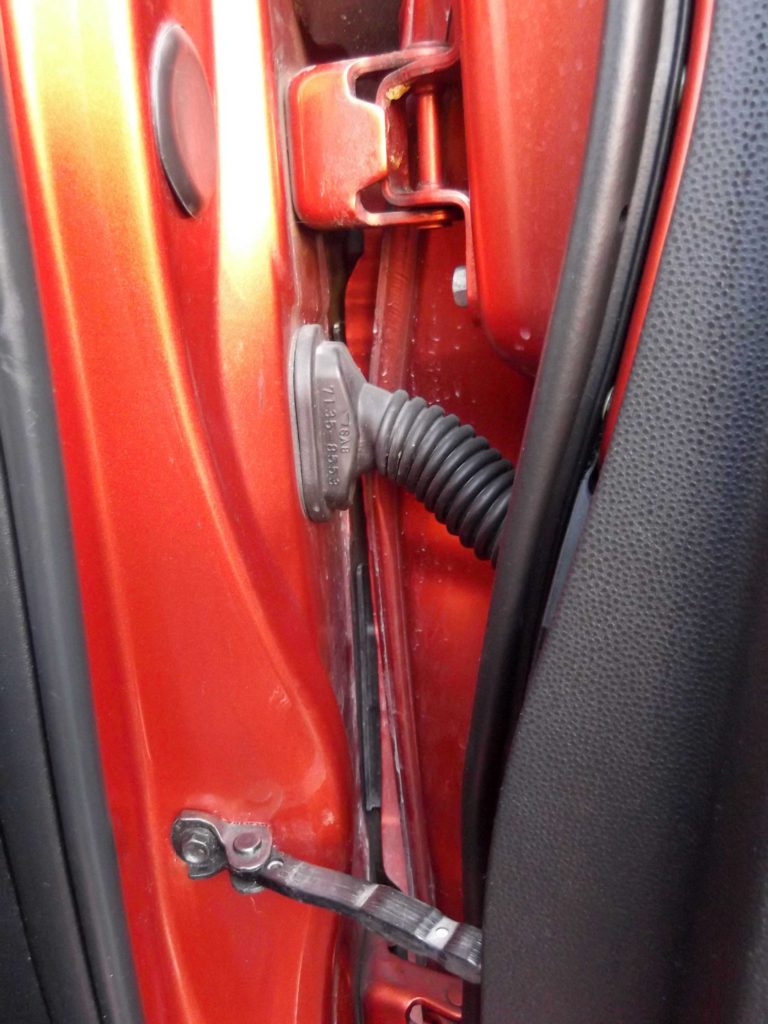
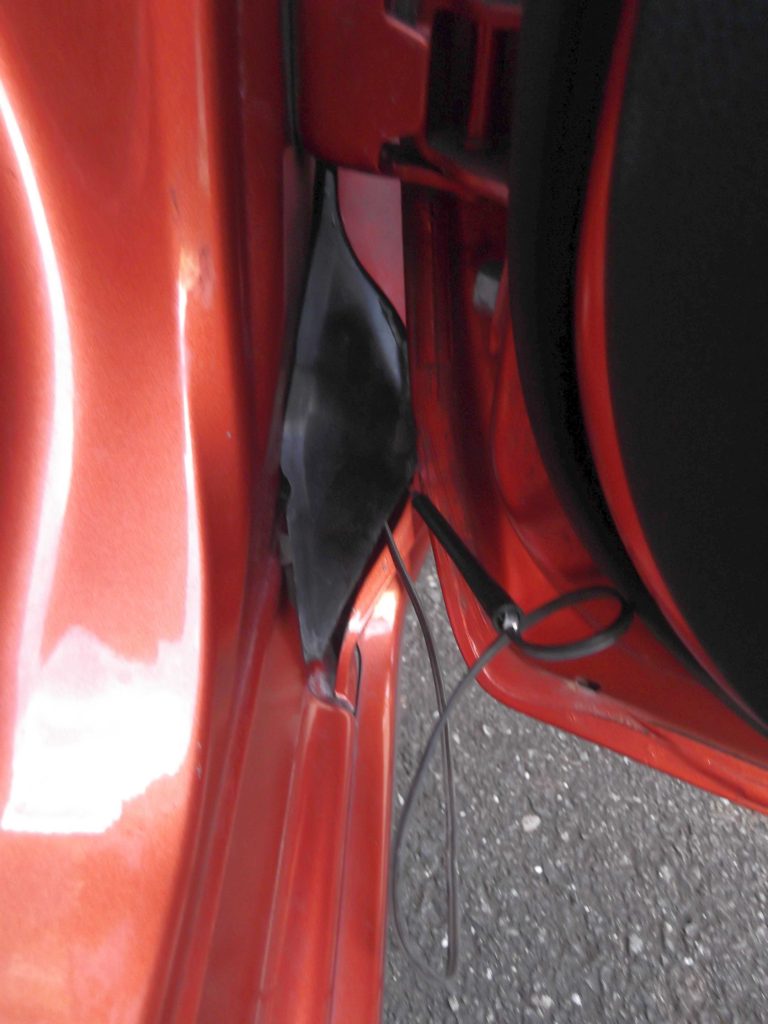
↑ "God's hand" it and "Wiring guide" ran most downward through the opening and shutting interior from the engine room to the door.
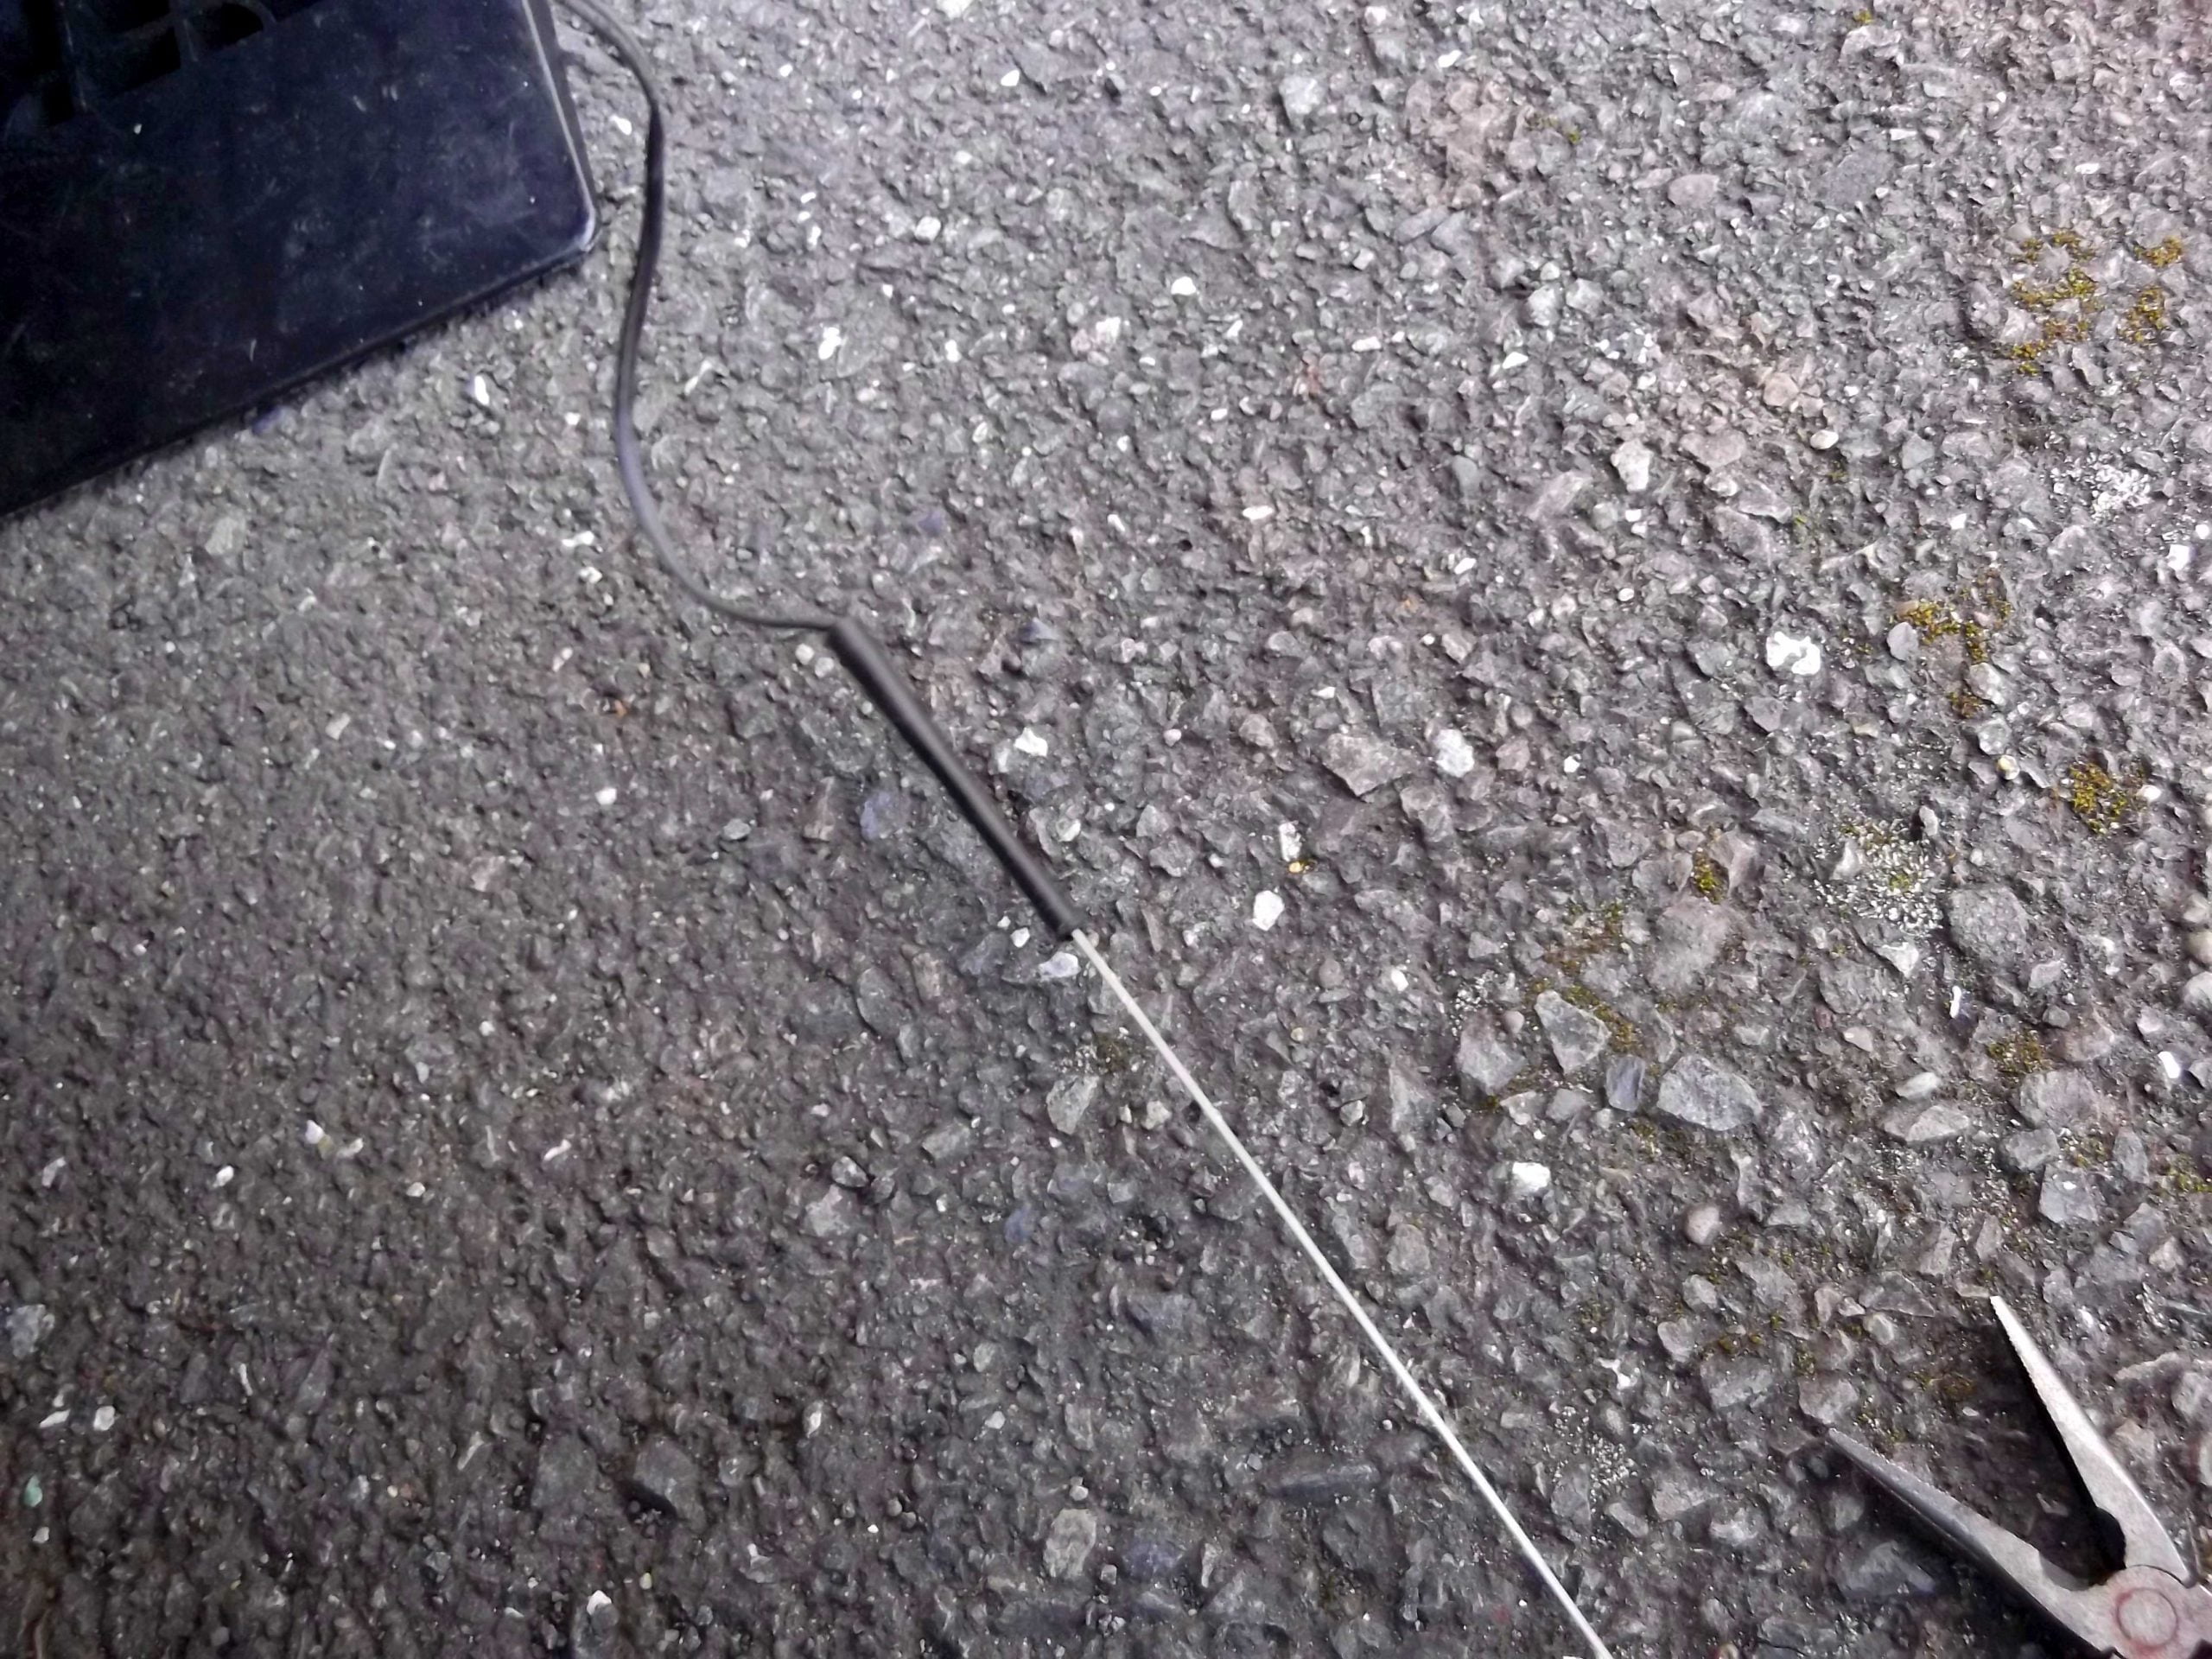
↓Web上ではなかなか語られていない私なりの"tips"となります。有線の狭い箇所においてのケーブルマネジメントは一気にやってはなりません!!!これは私の長年の"経験則"からのアンサーです。一気に貫通出来るような箇所も,分割して行って下さい。それが一番最良な時間短縮となり作業の効率化となります。例えば,アンダーネオンの有線のマネージメントにおいてはエンジンルームから直下の各ドアの隙間から一旦,配線ガイドを目の前に抜き出して,再度,次のマネージメントを行うという手法です。私は1箇所の貫通で,エンジンルームからドアの途中の隙間,次にドアの一番下の部分から一旦ケーブルを引き出し,3度目で地面へと貫通しています。面倒な作業に感じられるかと思いますが,何も見えない世界に一気に貫通しようとせず,地道に処理を行うことにより,時間的には数分の1以下まで短縮する事が可能となります。
↓It becomes "Tips" of my own way not talked about on www easily.
The cable management in the part where cable is narrow doesn't become it when doing at a dash. This is an answer from my longtime "Rule of thumb".
Please divide the part that can penetrate at a dash.
It becomes the most best time crunch and it becomes the efficiency improvement of work.
For instance, it is a technique of pulling out the wiring guide from the space from the engine room to each door in the right under to the presence once, and doing the following management again in the management of the cable of under neon.
Penetration..engine..room..door..on the way..space..next..door..extremely..lower side..once..cable..draw out..ground..penetrate.
Things shortened up to one for a few minutes become possible " timewise" by not starting penetrating to the world where anything is not seen at a dash, and processing it honestly though it is thought that it is felt in troublesome work.


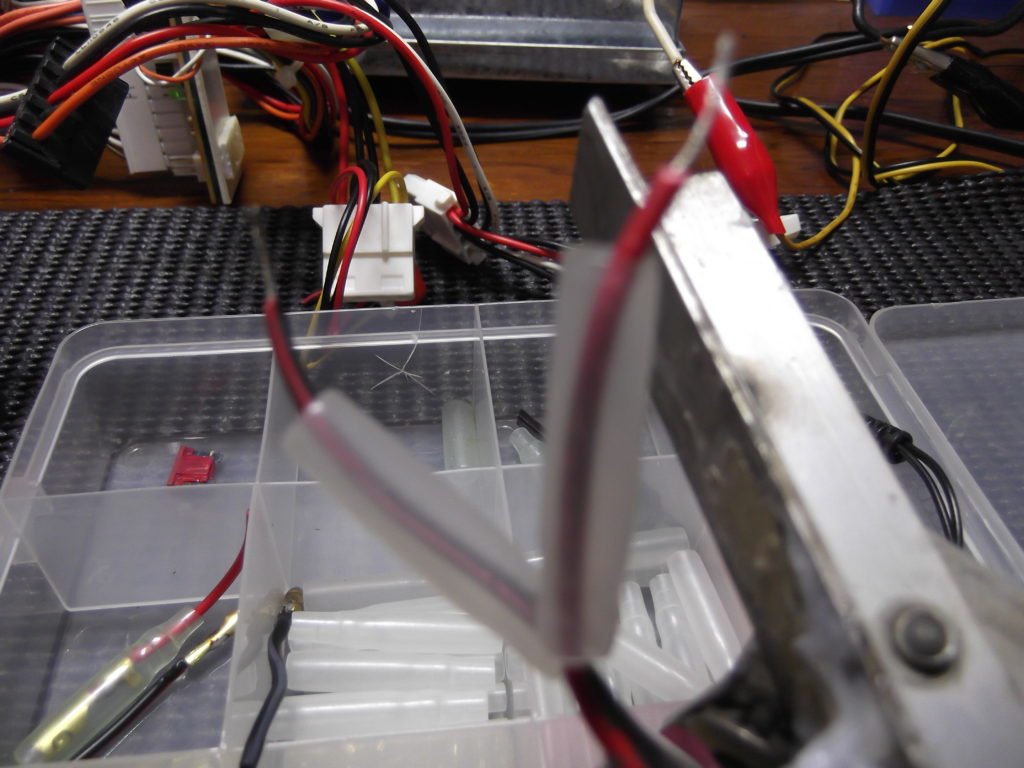
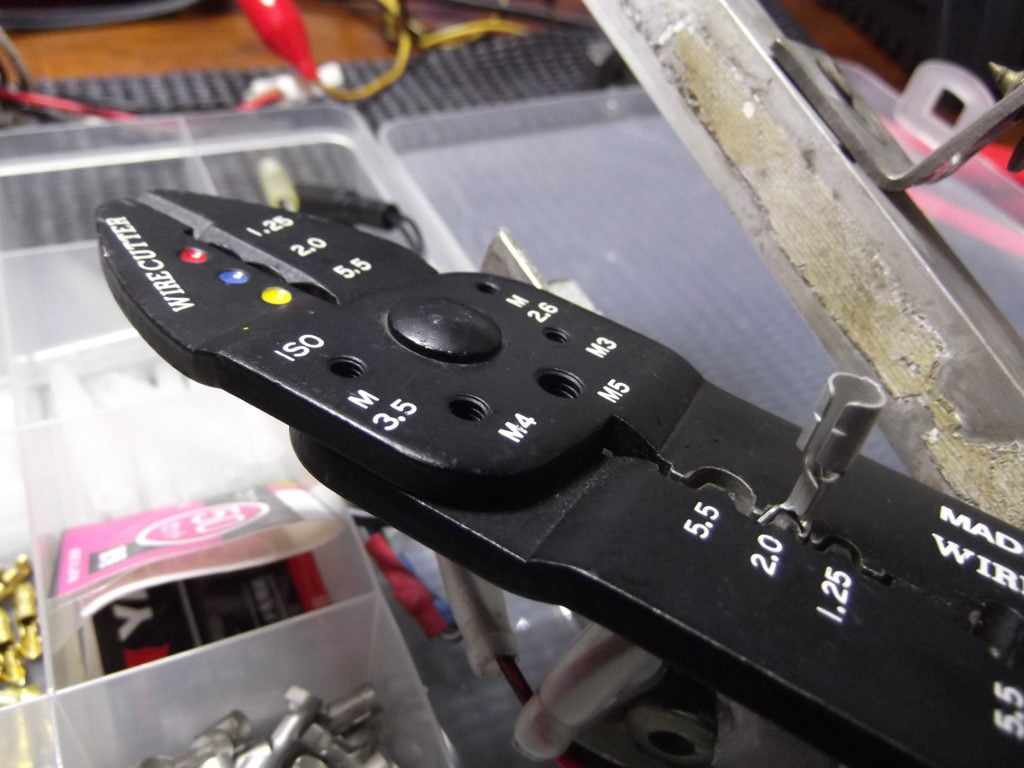
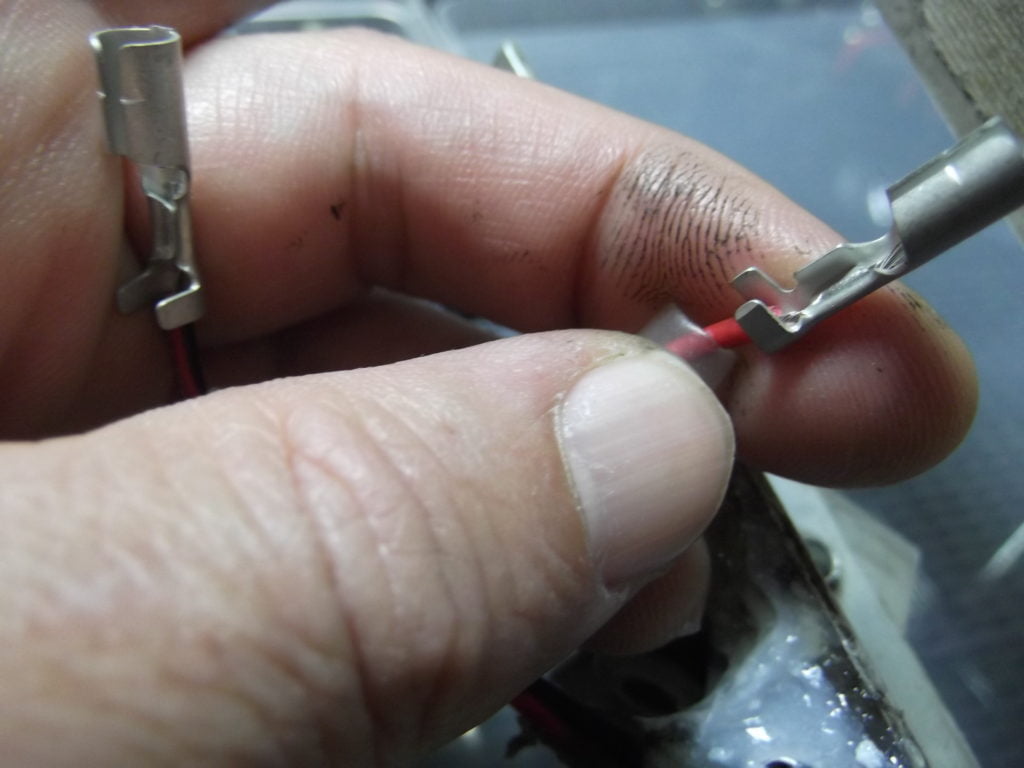
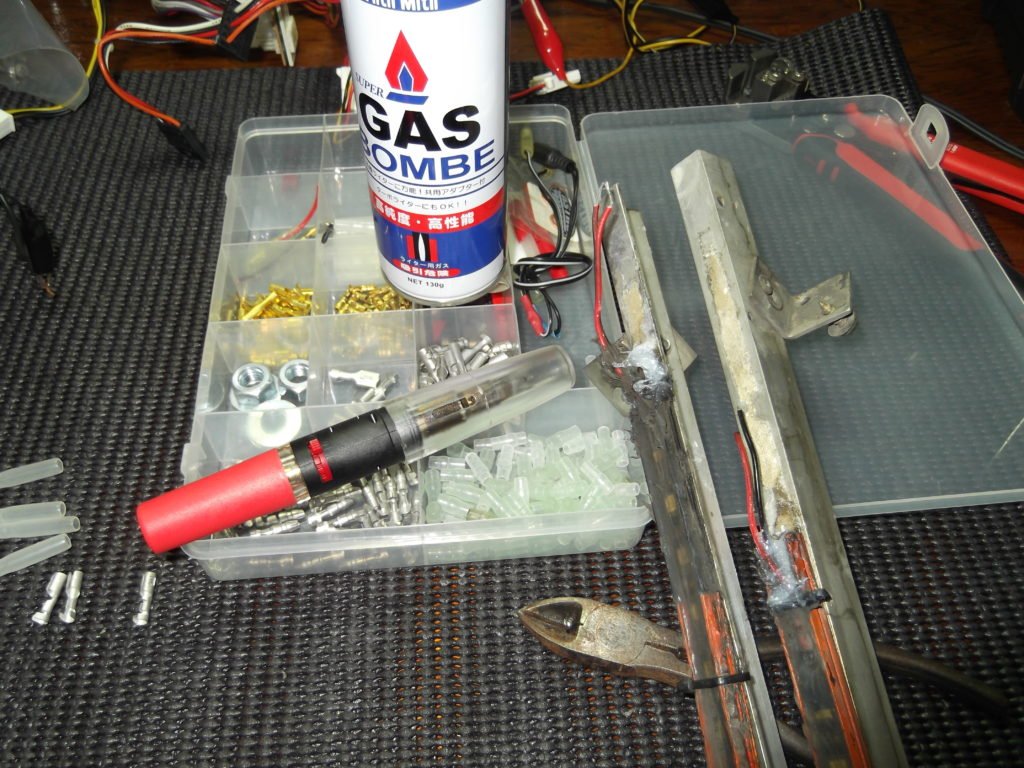
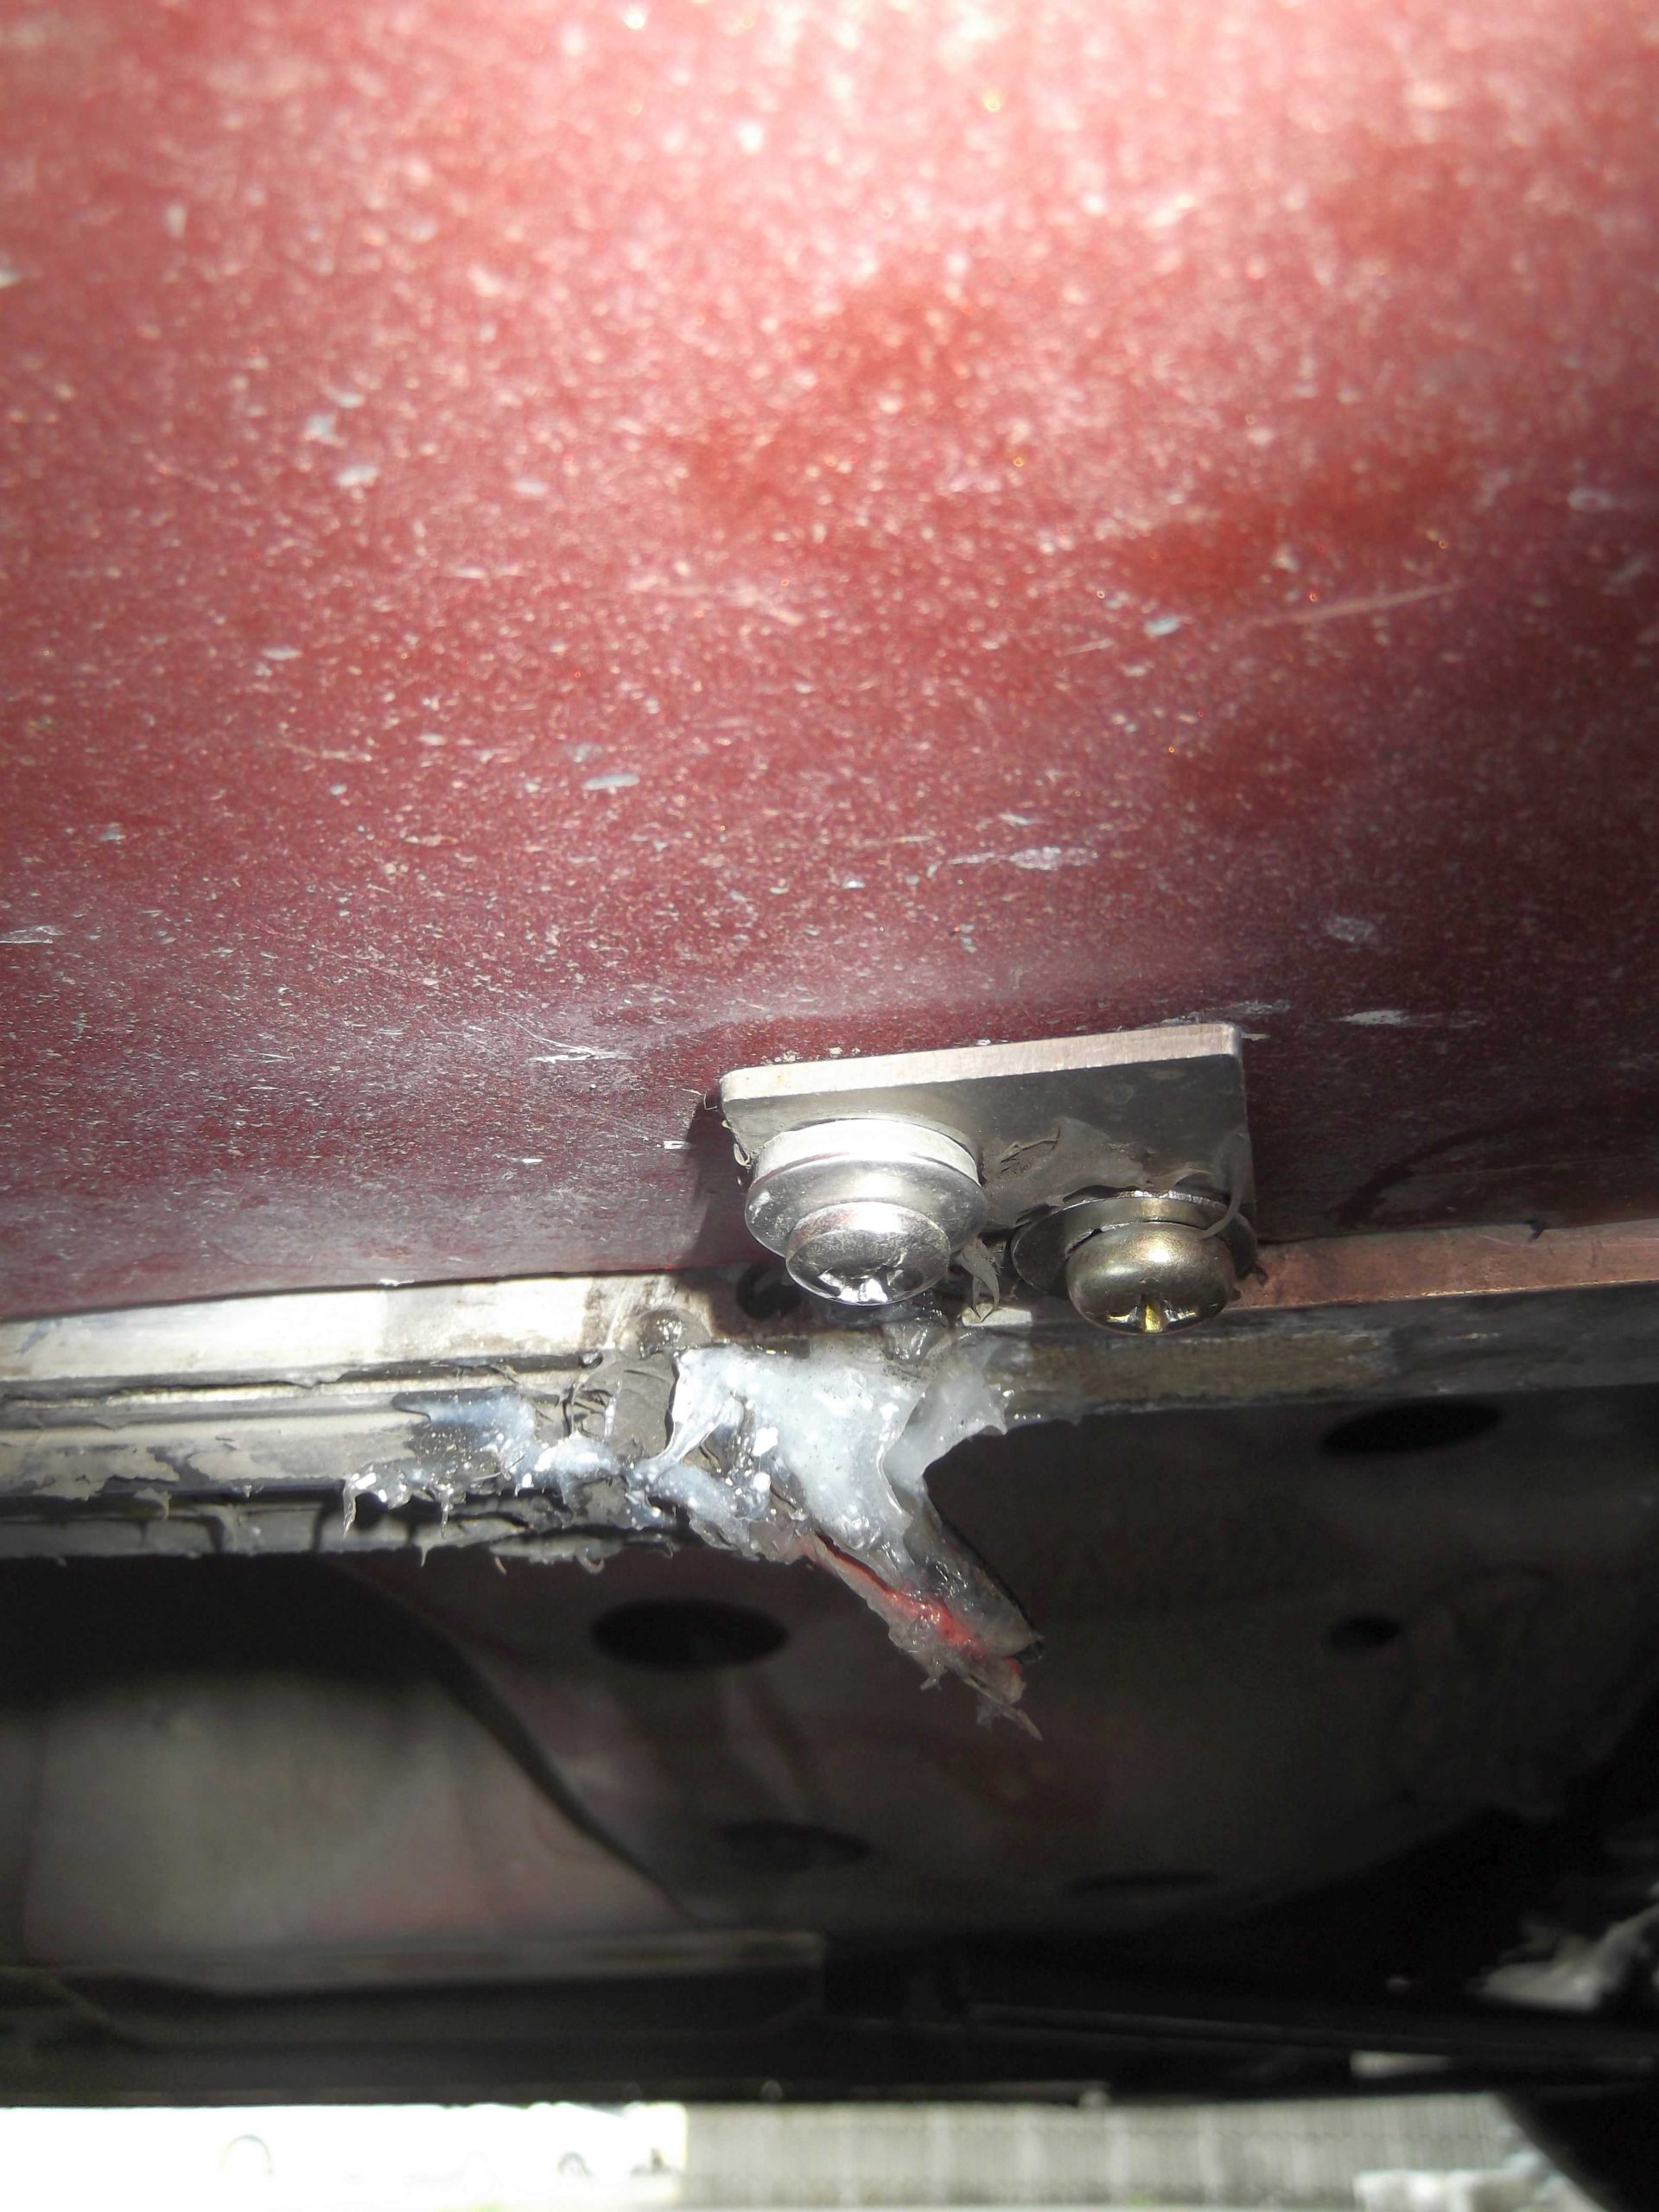
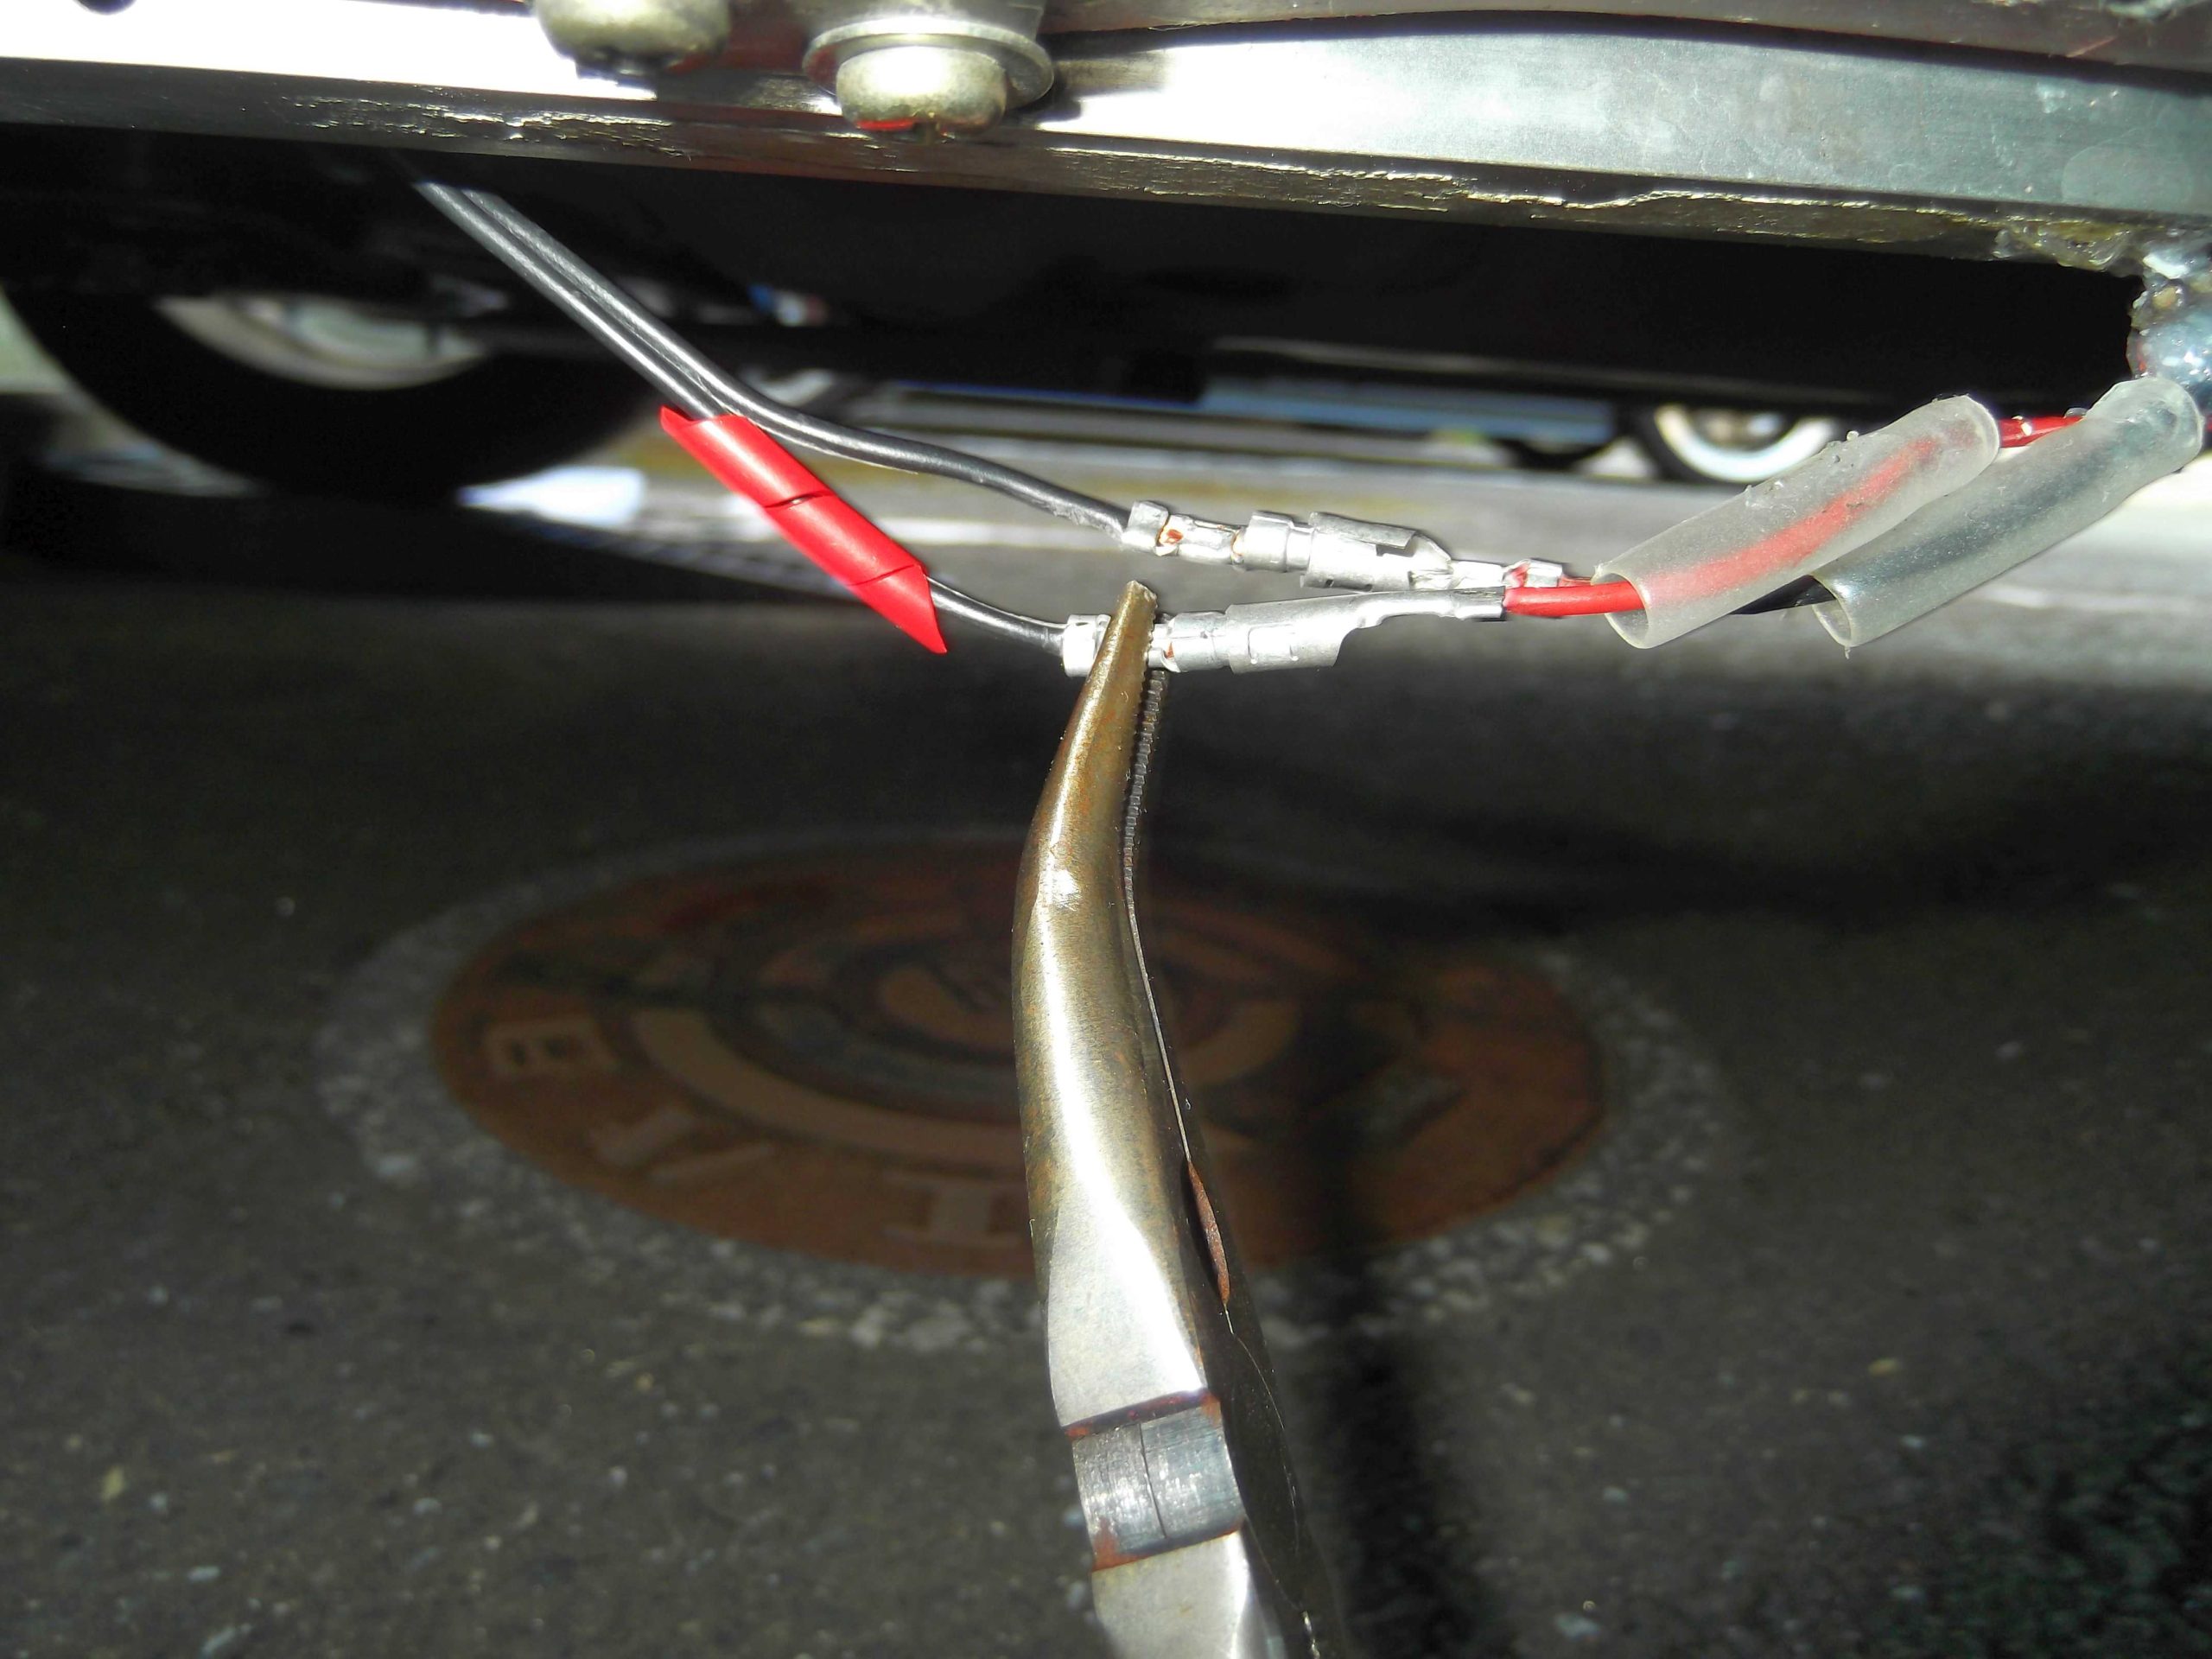
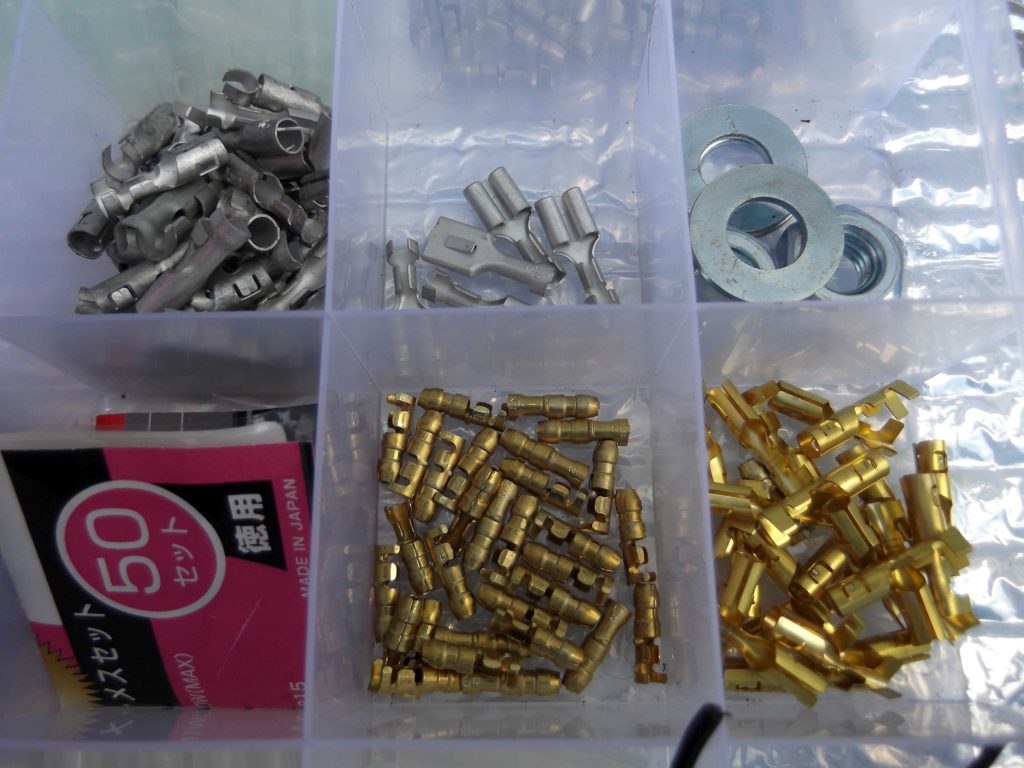
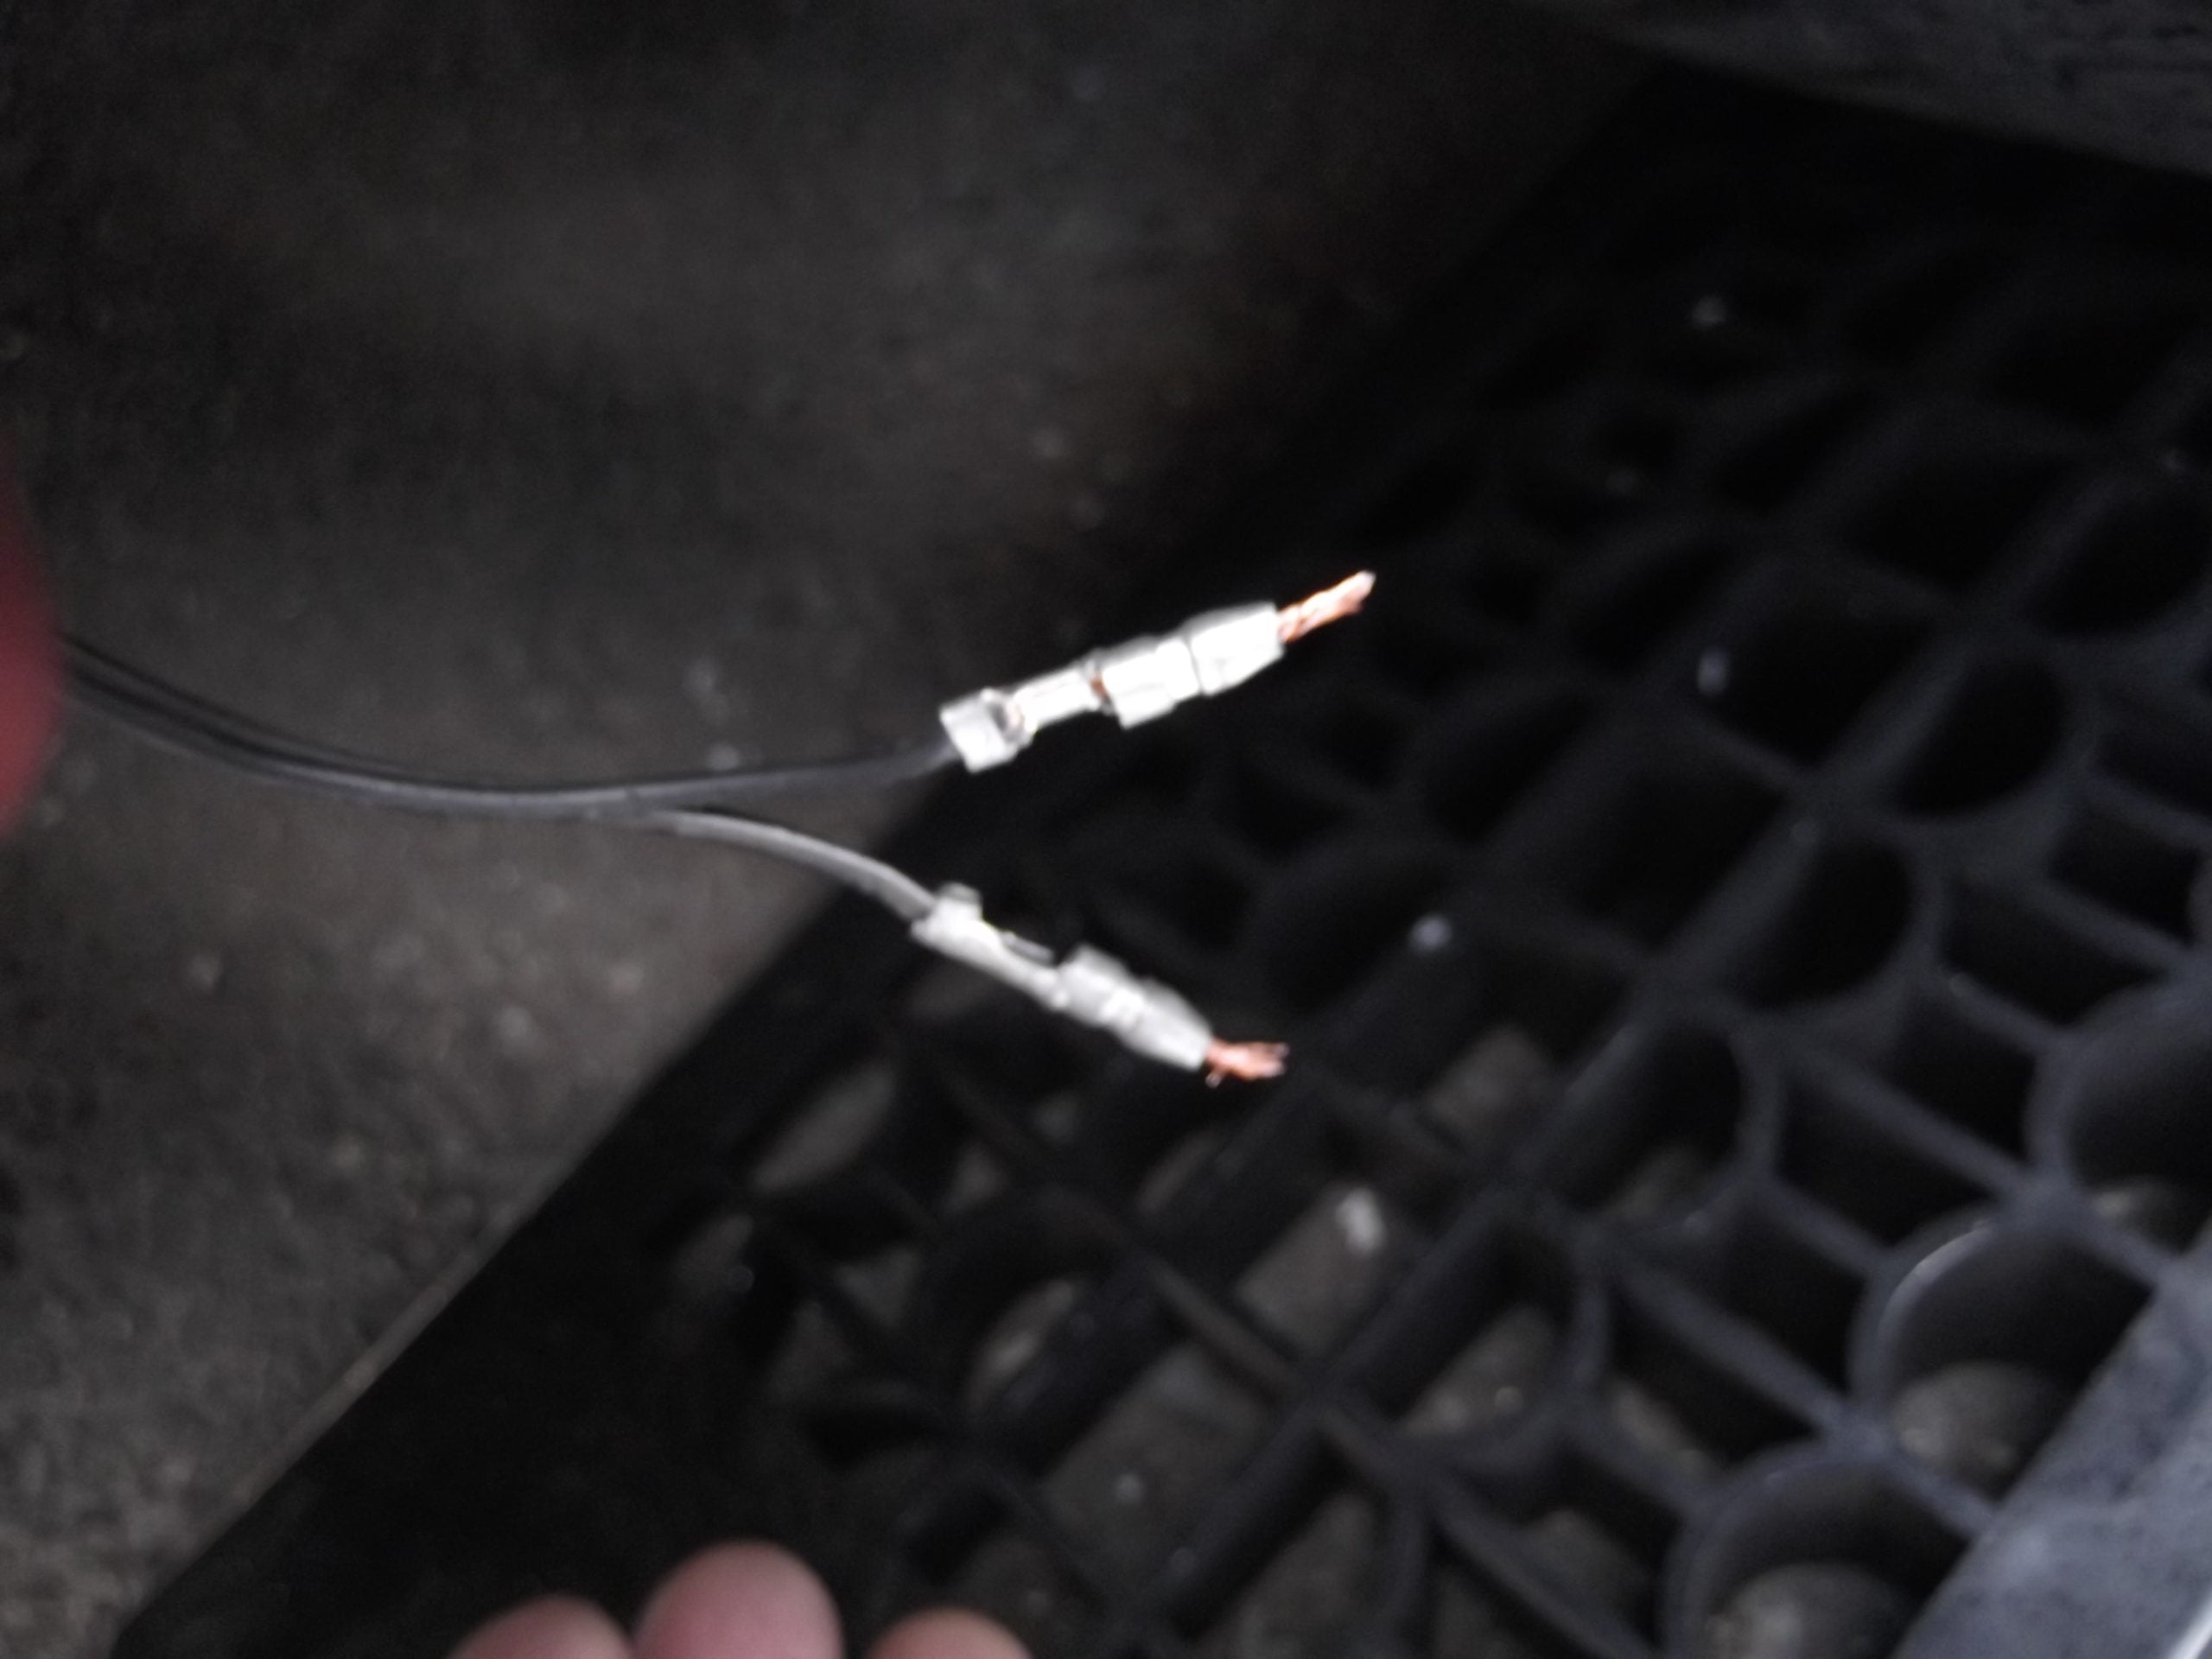
各接合部は新品と交換します。
Each junction is exchanged for the new article.
端子部品に関しては,私はアウトドアではあまり”金メッキ"は使い難いです。
素材が柔らかすぎて,どちらかというと室内でゆっくり作業する用途に向いているのではと感じています。
I do not use "Gold plate" easily by outdoor so much for the terminal parts.
It is felt that the material is too soft, and it is suitable for the usage in which either works slowly ”inn" doors.


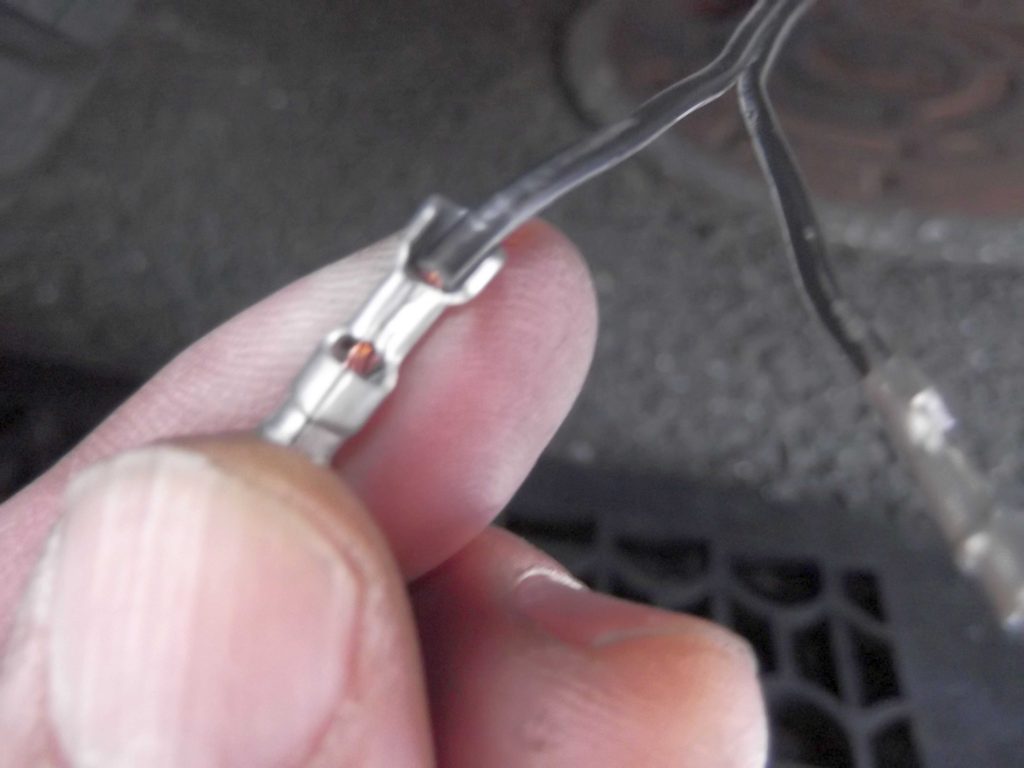
導線を端子の外側まで貫通し,ニッパーで切り落とします。
↑ I often use an upper right technique in the fieldwork.
It penetrates outside of the terminal through the lead, and it chops it off with nippers.
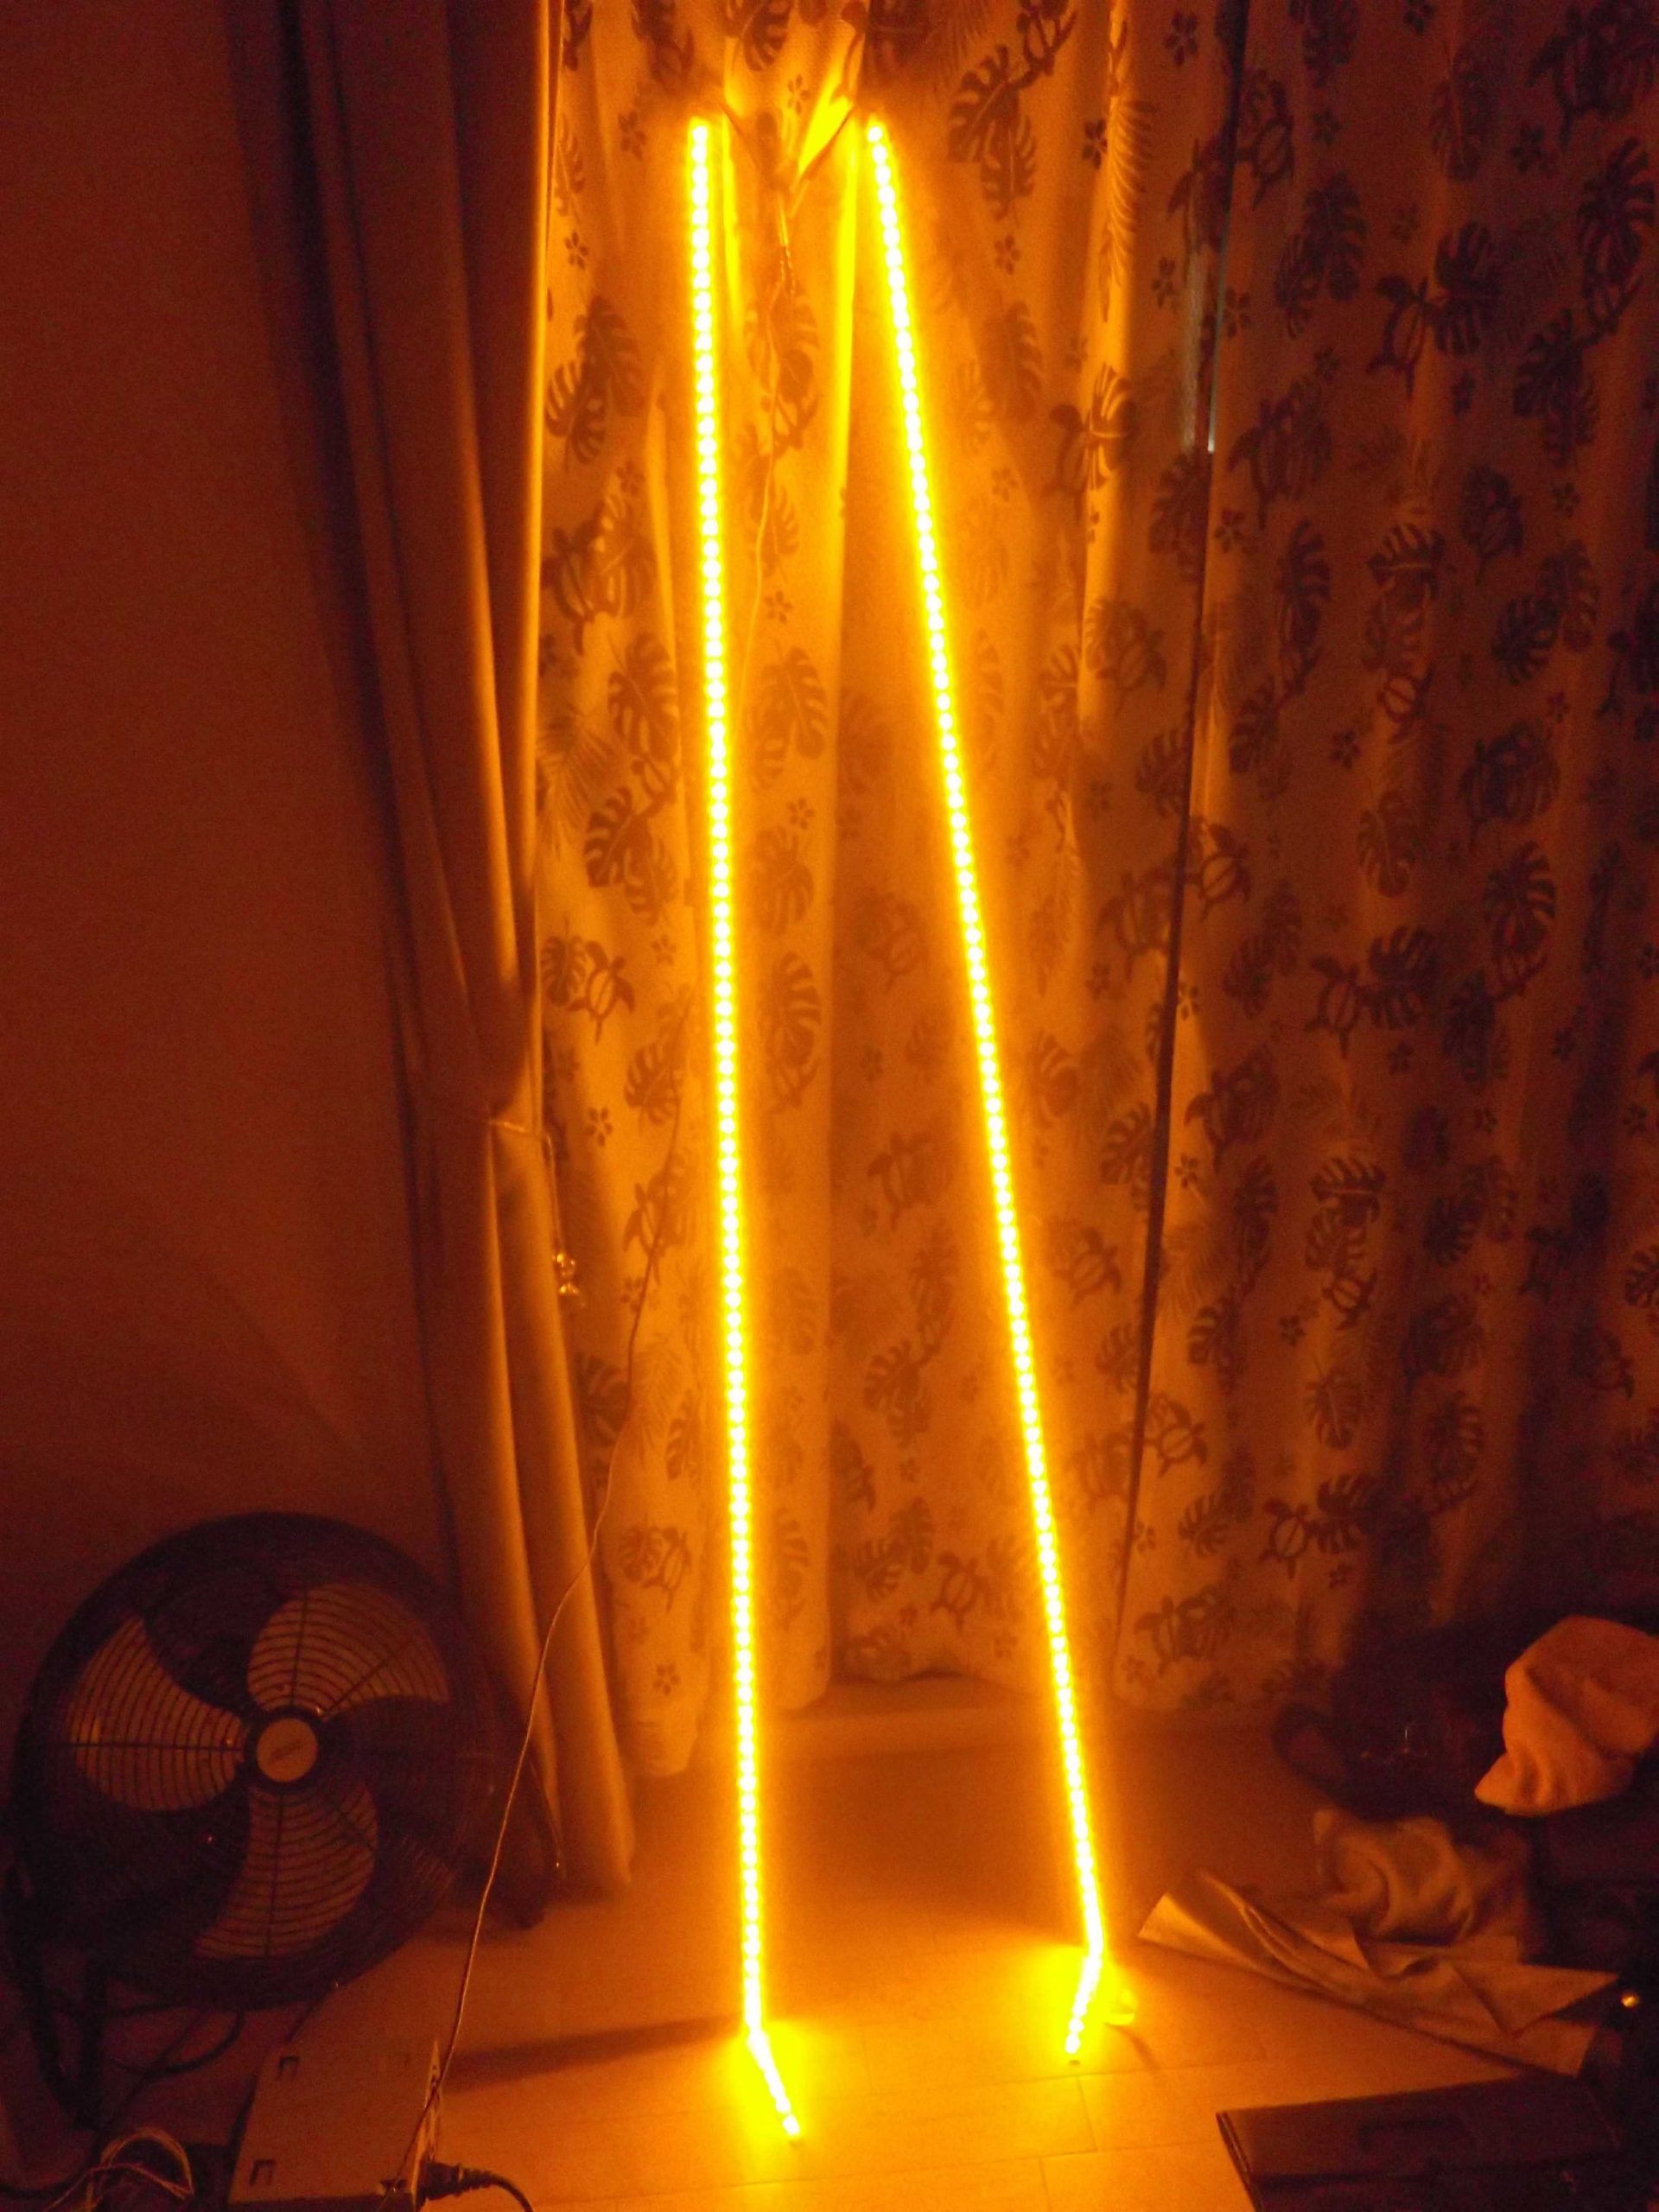
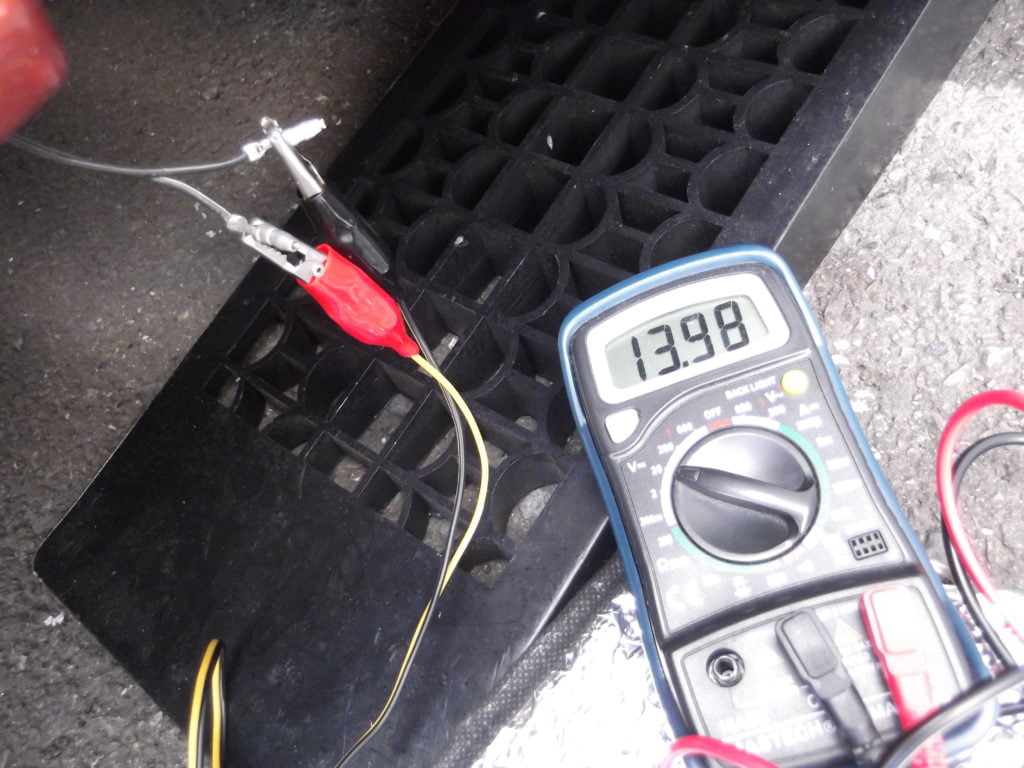
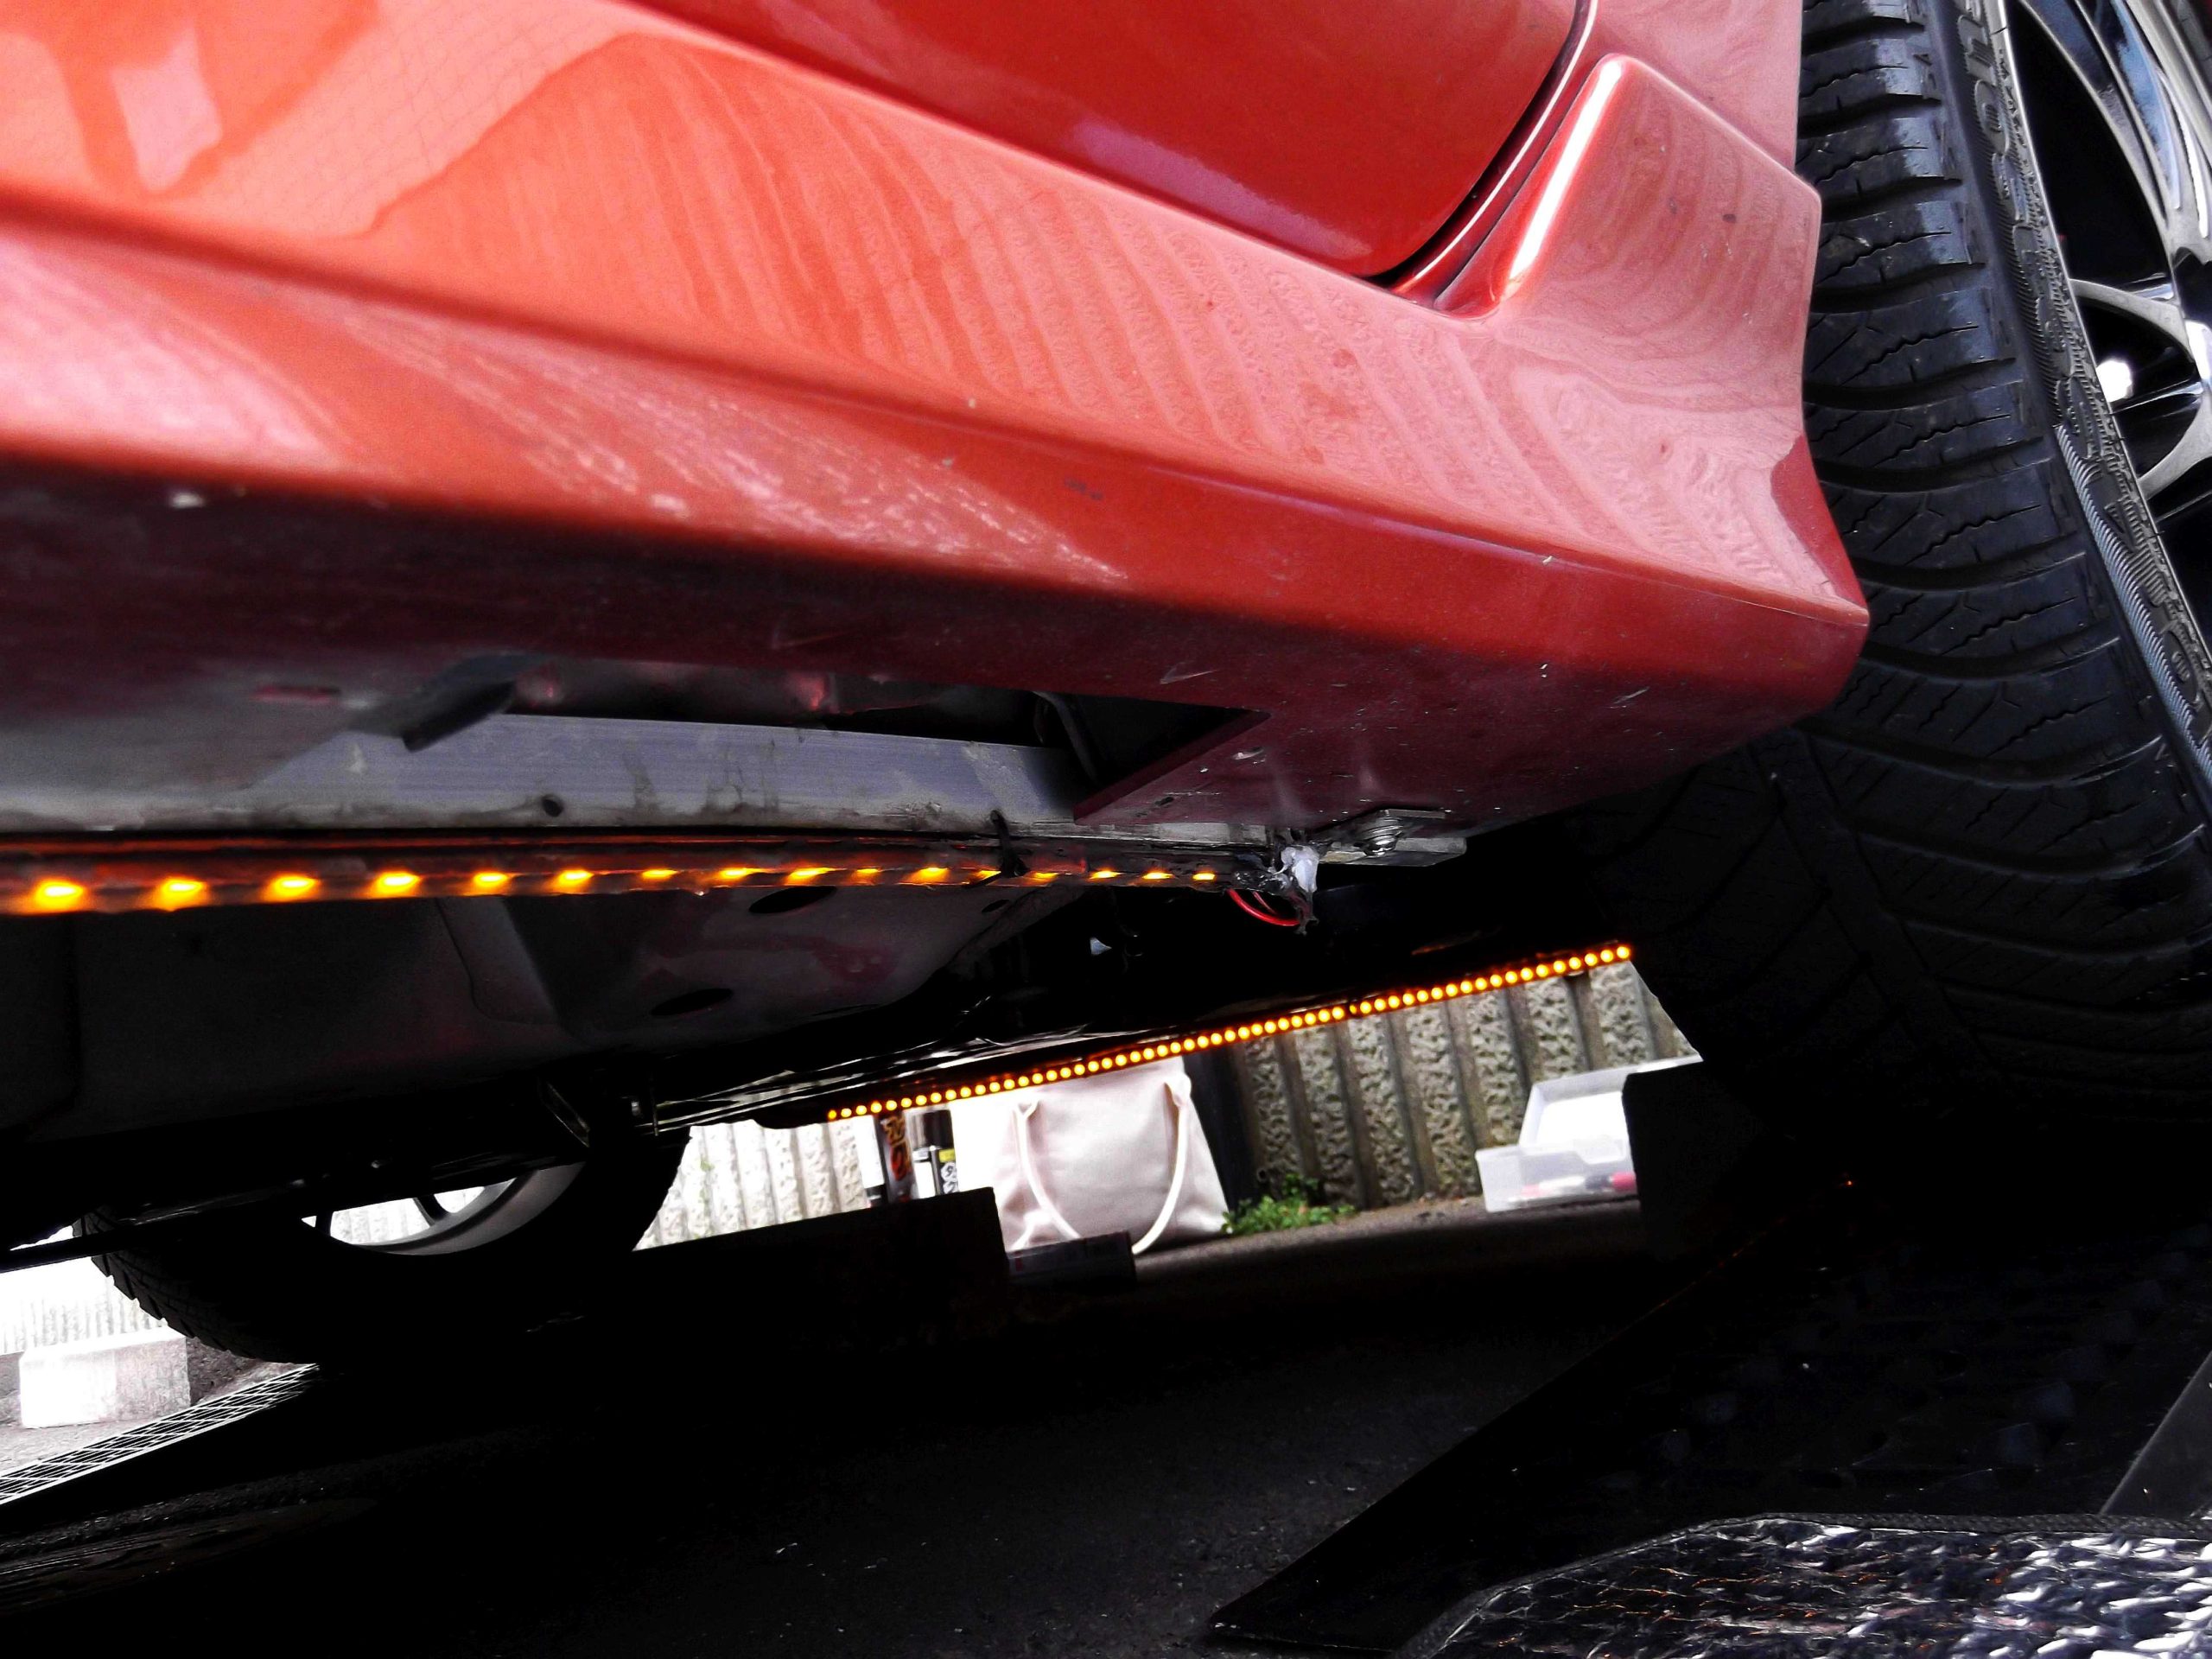
フロントの顔面直下のアンダーネオンは車検前に撤去しませんでした。セーフでした。左右両サイドの再設置が終わったので"点灯"式です。
Under neon right under the face of the reception desk had not been removed before the car inspection.
It was safe. .
Co's the reinstallation on a right and left both sides ended, it is "Light" type.


何かの御参考にして頂けると幸いです。

The private car is being returned to the state of "Before the car inspection"
by a legal car inspection of Japan having safely passed somehow last December.
It made it to the article because the mounting of right and left
"Under neon" was completed the other day.
It mounted more strongly the car inspection before.
It misappropriated it as it was because it still lit at present
and it existed though ago of yes
and two years because of 2018 the enforcement
of the light emitting diode of the tape of mounting under neon it passed considerably.
The frequency of detaching is three times in the body gets on now including this time.
Please let me match and publish though it did not make to the article without finding
an old image producing under neon easily because it was possible to discover it a little the other day.
If the illuminance of the light emitting diode is extremely perplexed in the future or it is useless (Do not light),
it is scheduled to exchange it for the new article.
The light emitting diode of the tape has evolved fast,
and current consumption and brightness have changed at all in the serial number?w.
That has come to stink of the trouble somehow though
all light emitting diodes were going to be exchanged
for the new article of a new serial number before the car inspection.
It lights and, at present,
it does by one respondent
and it is judged for a while that it's a maintenance
of the status quo and it will exist and is re-mounting.
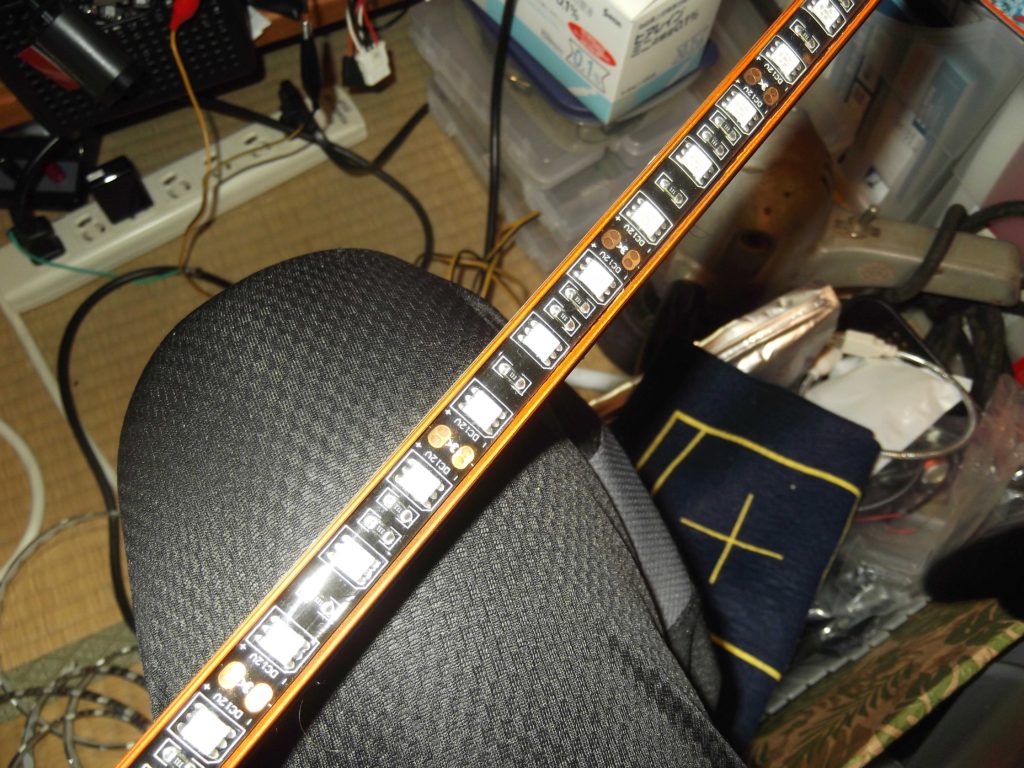
The technique of my "Work" uses L type rail made of aluminum.
Moreover, the light emitting diode sticks.
Covering the light emitting diode to devise
it to dare so as not to see "Source of light" from side uses
the cable concealment sold by \100(One dollar's Japanese shop!)of Daiso.co.
The width of the light emitting diode of the tape.
Just matches to 1㎝.
Is "Light" source seen or is ? faintly shone on without seeing it ‥
Co's this's a favor of the owner who has gotten on the car,
and the one depending on an aesthetic sense, w indiscriminately corrects by this,
says of what, and in the talk without.
Co's it's not possible to trust it only by the double-faced tape at all because
of the fall prevention when being running,
two or more places are connected by unite in there is weathering.
L type rail is perforated and it reinforces it through the unity belt.
L type rail made of aluminum can be bought cheaply in the do-it-yourself=D.I.Y's store.
It overflows in the car taken,
and the aluminum rail of 165㎝ is done in an over feeling now
and is done to a right and left aero part on both sides and the spaces
of the main body though tape led of 170㎝ had been mounted on both sides before.
It connects it with the body in the rail made
of aluminum that with metal fittings of L character type.
The point of contact of L type aluminum
and L type metal fittings is connected
by the technique of "Occupy it" Japanese "Rivet for cage".
It's possible to have it in "Without parting sticking =" as everyone is easy ..
the iron plate and the iron plate.. though a special tool is necessary
if becoming accustomed to perforating and the insertion of the rivet for cage though
thought that there are a lot of people who know, too.
Co's I have neither the welding technology nor the tool, such a technique is used.
An aero resin is perforated, and the point and last (back) have been reinforced in the parts other than
the L character metal fittings through the wire in preparation for the fall prevention by an intense running.
It's an easily available tool material in the do-it-yourself store for metal fittings of L character type.
Is a part absorbed of me a point to use the one for strong concrete as for the screw?
It's powerful without rusting.
However, it has not arrived to fix with the nut perfectly in the back part because it's not a bolt but a screw type.
It's judged that detaching is considerably difficult,
and adopts the screw type for me though bolt & nut type is stronger if it's possible to remove aero all.
Naturally, because the other party of the object that is is aero (resin),
an uneasy element remains a little on the strength side.
Shite of ..fat.. was reinforced more than the screw used so far in an up-to-date part in head = rail this time.
Hips (tail) that correspond to the rear part
of the car are fixed of an aero resin and the rail through the wire.
It was not a problem that piercingly
and was large though there was respect thought to be "Electric trouble" in momentarily.
It would be greatly appreciated about something when it is possible to refer.

- eichanx
- 美しい外観(フォルム)に負けない機能!!-PC電源の再活用・再利用!!- 日本製!!-"waves"社製-ATX電源取り出しモジュール-電源検証ボード!! 2024-02-21
- 中世の史跡!!-鎌倉-"永福寺"跡(“Youfukujiato") を訪れた!! 2024-02-12
- 自筆で記した"父"の"四十九日法要"の"御布施"書!! 2024-02-11
- 車のステアリングが上達する!?-驚異のスタイリッシュなハンドリング"矯正"用?!-"ハンドルカバー"のレビュー!! 2024-02-04
- コンセントにつなぐだけで電気料金や消費電力(W)を簡単に知ることのできるアイテム!!-節電の為の"エコチェッカー"-ET30Dのレビュー!! 2024-02-04